
Bread and Pastry Recipes
Rustic Bread or Baguettes
One large loaf or 3 - 4 baguettes
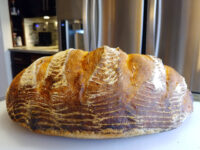
You will absolutely love this bread for its incredible flavors and textures. We will prepare together a stunning rustic bread and a classic French baguette all from one single bread dough. The crunch of the crust on this homemade bread is more satisfying than almost any crusty bread you can buy. Read More
Bread and Pastry Recipes
Before You Start
Let’s talk about important parts of the recipe before you start…
My Favorite Homemade Bread: The Rustic Bread or Baguettes
There is something truly special about baking your own bread, and my recipe for Rustic Bread or Baguettes is one of my all-time favorites. It’s a recipe I’ve perfected for making either a large, hearty loaf of rustic bread or 3-4 beautiful, slender baguettes. The other wonderful thing about this bread dough is that it’s a fantastic canvas for your creativity. The recipe notes you can add caraway seeds, which I love, but you could add other herbs or spices to make it your own (though that would be a modification from my recipe as written). I’ve even included my special instructions for baking bread on a grill, which gives it an amazing smoky flavor, but it’s just as delicious from a regular oven. Let’s get started on this baking adventure!
Read moreLorem ipsum dolor sit amet, consectetuer adipiscing elit. Etiam ligula pede, sagittis quis,Lorem ipsum dolor sit amet, consectetuer adipiscing elit. Etiam ligula pede, sagittis quis, Lorem ipsum dolor sit.
Read less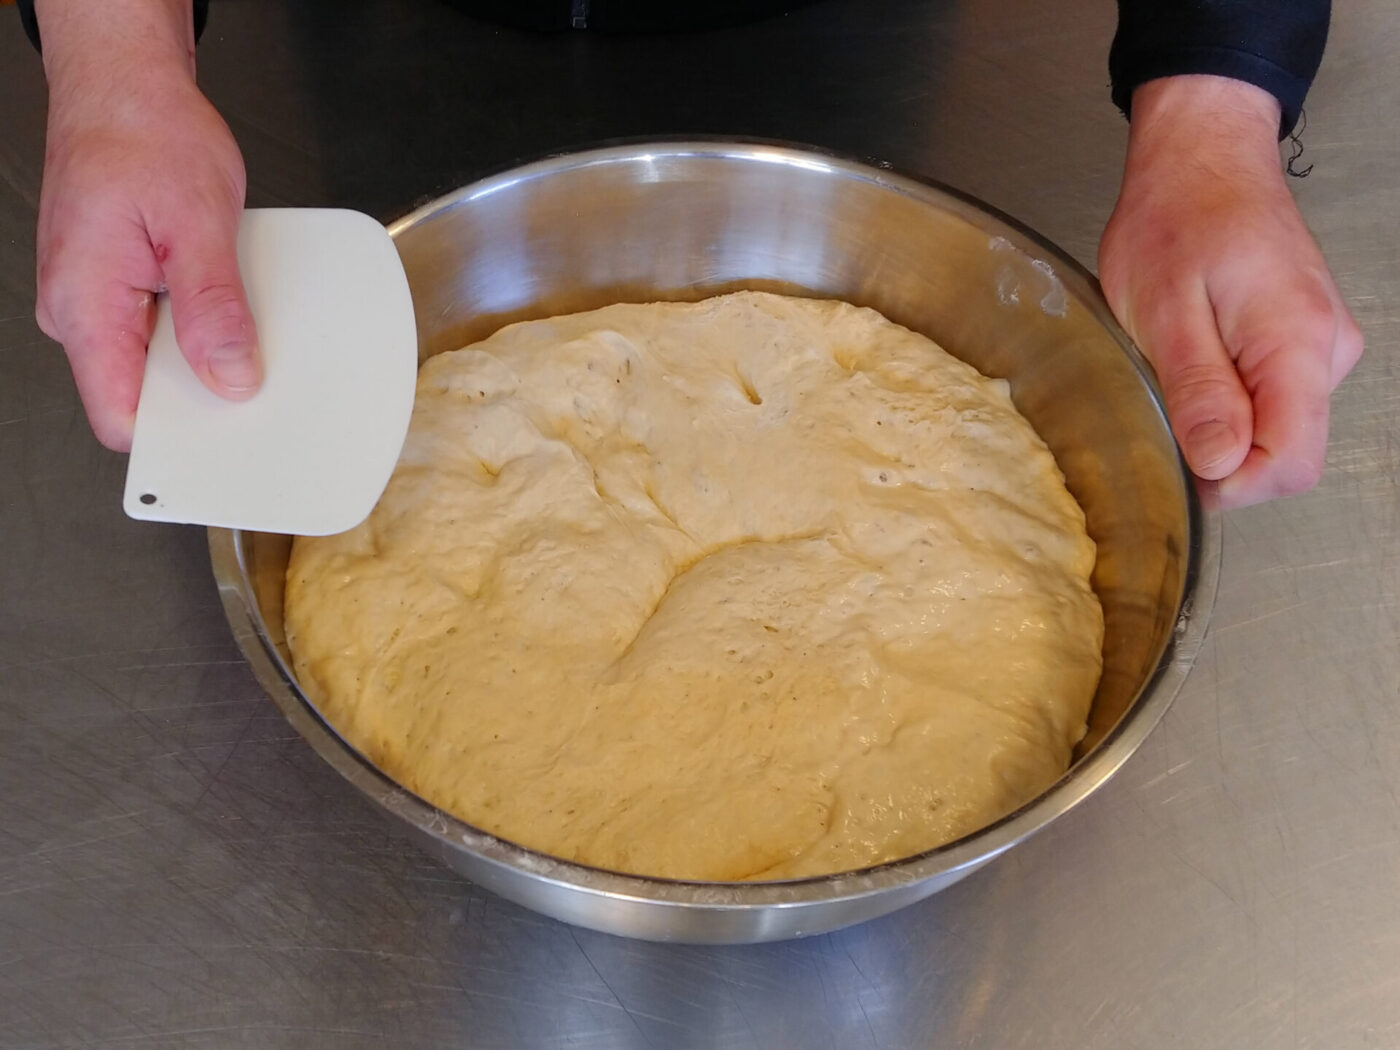
Understanding the Ingredients for My Rustic Bread or Baguettes
For my Rustic Bread or Baguettes recipe, the ingredients are simple but specific. I use bread flour, which has a higher protein content and is essential for creating the strong gluten structure we need for a chewy crumb and sturdy loaf. You’ll also need a little confectioners’ sugar, which helps the active dry yeast get going, and of course, salt for flavor. I also list caraway seeds as an optional ingredient; I personally love the flavor they add to this rustic bread. We use lukewarm water (about 90 to 100°F) to activate the yeast properly. When you’re mixing, this bread dough should not be too sticky. If you find it’s sticking to the bowl after a couple of minutes, I recommend adding 2 tablespoons of bread flour and processing a bit more. That usually solves it.
The Importance of the Long Rise and Deflation for This Bread Dough
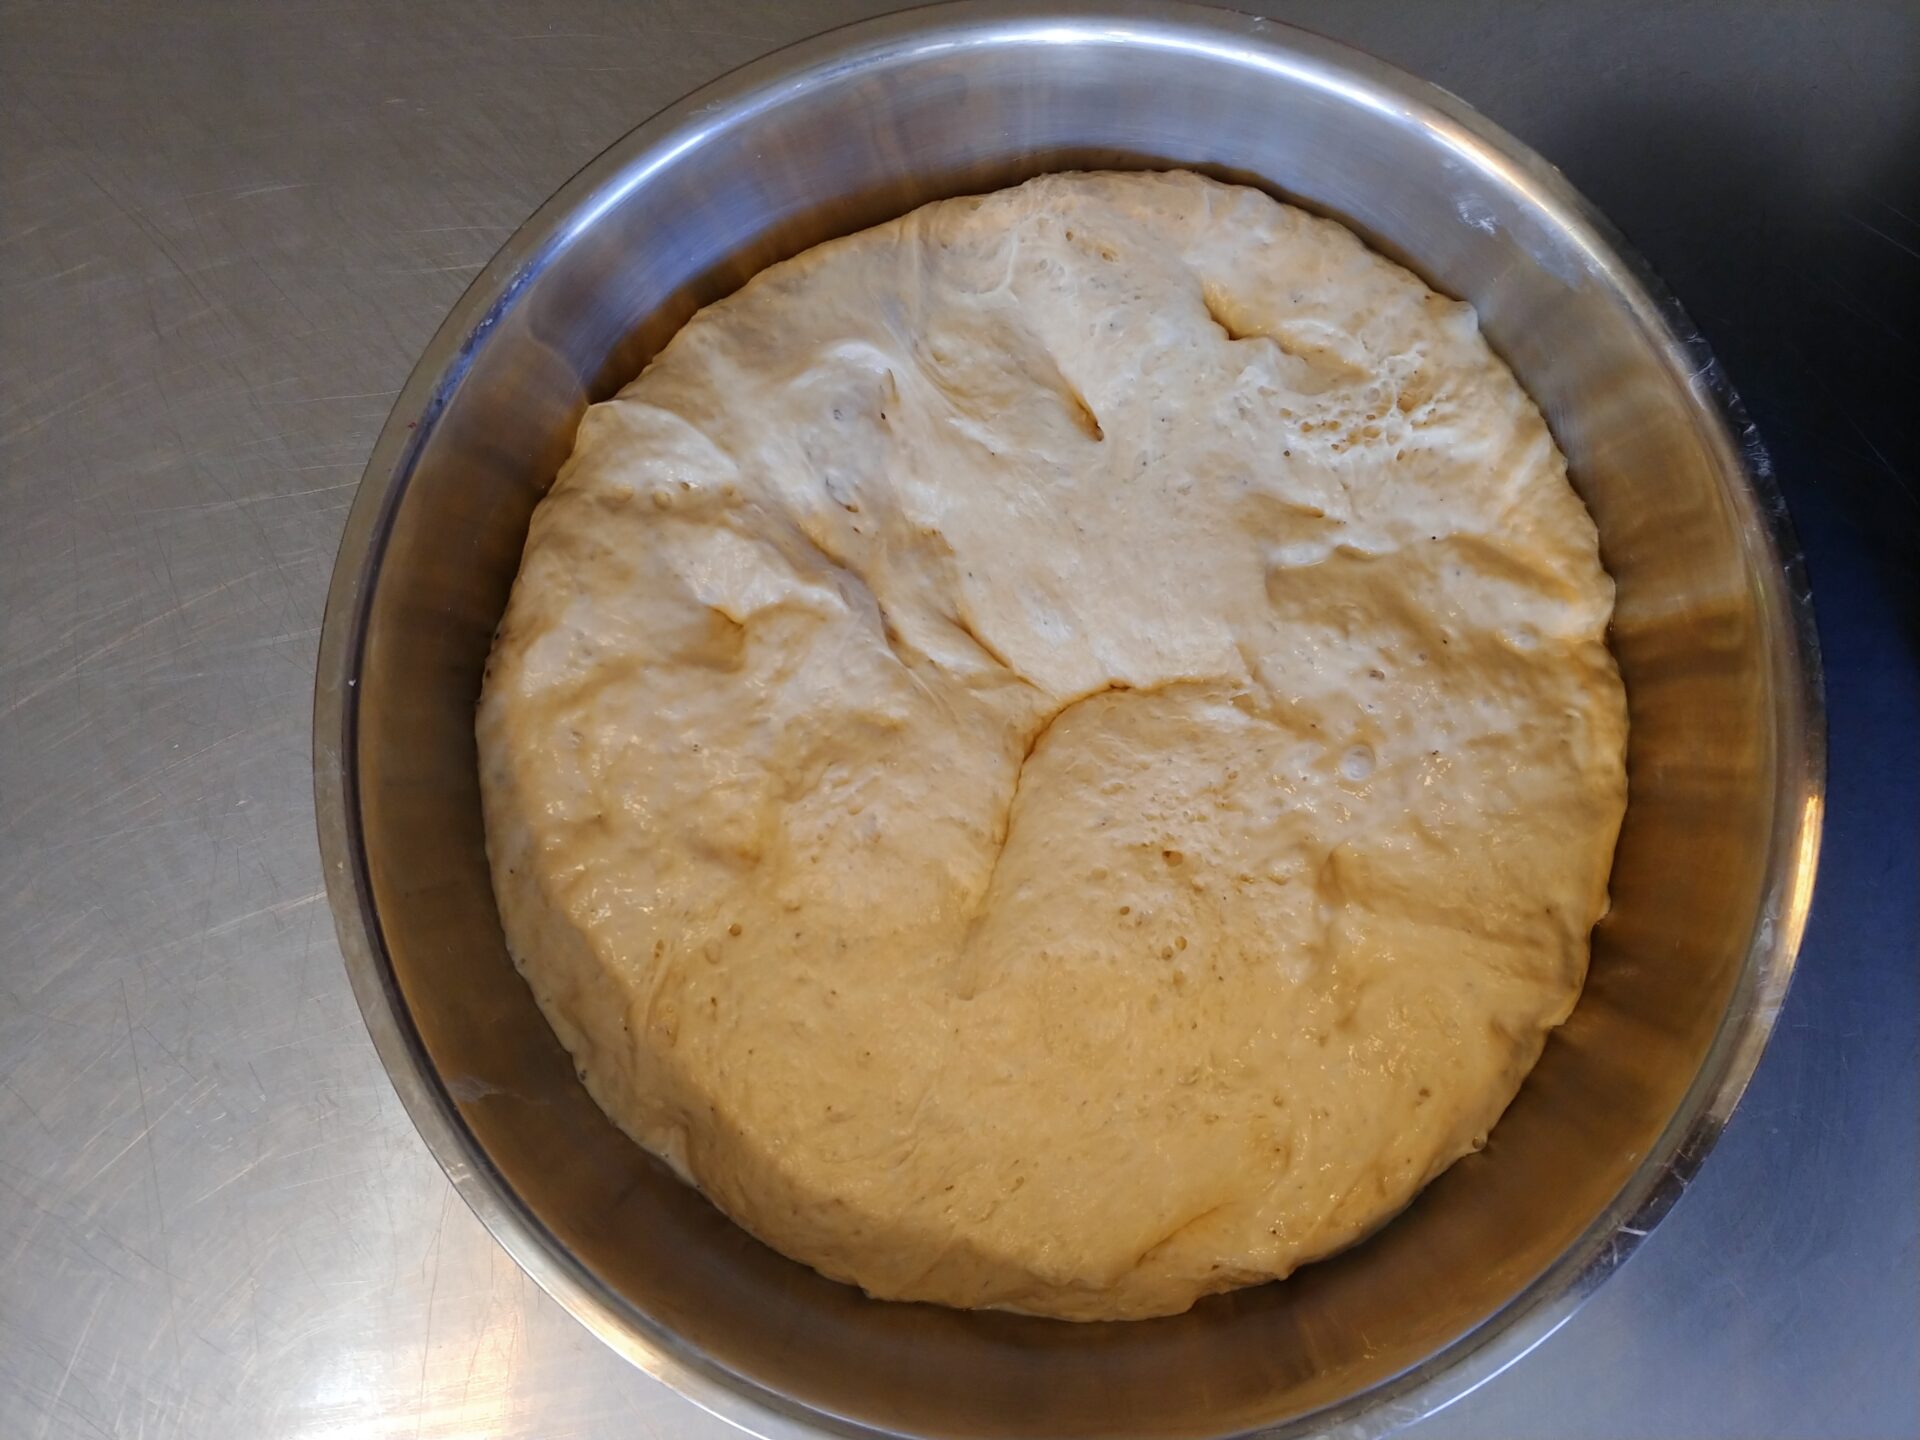
Patience is key for my Rustic Bread or Baguettes. The real magic happens during the rising and deflating process. First, we let the bread dough rise in a warm place until it doubles, which takes about 1.5 to 3 hours. But we don’t stop there. After this first rise, I have you deflate the dough right in the bowl by folding it over on itself a few times. Then, you let it rise *again* until it doubles, which takes another 1 to 2 hours. I note in my recipe that this deflation process is best repeated at least 3 times, and even more is better! This entire process builds incredible flavor and a beautiful, airy structure in your final homemade bread. You can even stretch this rising time out, letting it happen at room temperature, as long as the total rising time (with all deflations) stays under 24 hours.
My Shaping Technique for Rustic Bread or Baguettes
When it’s time to shape your Rustic Bread or Baguettes, I have a very specific technique. A key part of my instruction is to work on a surface (like your countertop) that has *no flour* on it. This is important. The slight tackiness of the bread dough against the clean counter helps create surface tension. For both the loaf and the baguettes, I use a bowl scraper. I place the scraper at a slight angle against the bottom of the dough and push, which rolls and stretches the dough at the same time. I repeat this a few times, turning the dough 90 degrees each time, to form a tight loaf or compact dough balls (which will become the baguettes). This technique is crucial for getting a good “oven spring” or rise during baking bread.
The Critical Final Proofing Times
Once your loaf or baguettes are shaped, the final rise, or proofing, is next. This step is critical, and the timing is very specific and different for each shape. If you are making the single loaf of rustic bread, you’ll let it proof in its floured basket in a warm place for about 30 minutes. My recipe clearly states not to go much longer than that. However, if you have shaped the dough into baguettes, the proofing time is even shorter: no more than 15 minutes. This shorter final proofing time is intentional and helps the baguettes keep their shape and get that classic, chewy texture when baked.
How I Get a Perfect Crusty Bread with Steam
The secret to that amazing, crackly, crusty bread is steam! My recipe for Rustic Bread or Baguettes explains how to do this in both an oven and on a grill. For oven baking bread, I have you preheat the oven to 450°F with a small heatproof bowl of water on the bottom rack. Just before the bread goes in, you add ice cubes to that bowl. This creates a burst of steam. I even suggest adding more ice cubes during baking for an even crispier crust. This steam is essential; it keeps the surface of the bread dough moist at the beginning, allowing it to expand fully before the crust sets and gets that beautiful, deep-golden brown color.
Scoring the Top of Your Rustic Bread or Baguettes
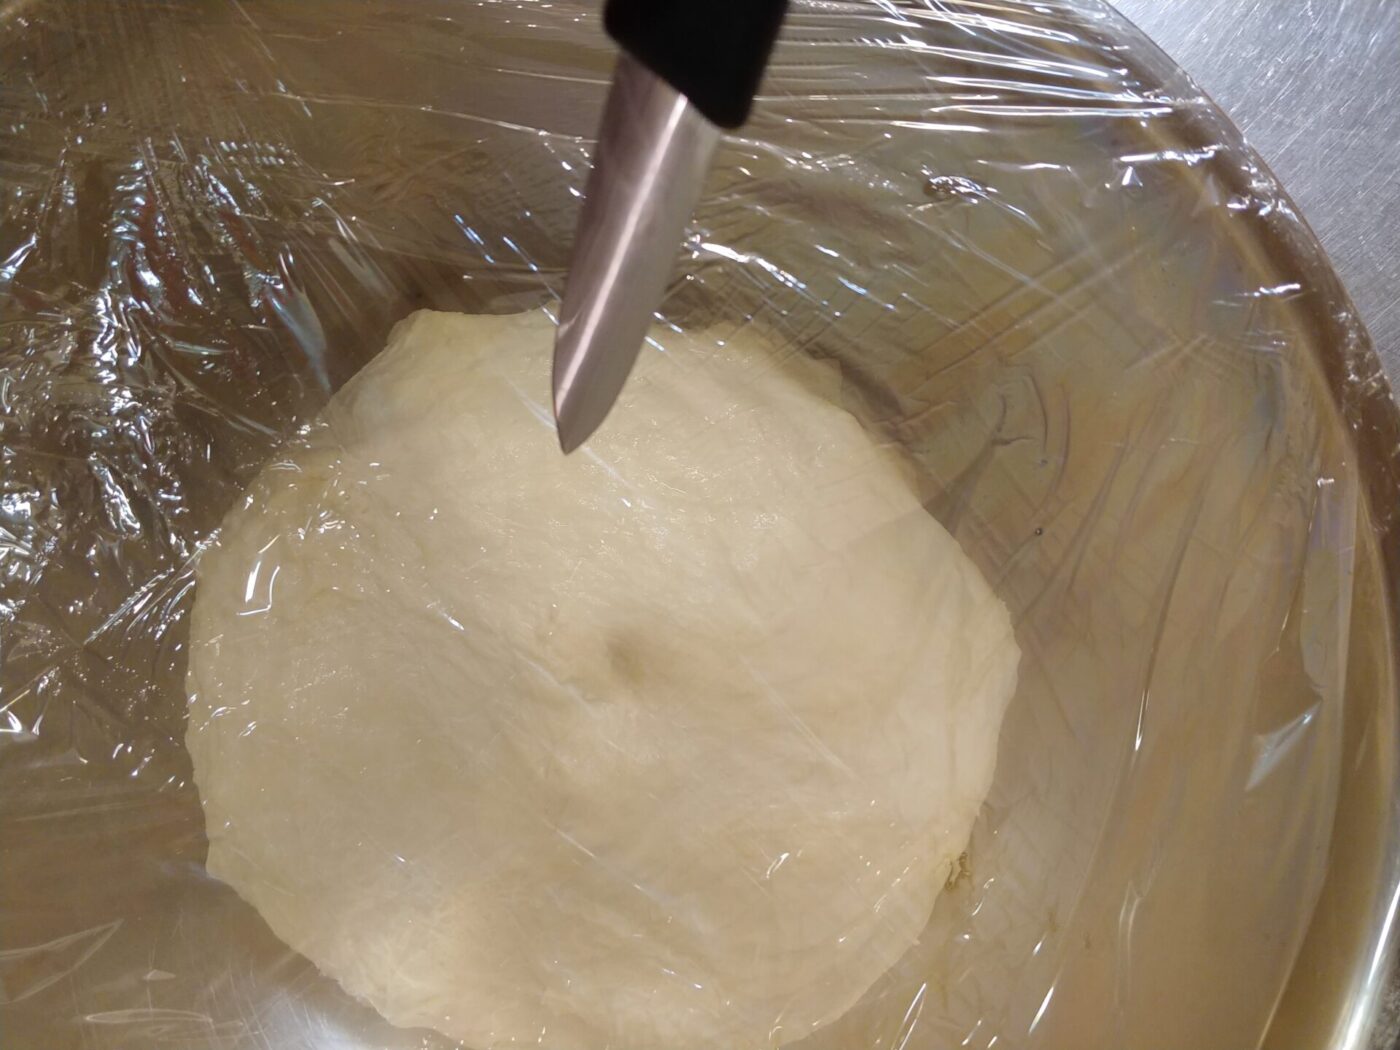
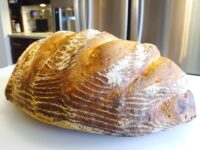
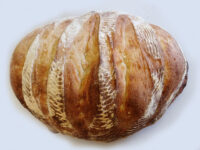
Before the Rustic Bread or Baguettes hit the hot oven, we have to score them, which means cutting the top. This isn’t just for looks, though it does make the bread beautiful! Scoring is a key step that guides where the bread will expand during baking bread. Without these cuts, the expanding loaf would just burst open in random, less attractive places. I use a very sharp razor or knife to make 4-6 cuts on the top of the rustic bread loaf or 2-4 cuts on the top of each baguette. This controlled “opening” allows the bread to rise to its full potential (what bakers call “oven spring”) and helps create the characteristic “ear” you see on artisan homemade bread.
Rustic Bread or Baguettes
Ingredients:
Click any ingredient to learn more4 ½ cups of bread flour
1 TSP of confectioners’ sugar
1 ½ TSP of active dry yeasts
1 TBSP of salt
Optionally: 1 ½ TSP of caraway seeds
2 cups of water - preheat in microwave to lukewarm (about 90 to 100°F)
Nutrition per entire recipe (whole batch):
EstimatedCalories 2067
Protein 69.9 g
Fat 9.8 g
Saturated fat 1.4 g
Carbohydrate 414.6 g
Sugars 5.8 g
Fiber 15.2 g
Sodium 4791 mg
Cholesterol 0 mg
Estimated. Worked out from the ingredients above using the United States Department of Agriculture’s FoodData Central reference data. An estimate, not a measurement — brands, sizes and how much of a marinade actually ends up on the plate all move it.
Directions:
1.Dough:
1.1.
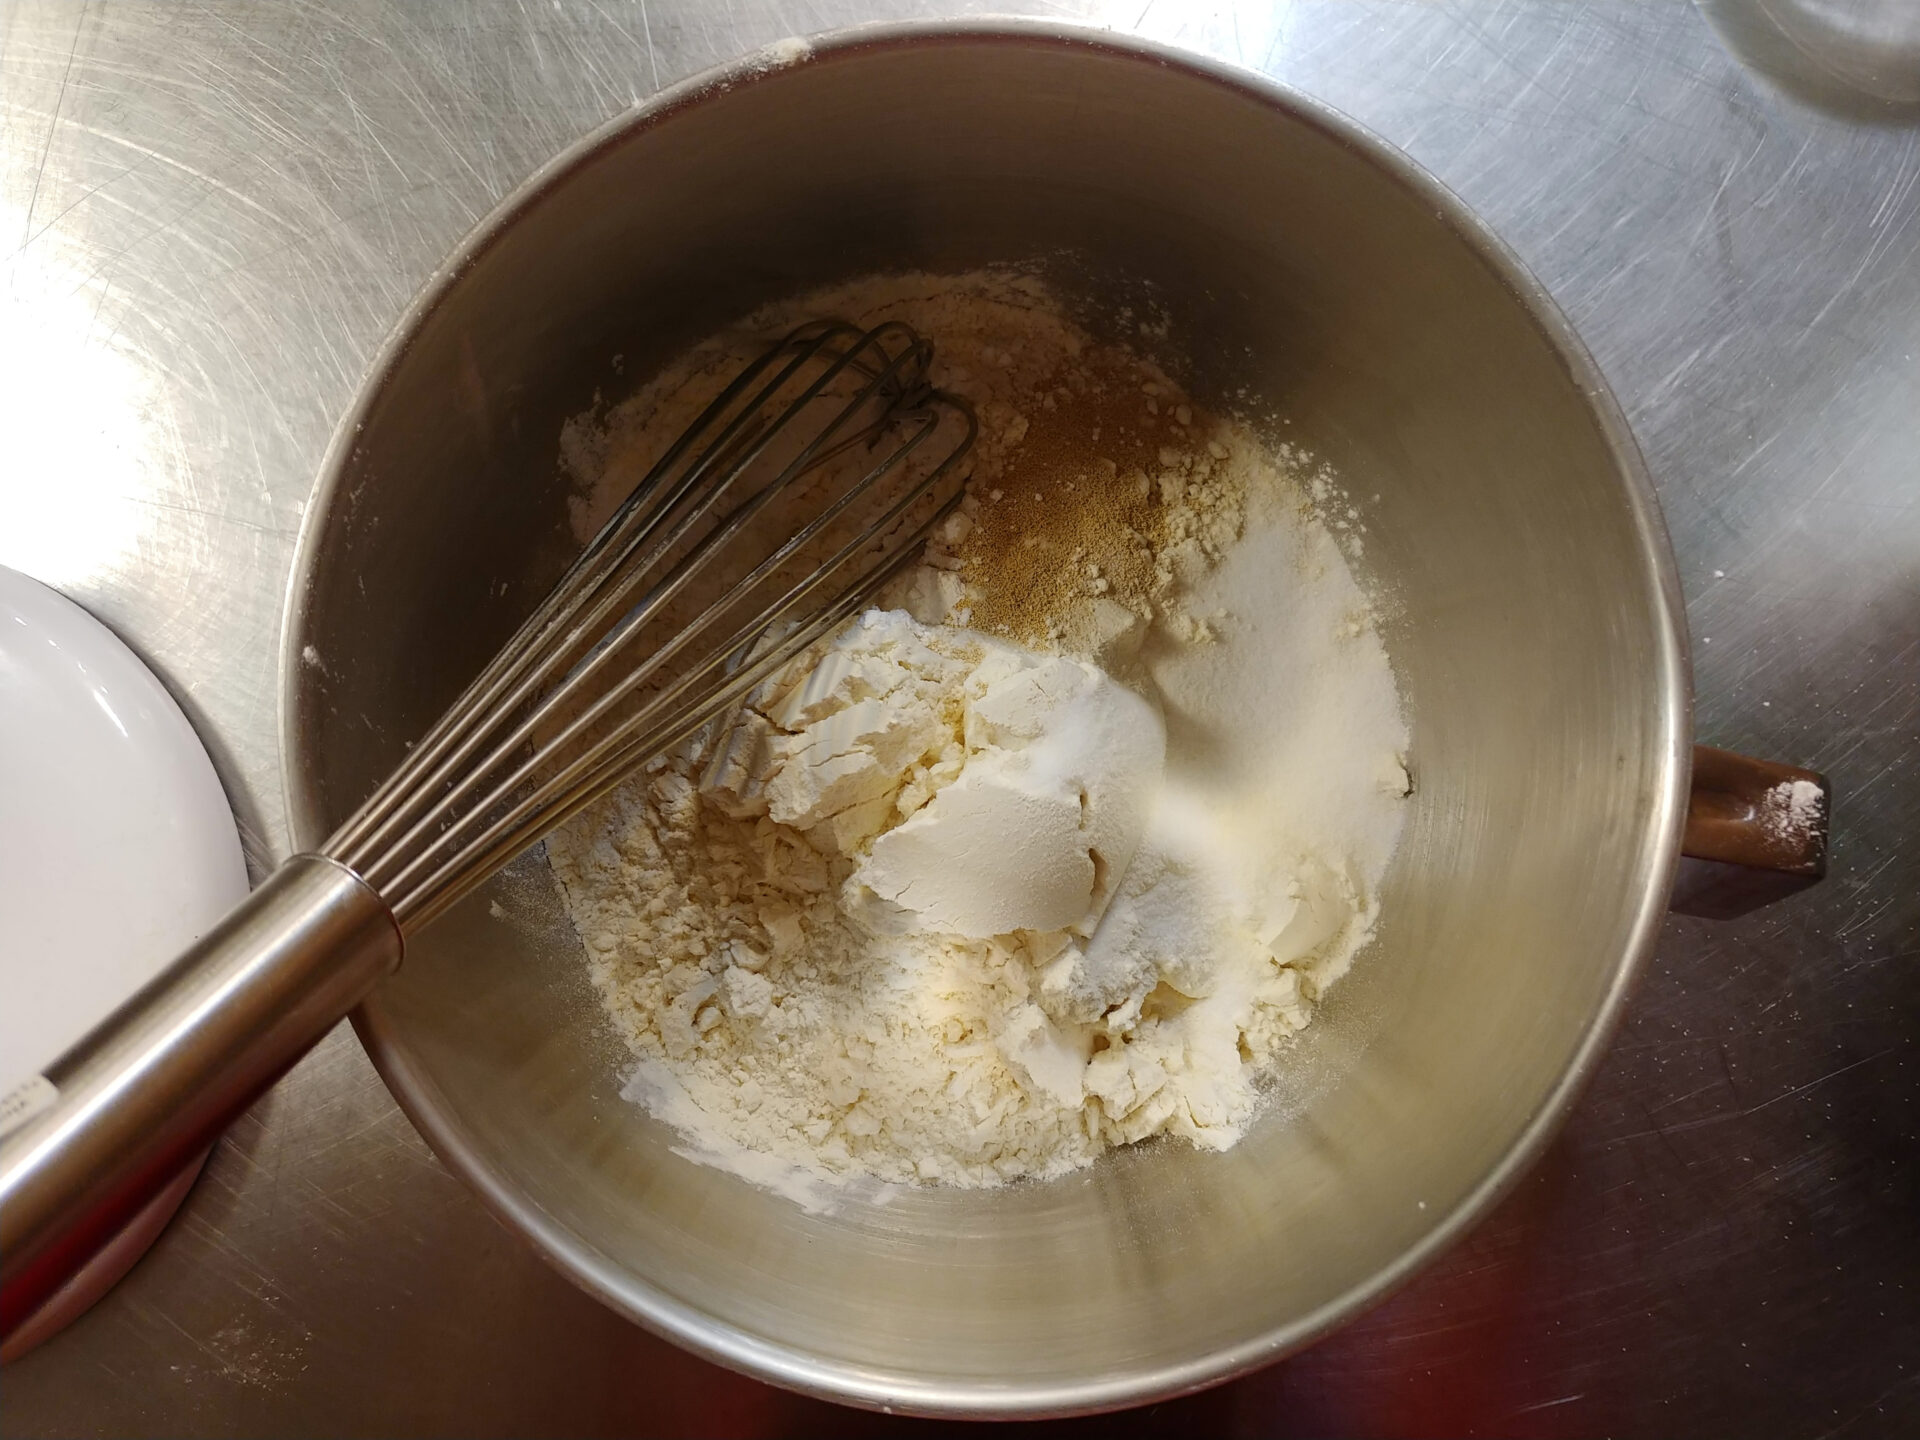
Add into the kitchen mixer with a hook attachment:
4 ½ cups of bread flour
1 TSP of confectioners’ sugar
1 ½ TSP of active dry yeasts
1 TBSP of salt
Optionally: 1 ½ TSP of caraway seeds
Briefly stir with a whisk just enough to combine all ingredients (about 1 minute).
1.2.
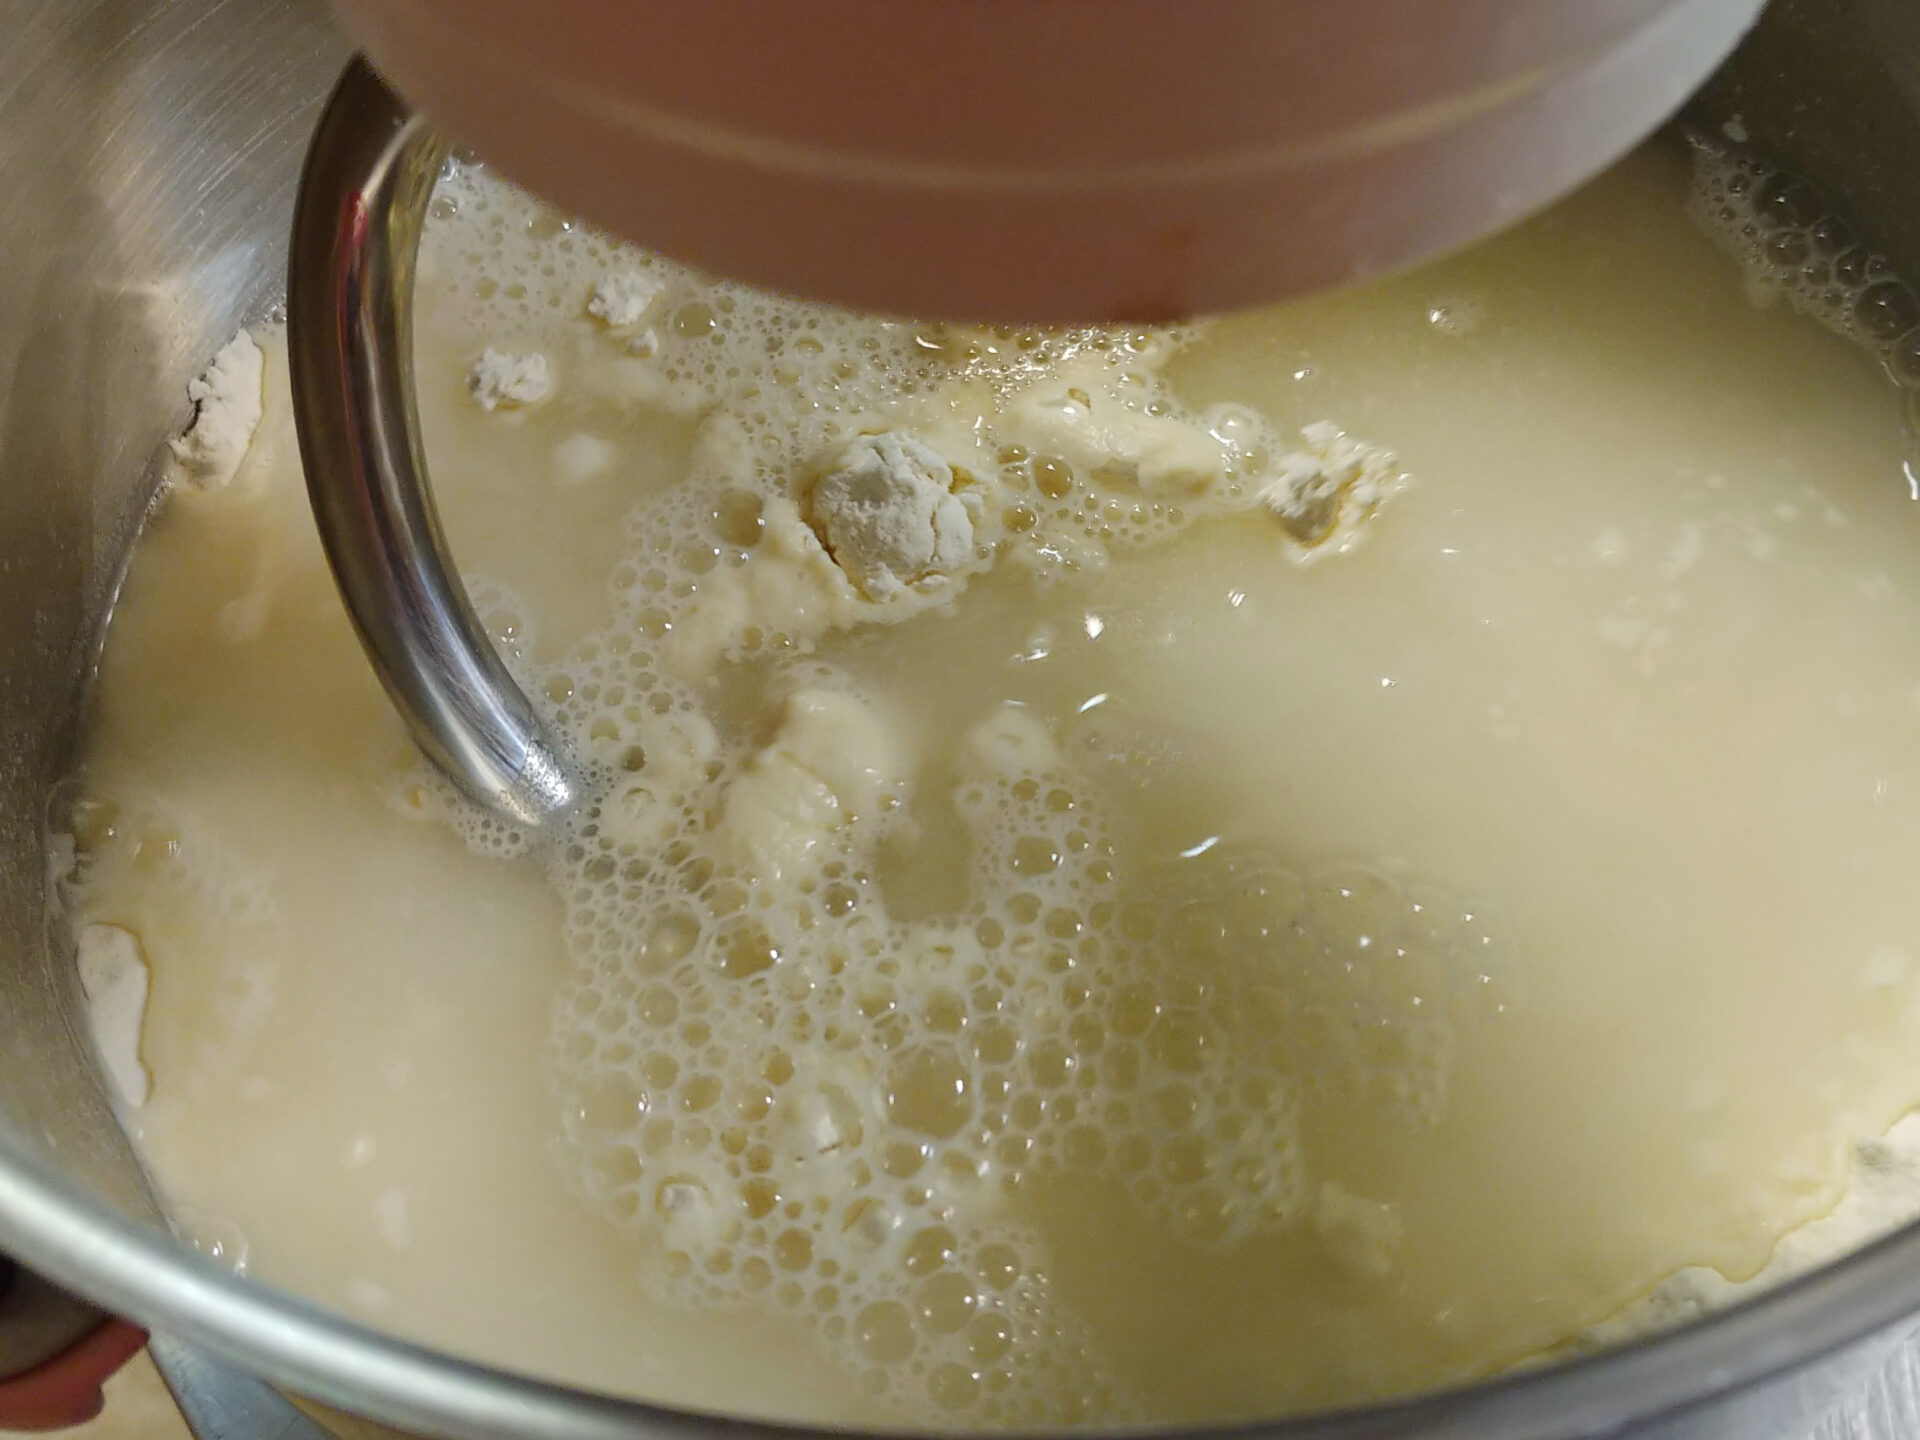
Add:
2 cups of water
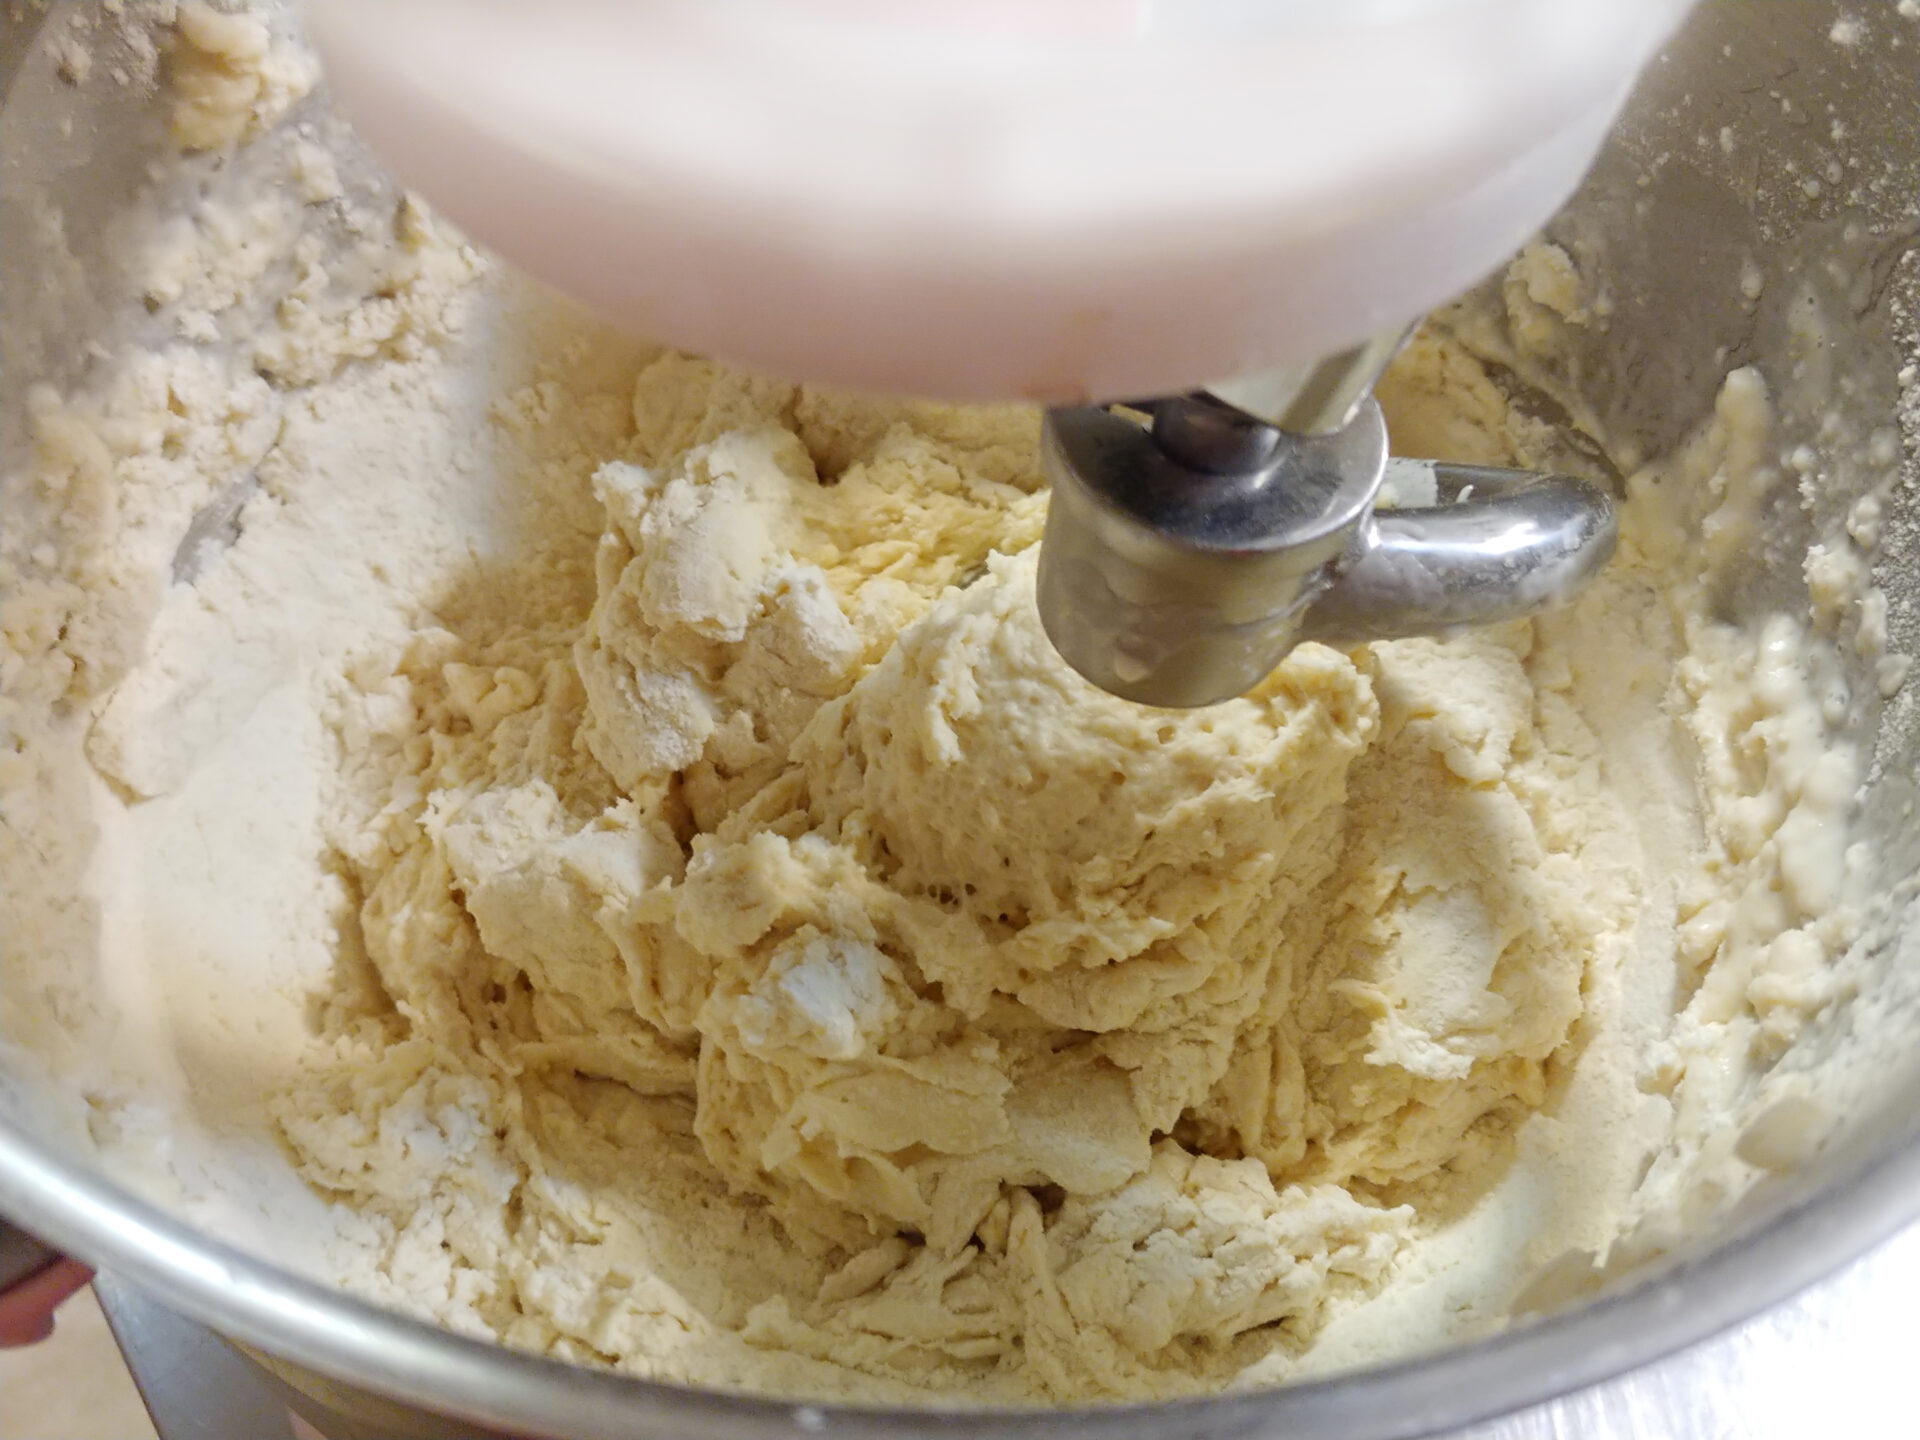
Knead on a low speed until all ingredients are partially incorporated (about 1 – 2 minutes).
1.3.
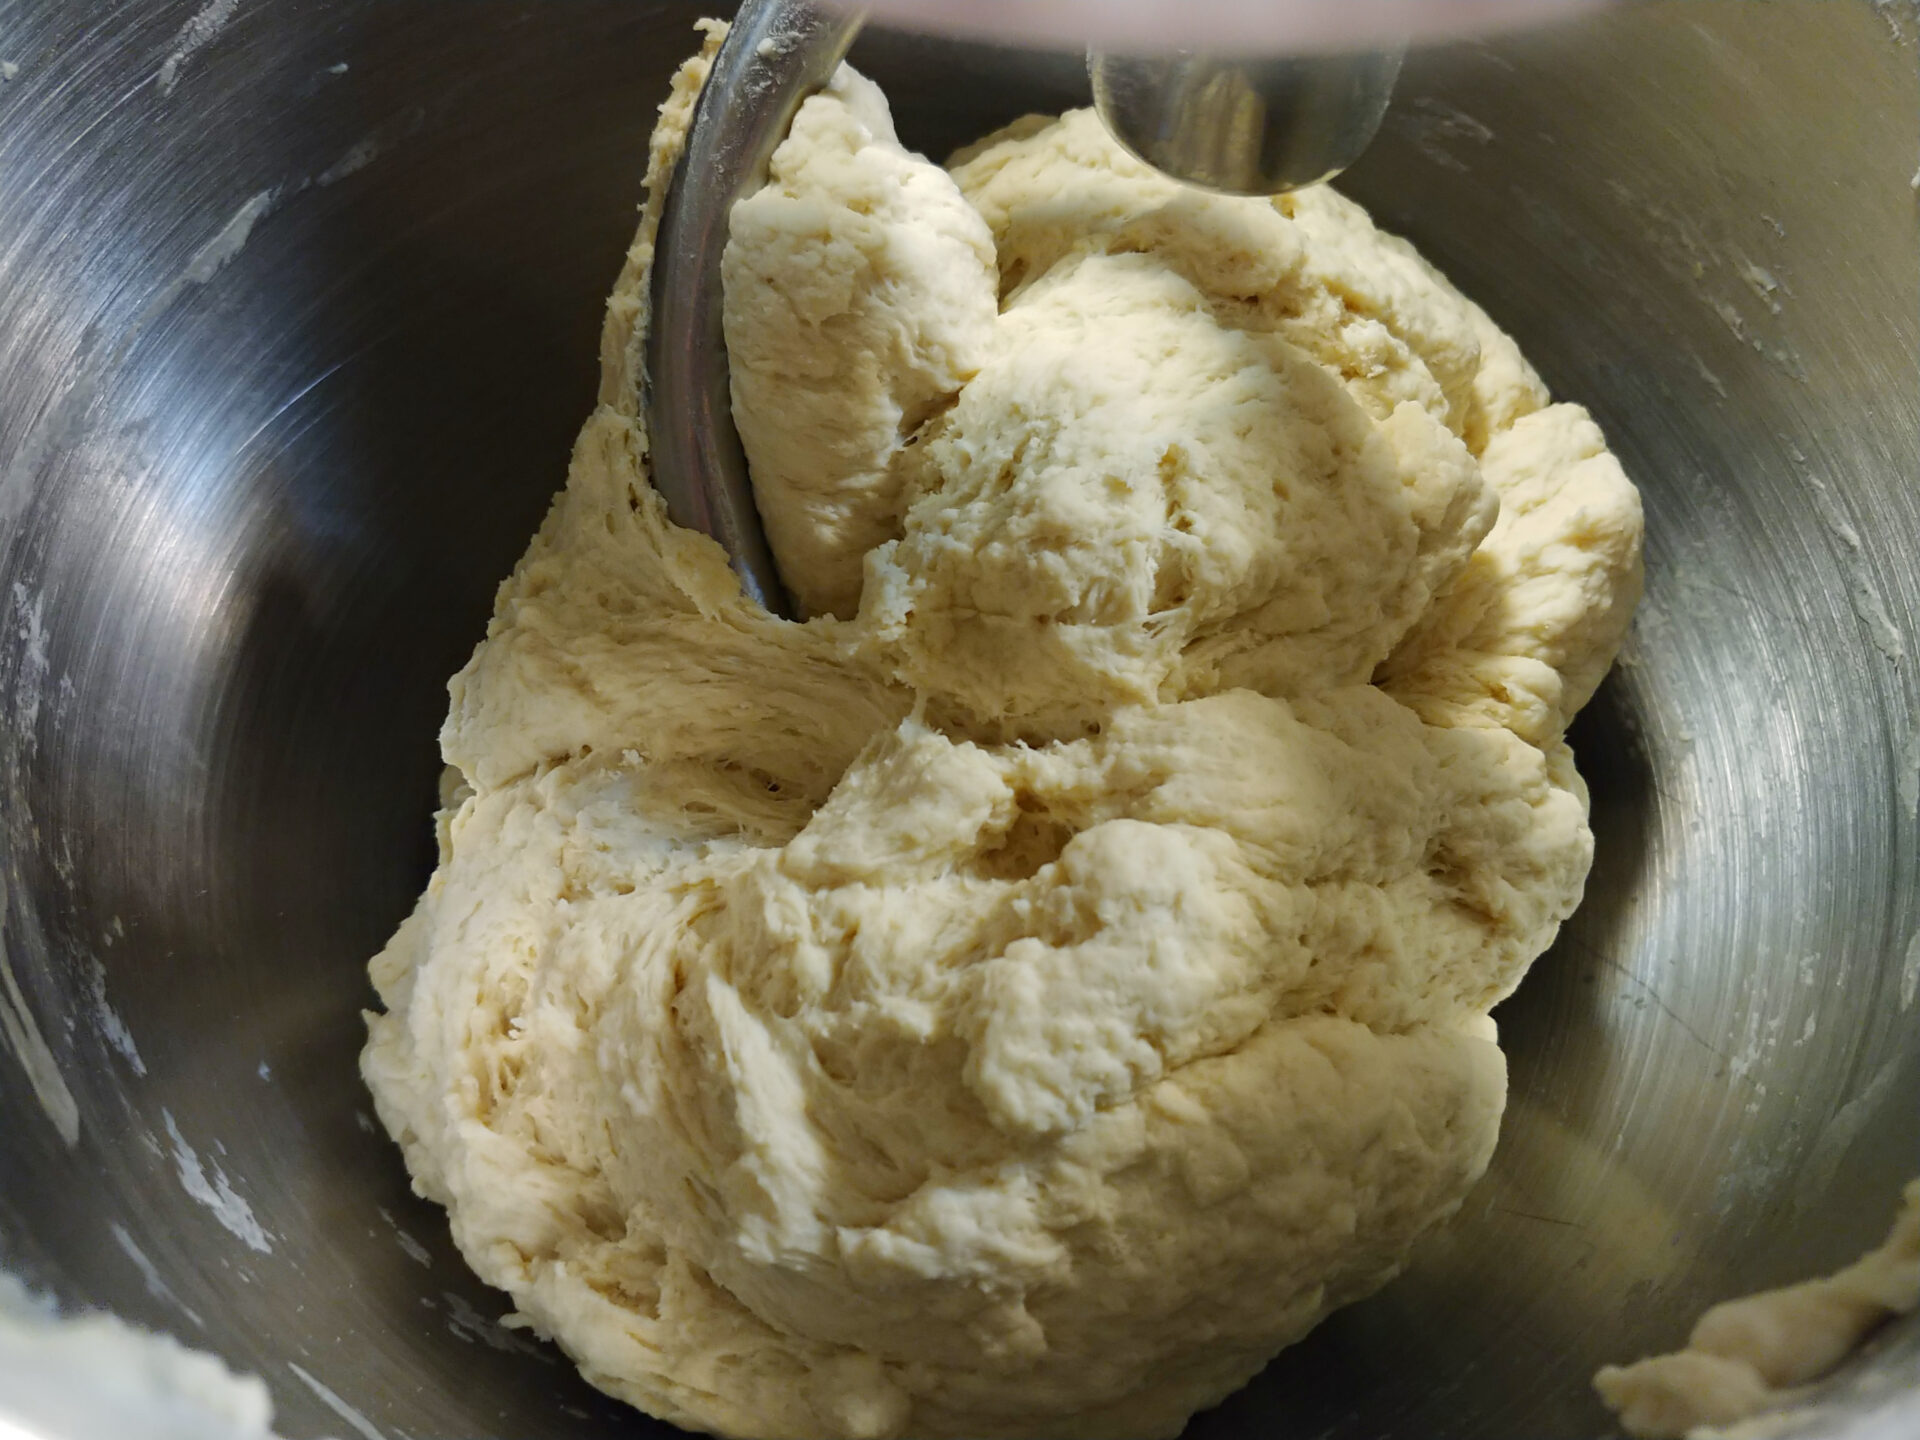
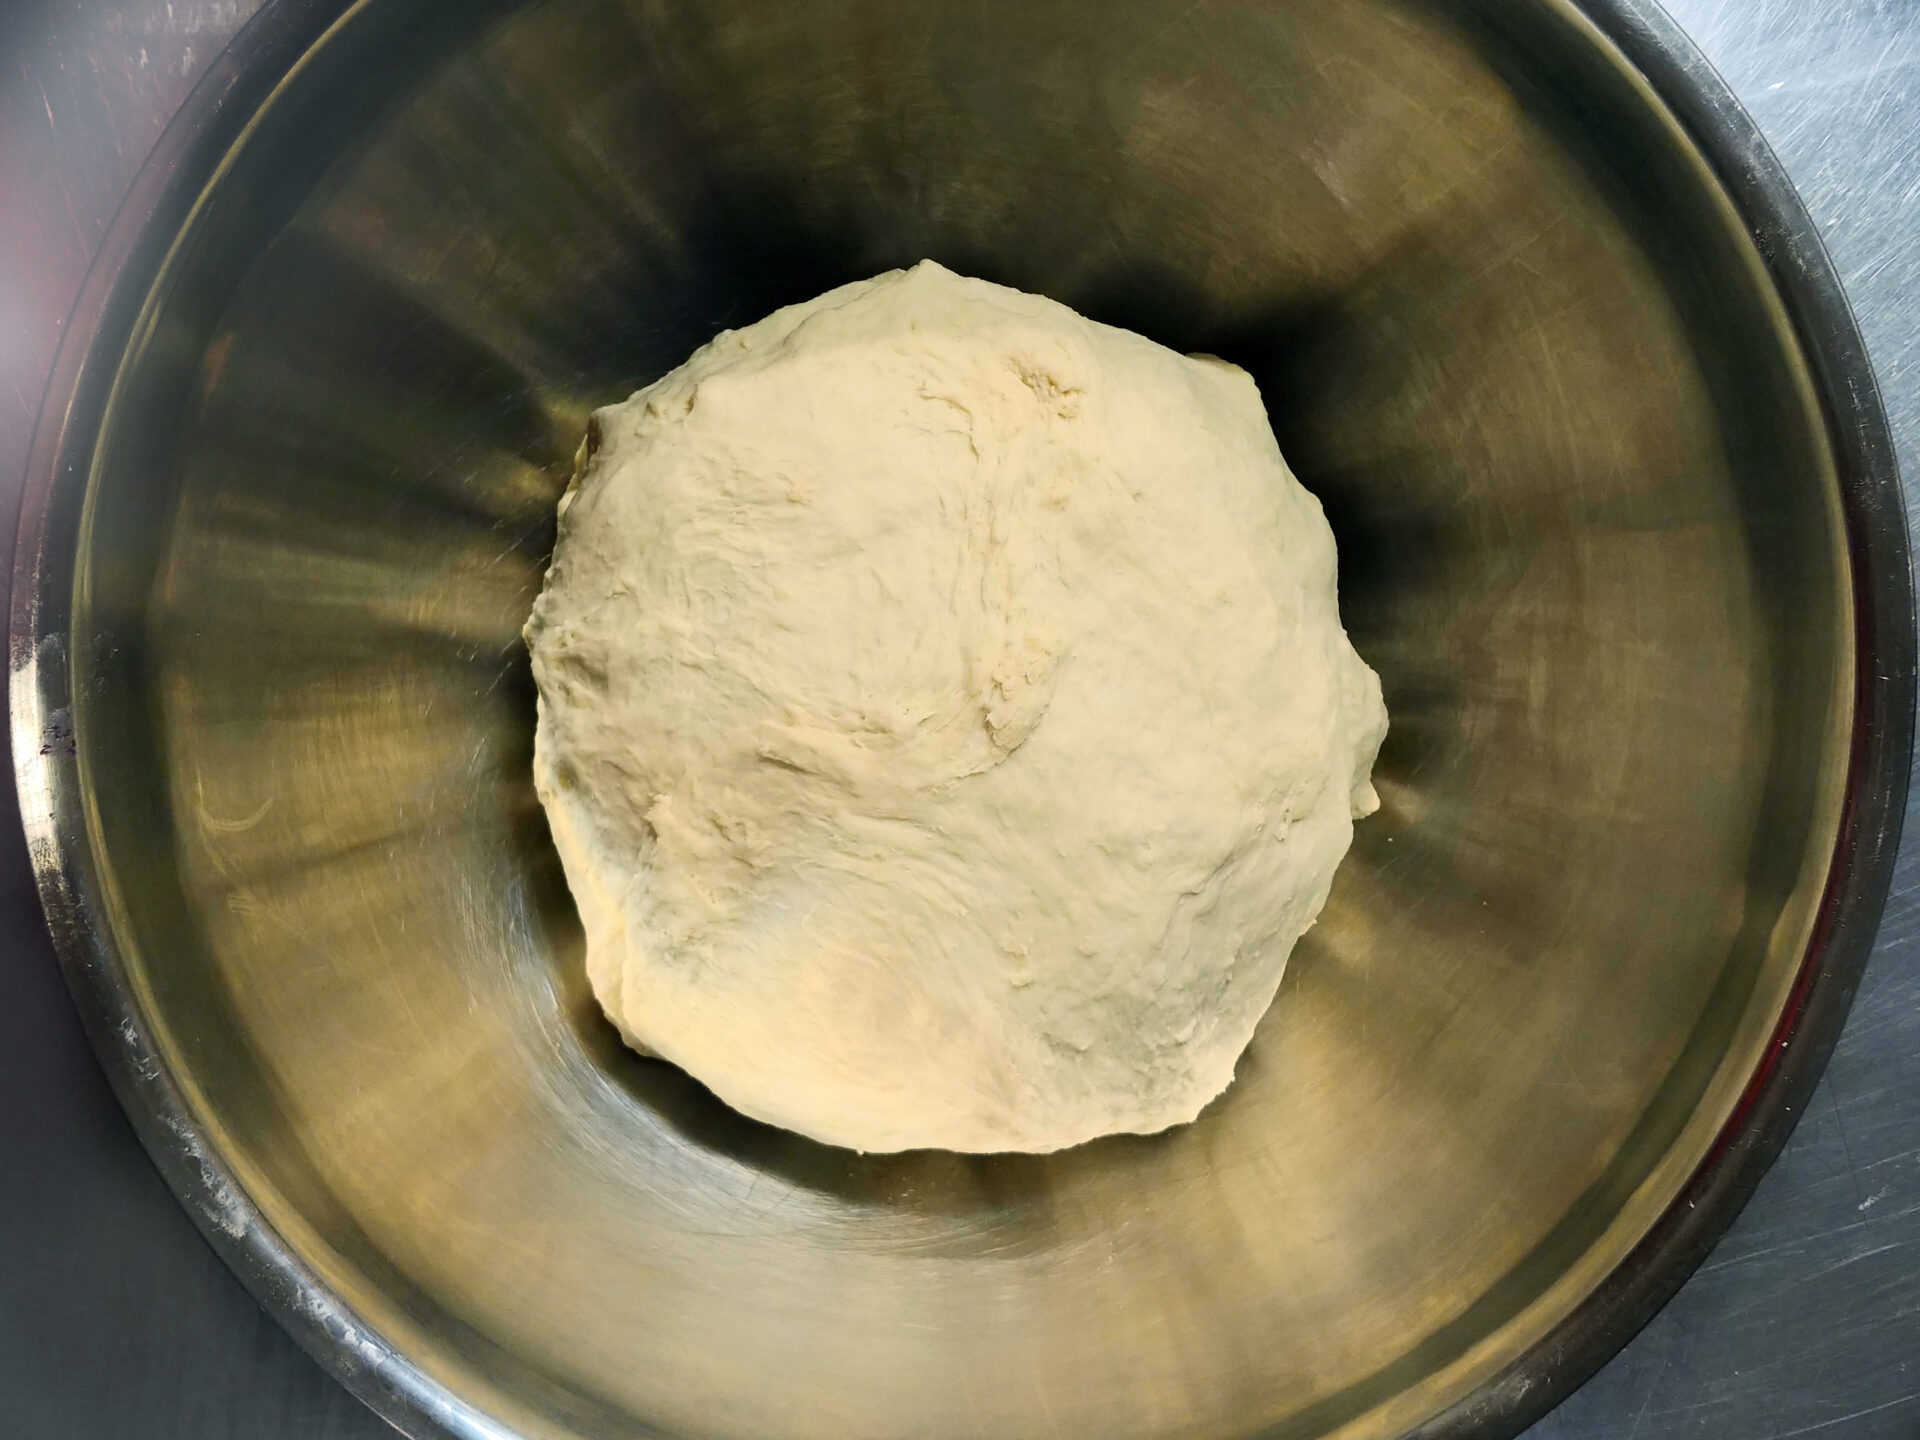
Then increase speed to medium-high and knead until a compact dough is formed (about 1 – 2 minutes).
Note:
- The dough should not be too sticky (at least not too much).
- If it sticks to the mixing bowl after about 2 to 3 minutes of processing, add 2 TBSP of flour and process for 1 – 2 minutes. That should solve the problem. If not, add a little more flour.
2.Rising the Dough:
2.1.
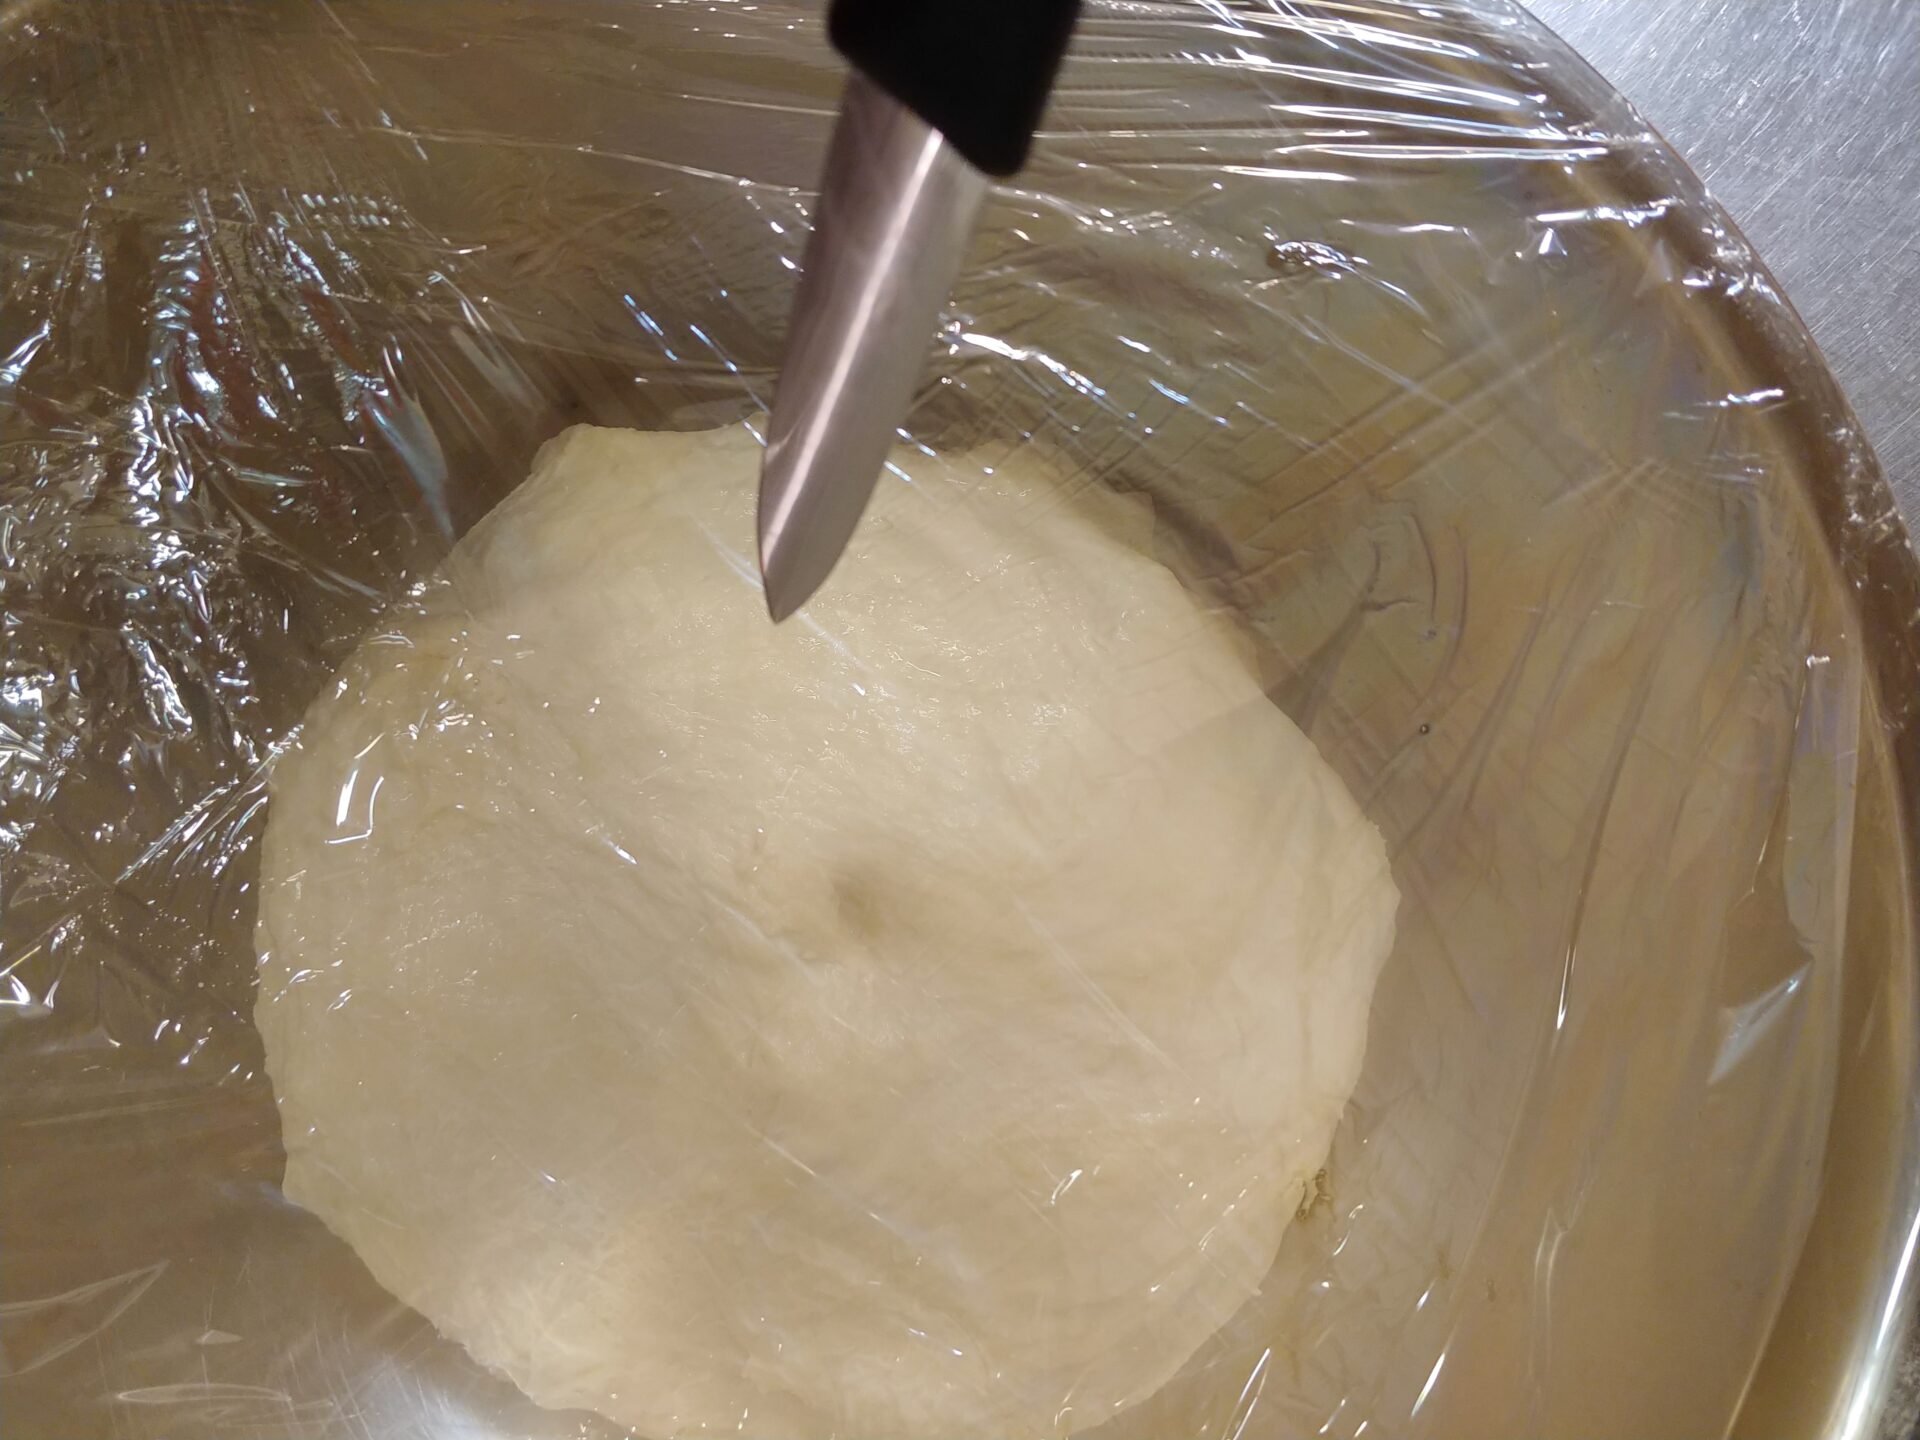
Remove the bowl with the dough from the mixer and cover the bowl with plastic wrap.
2.3.
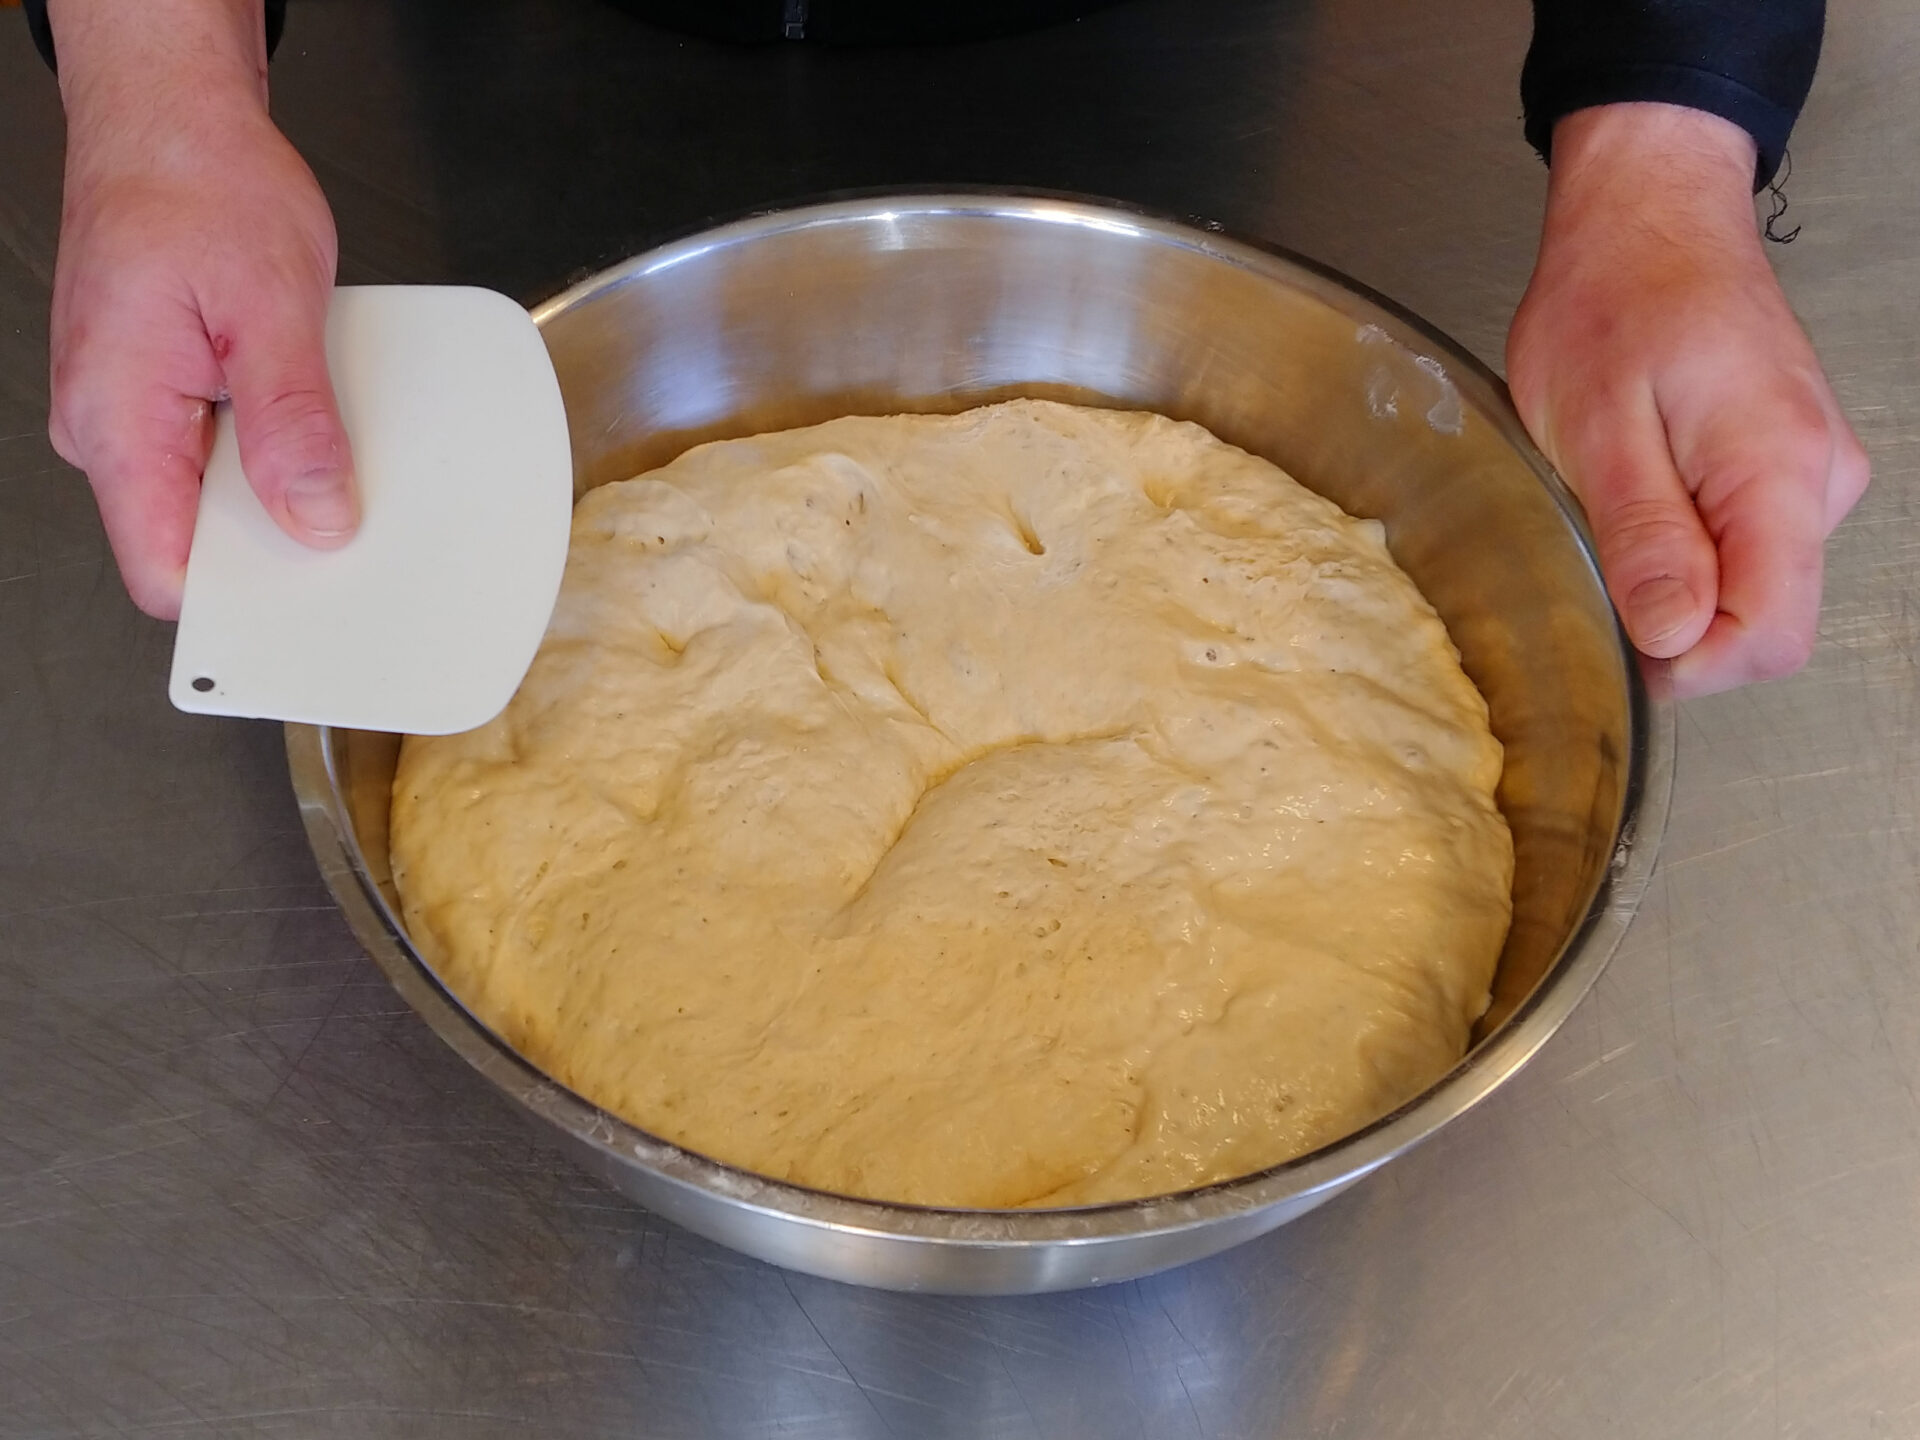
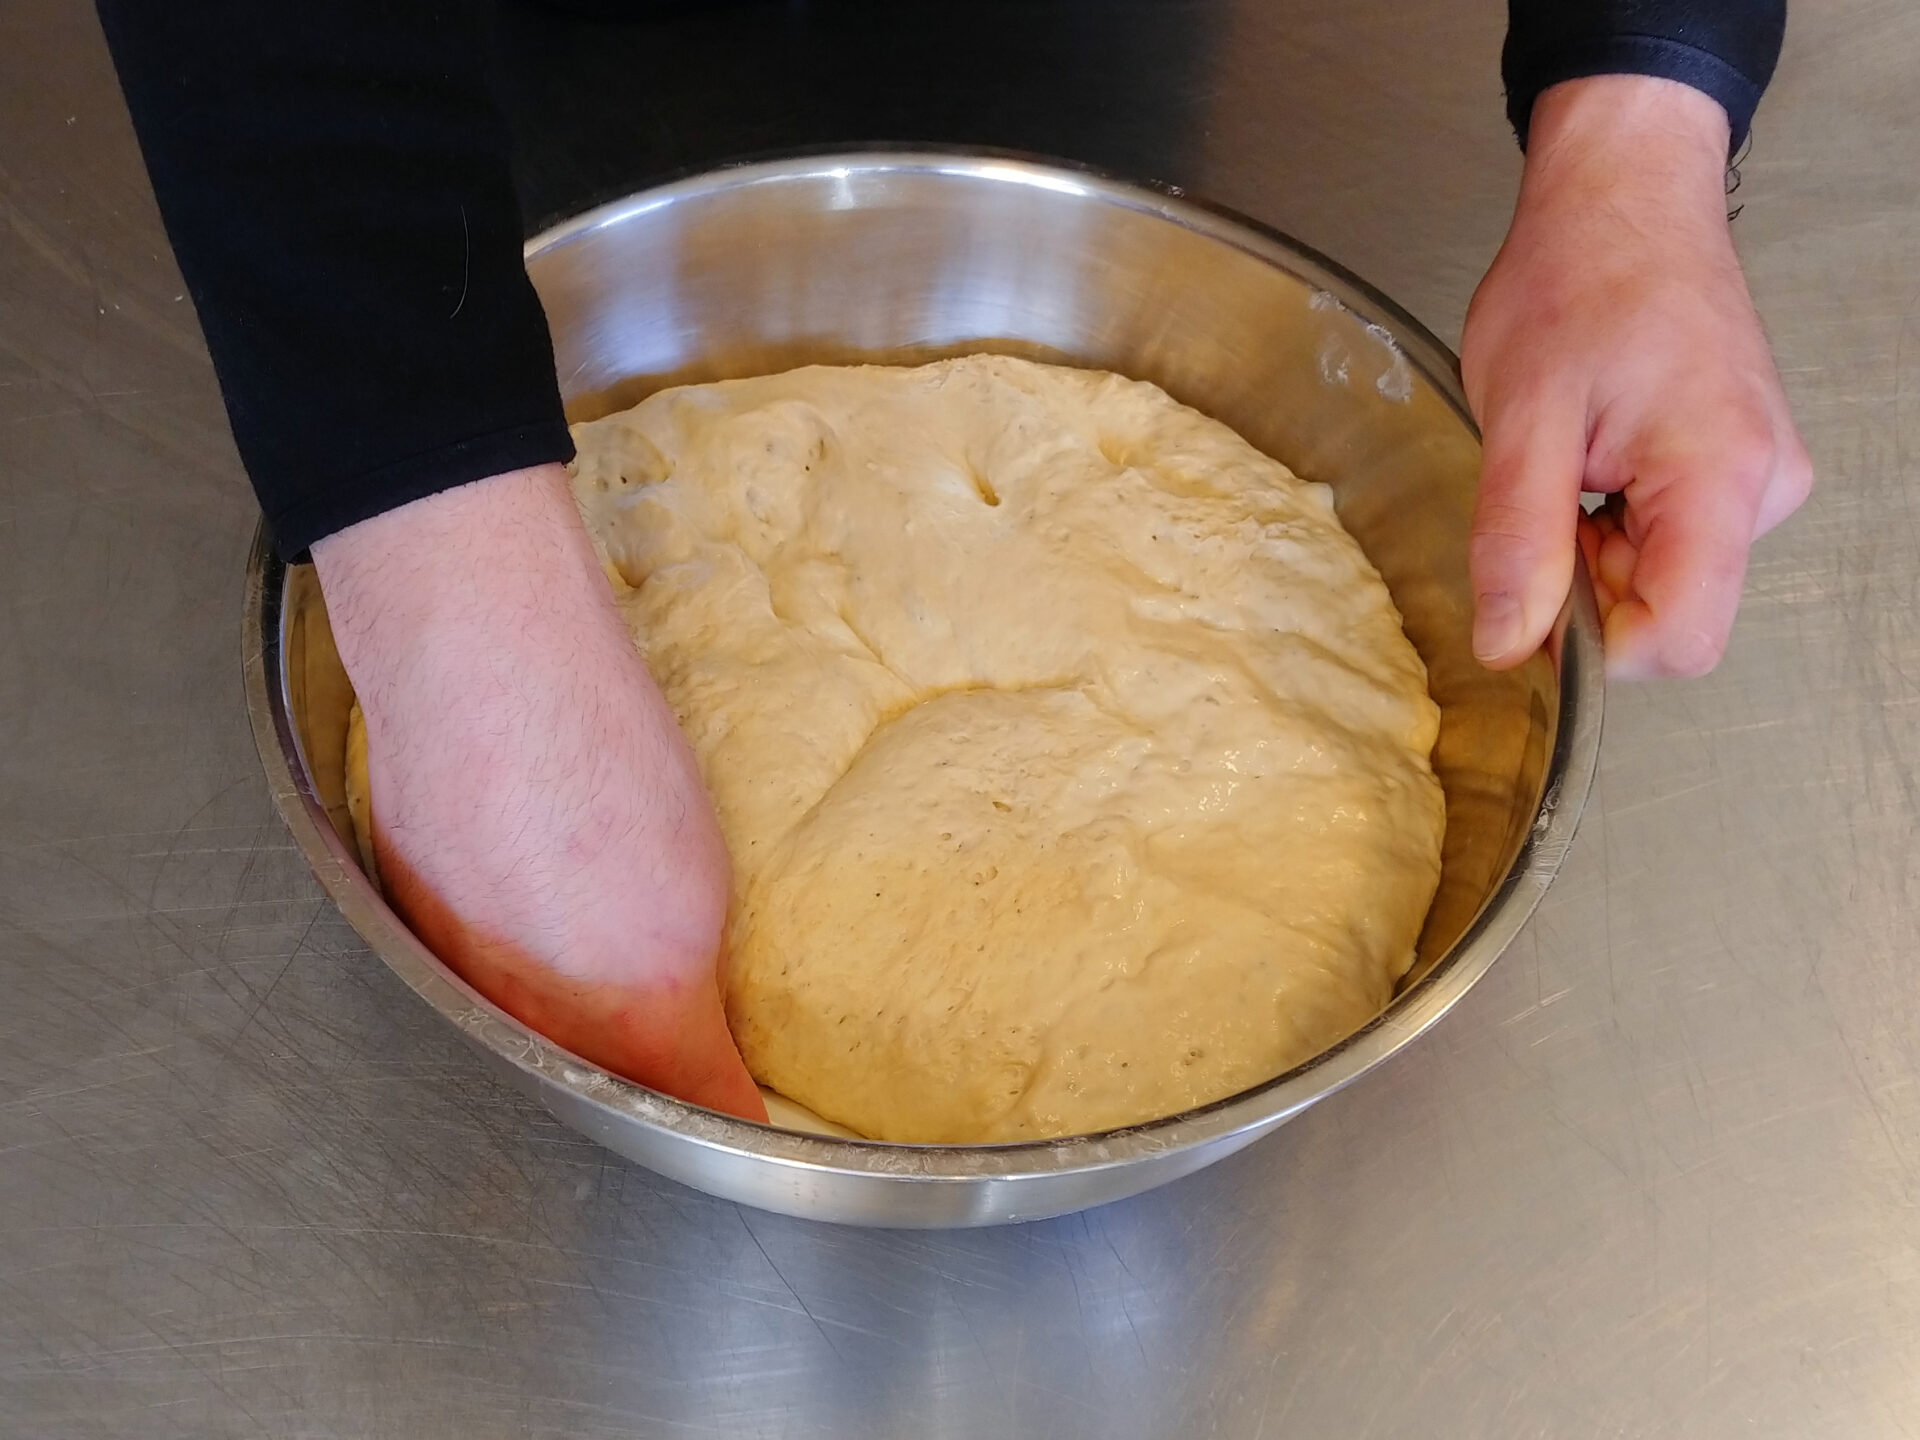
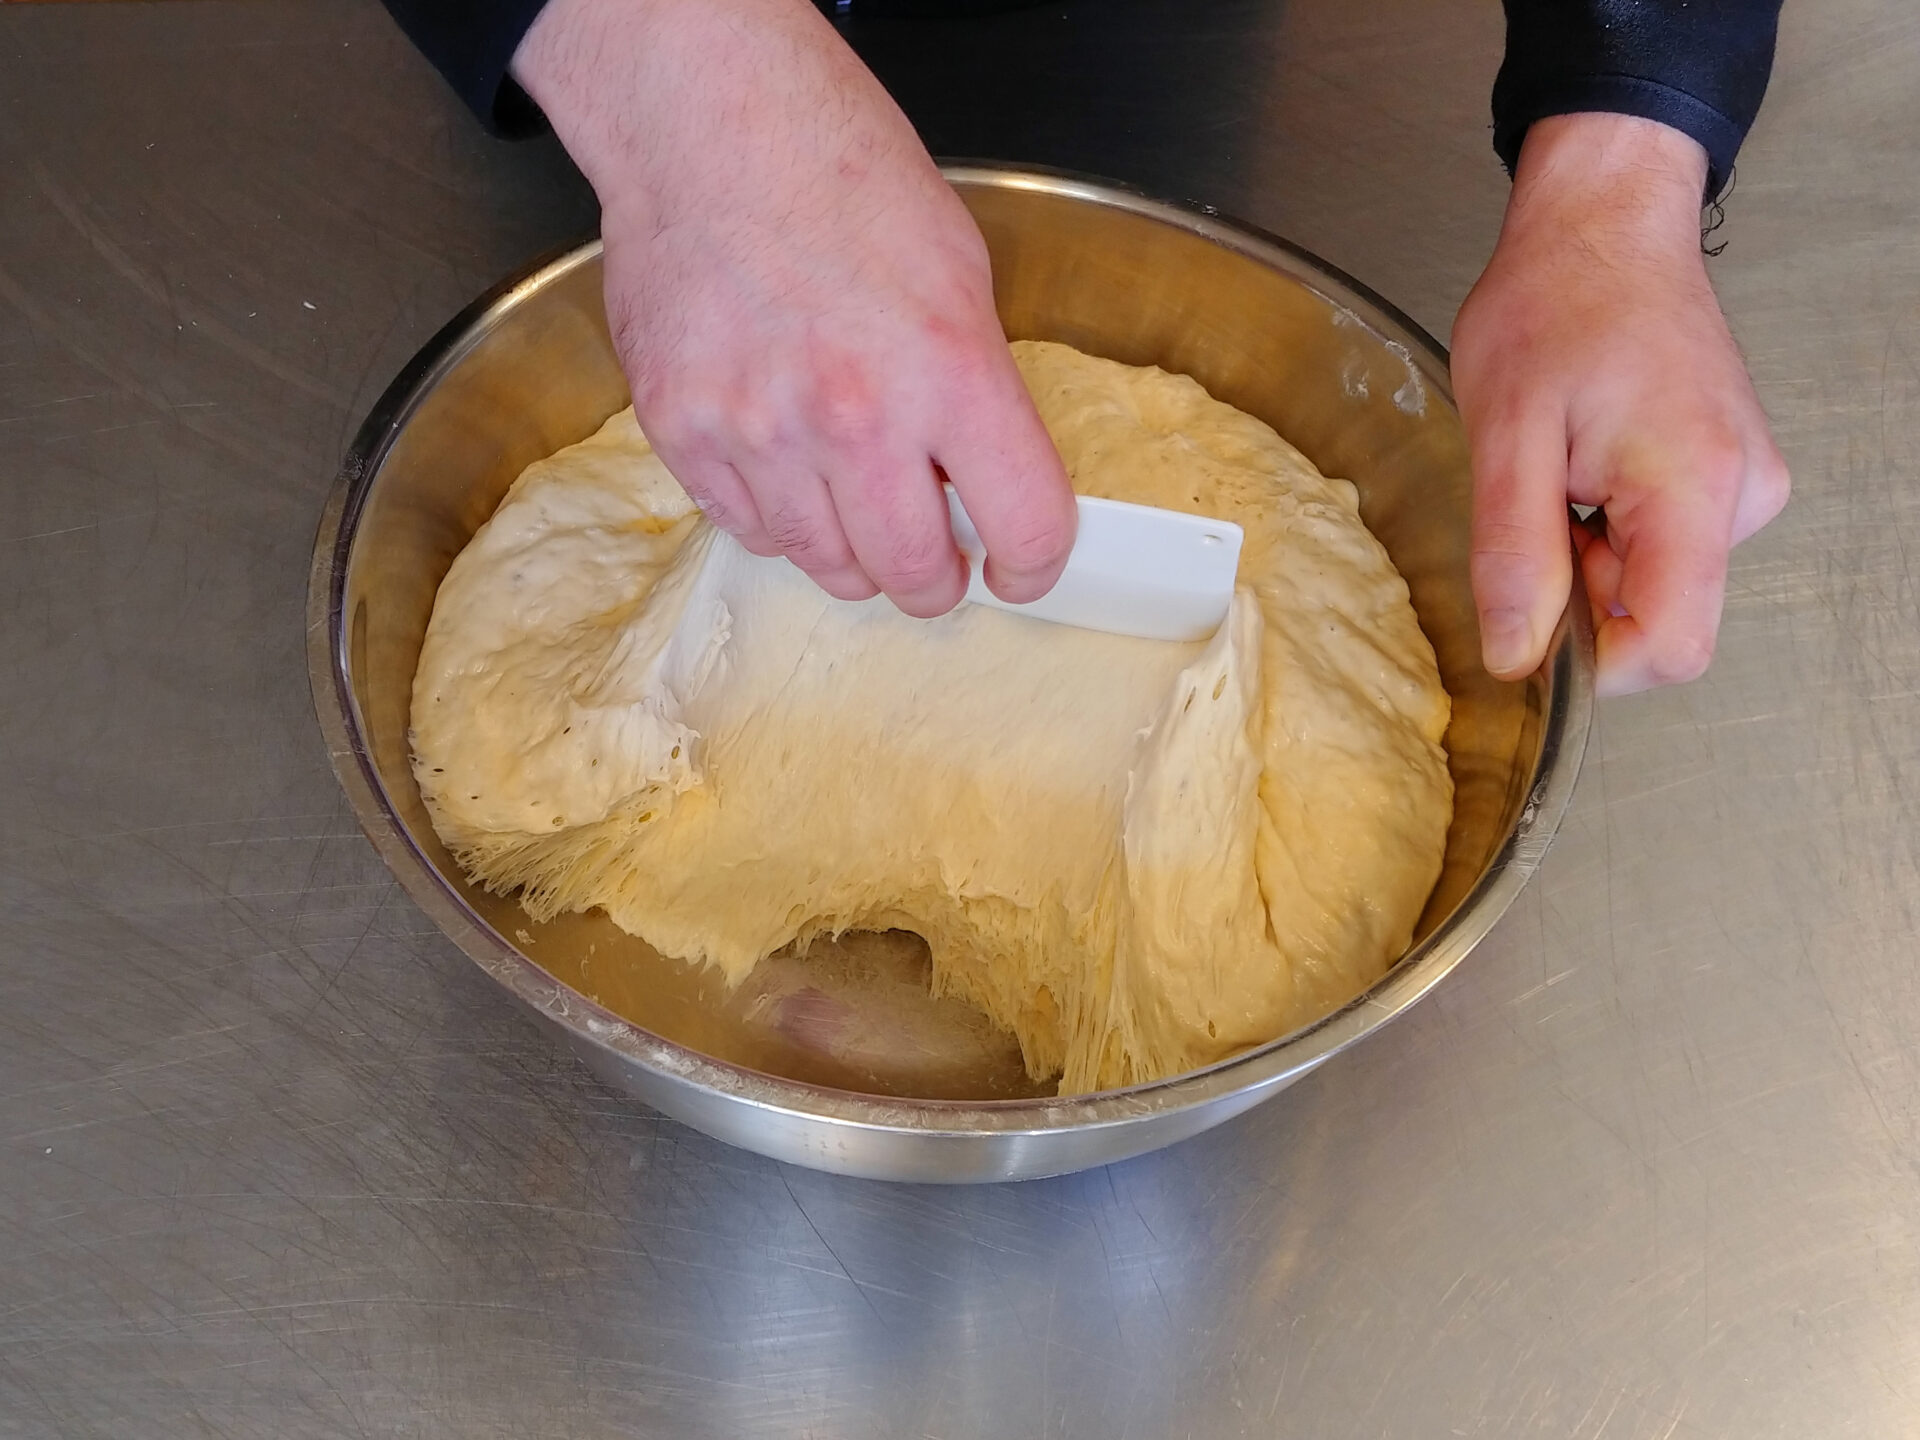
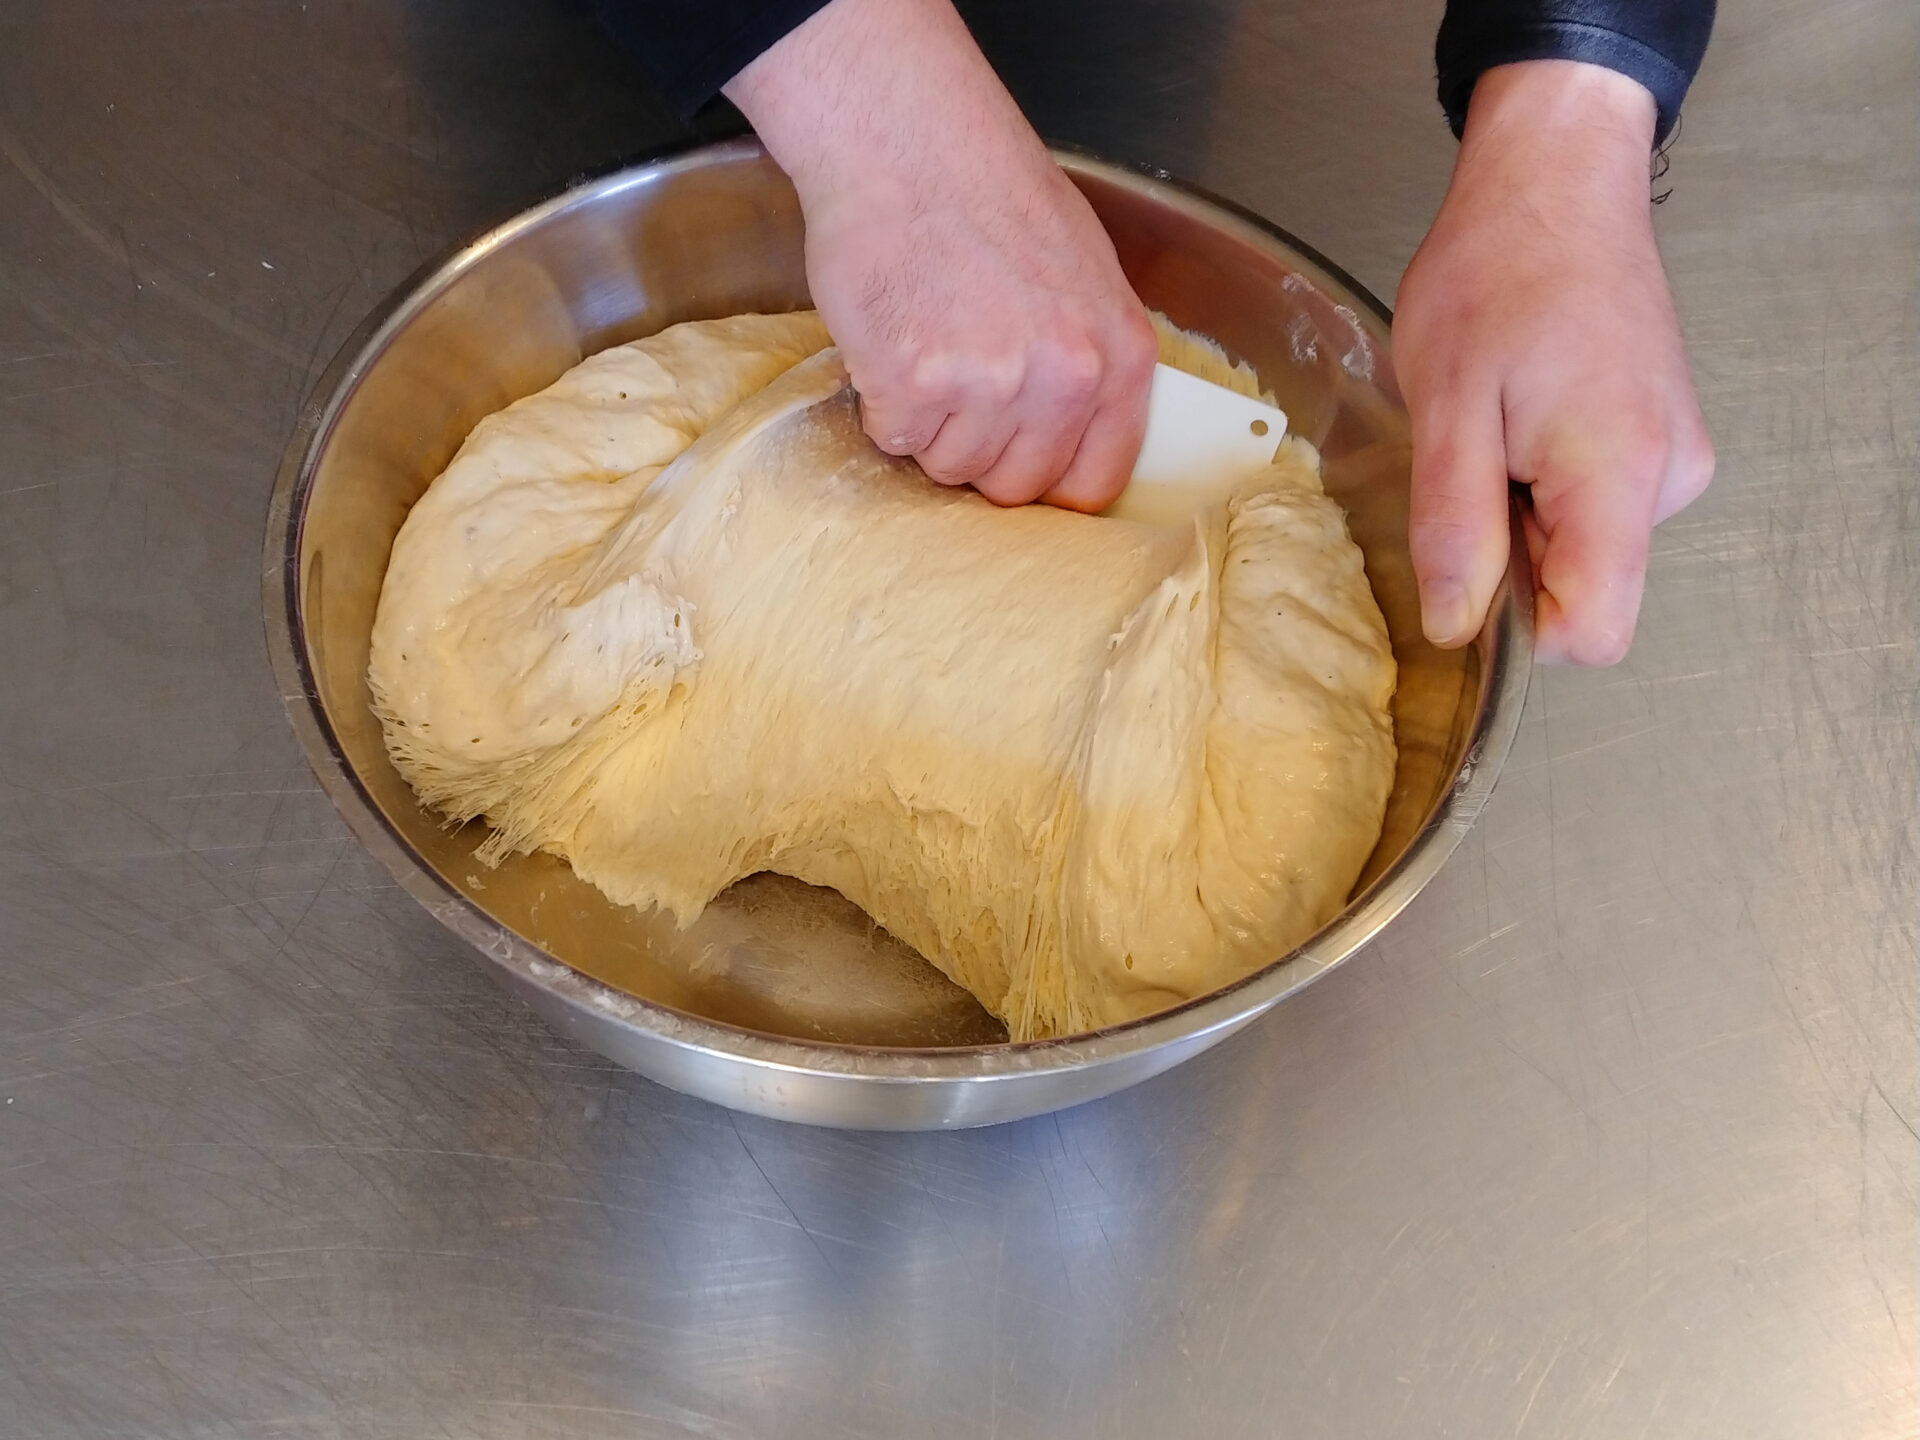
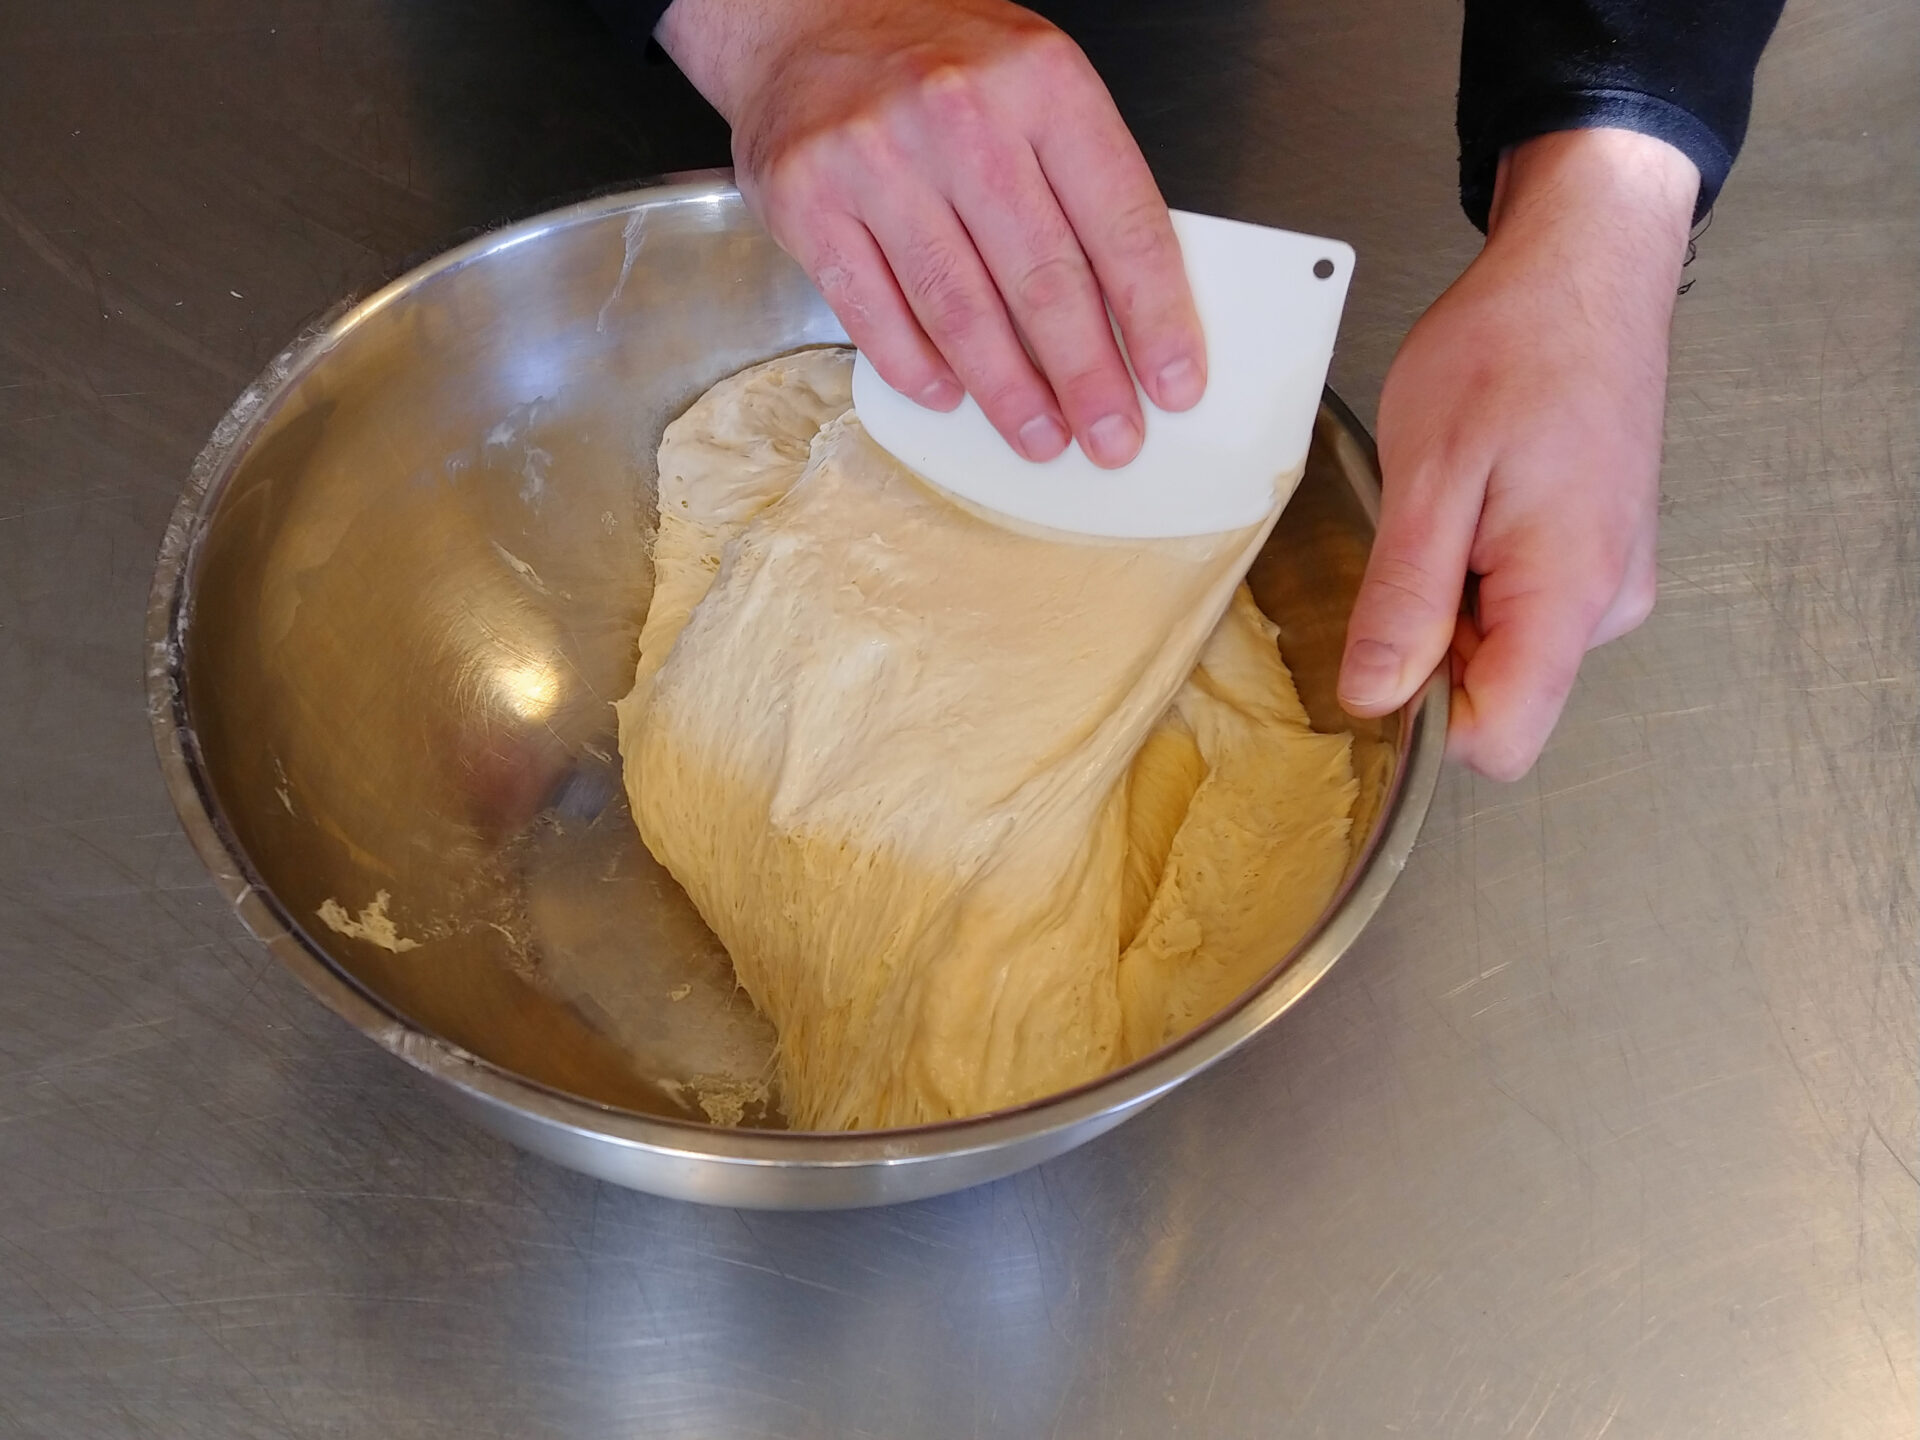
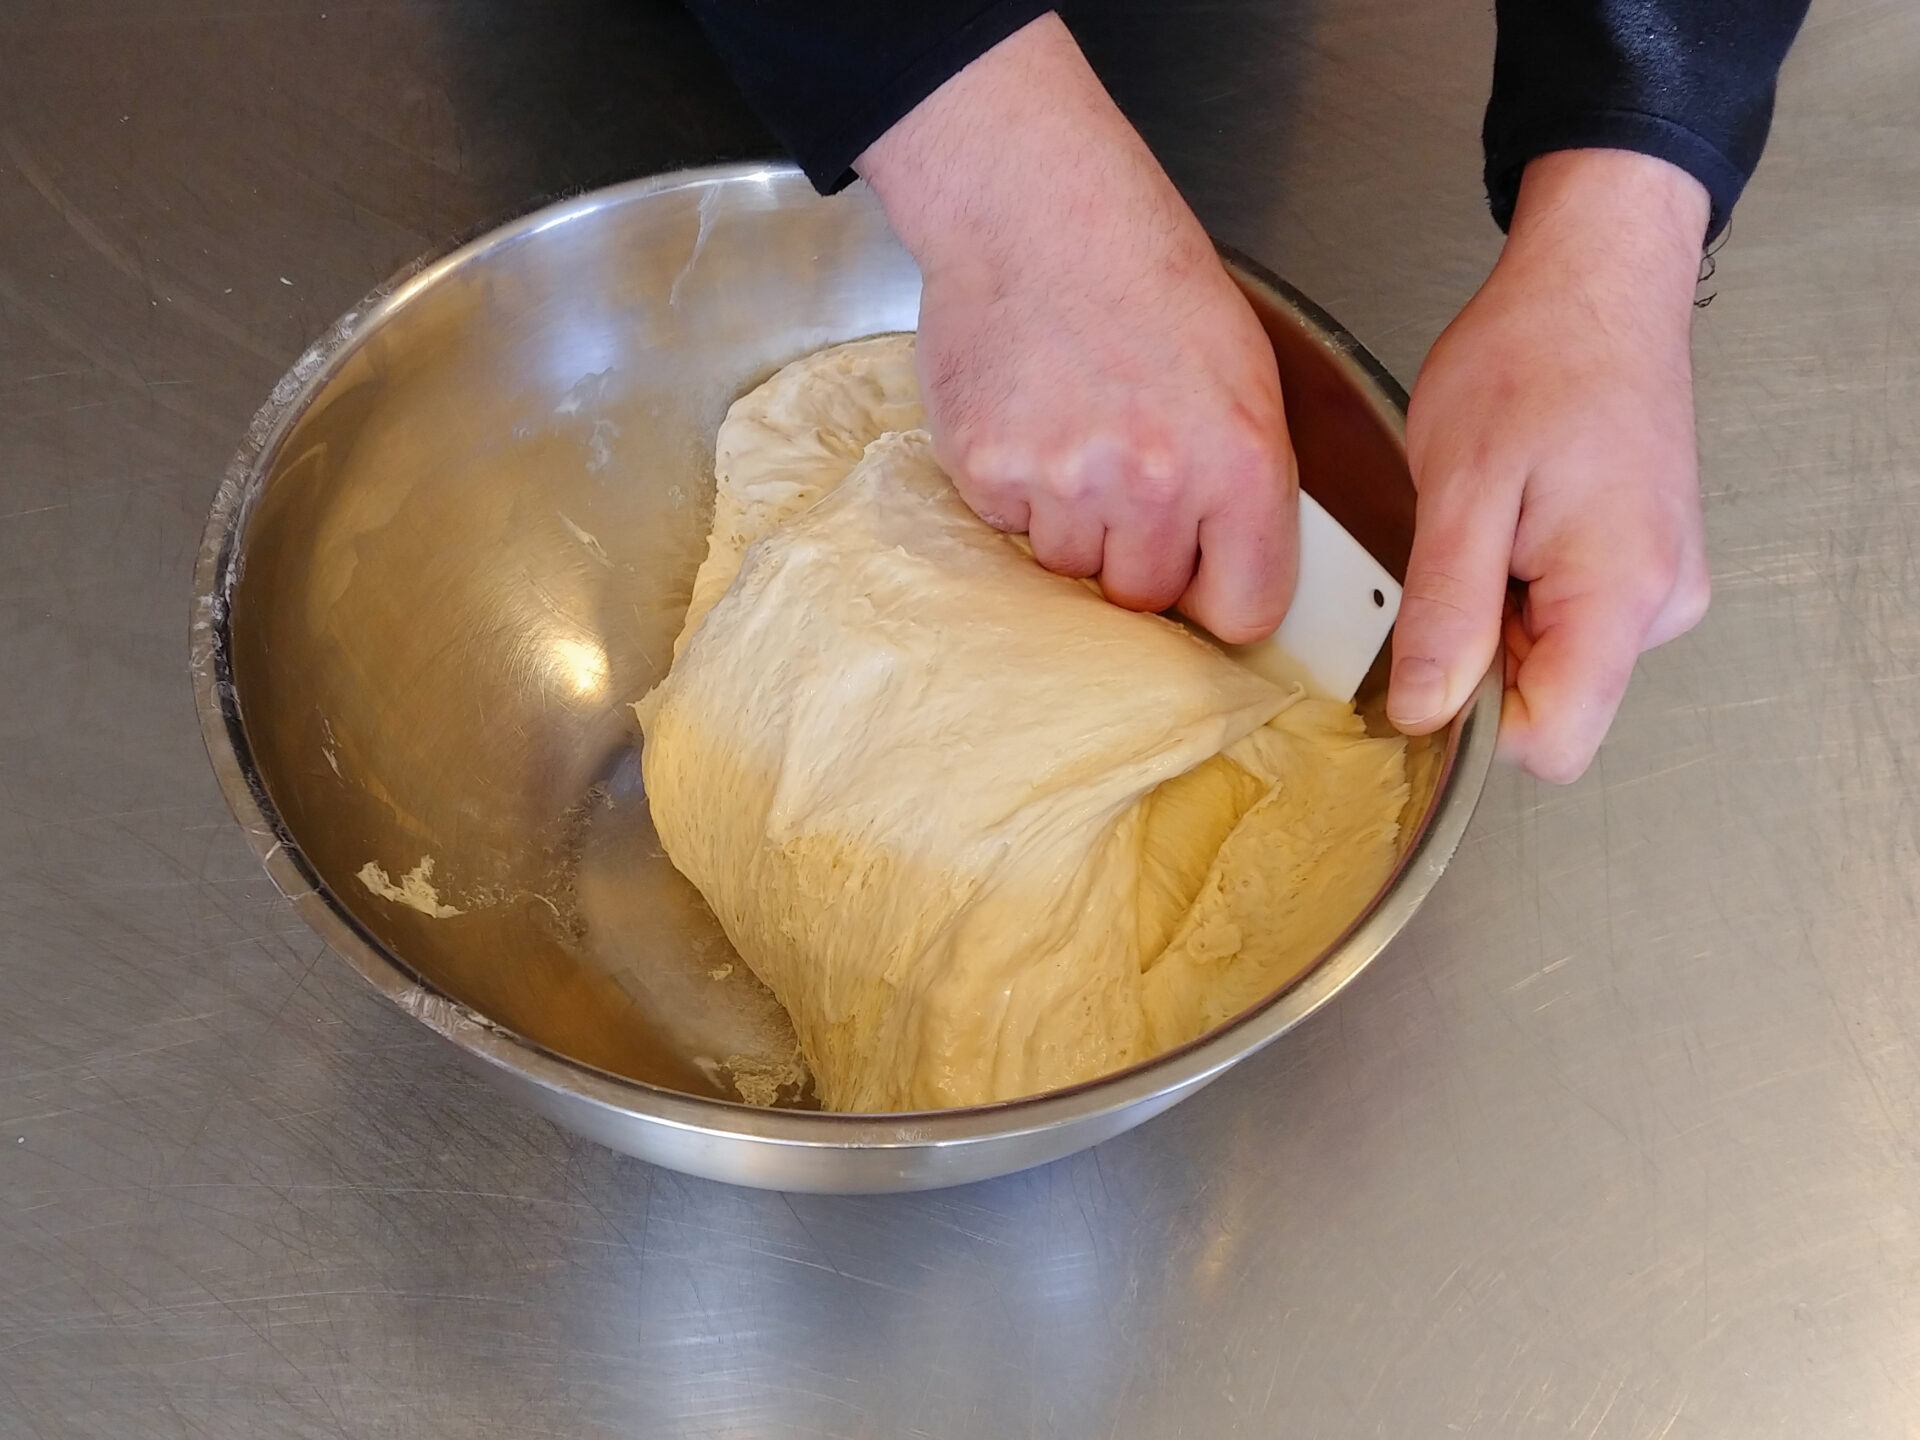
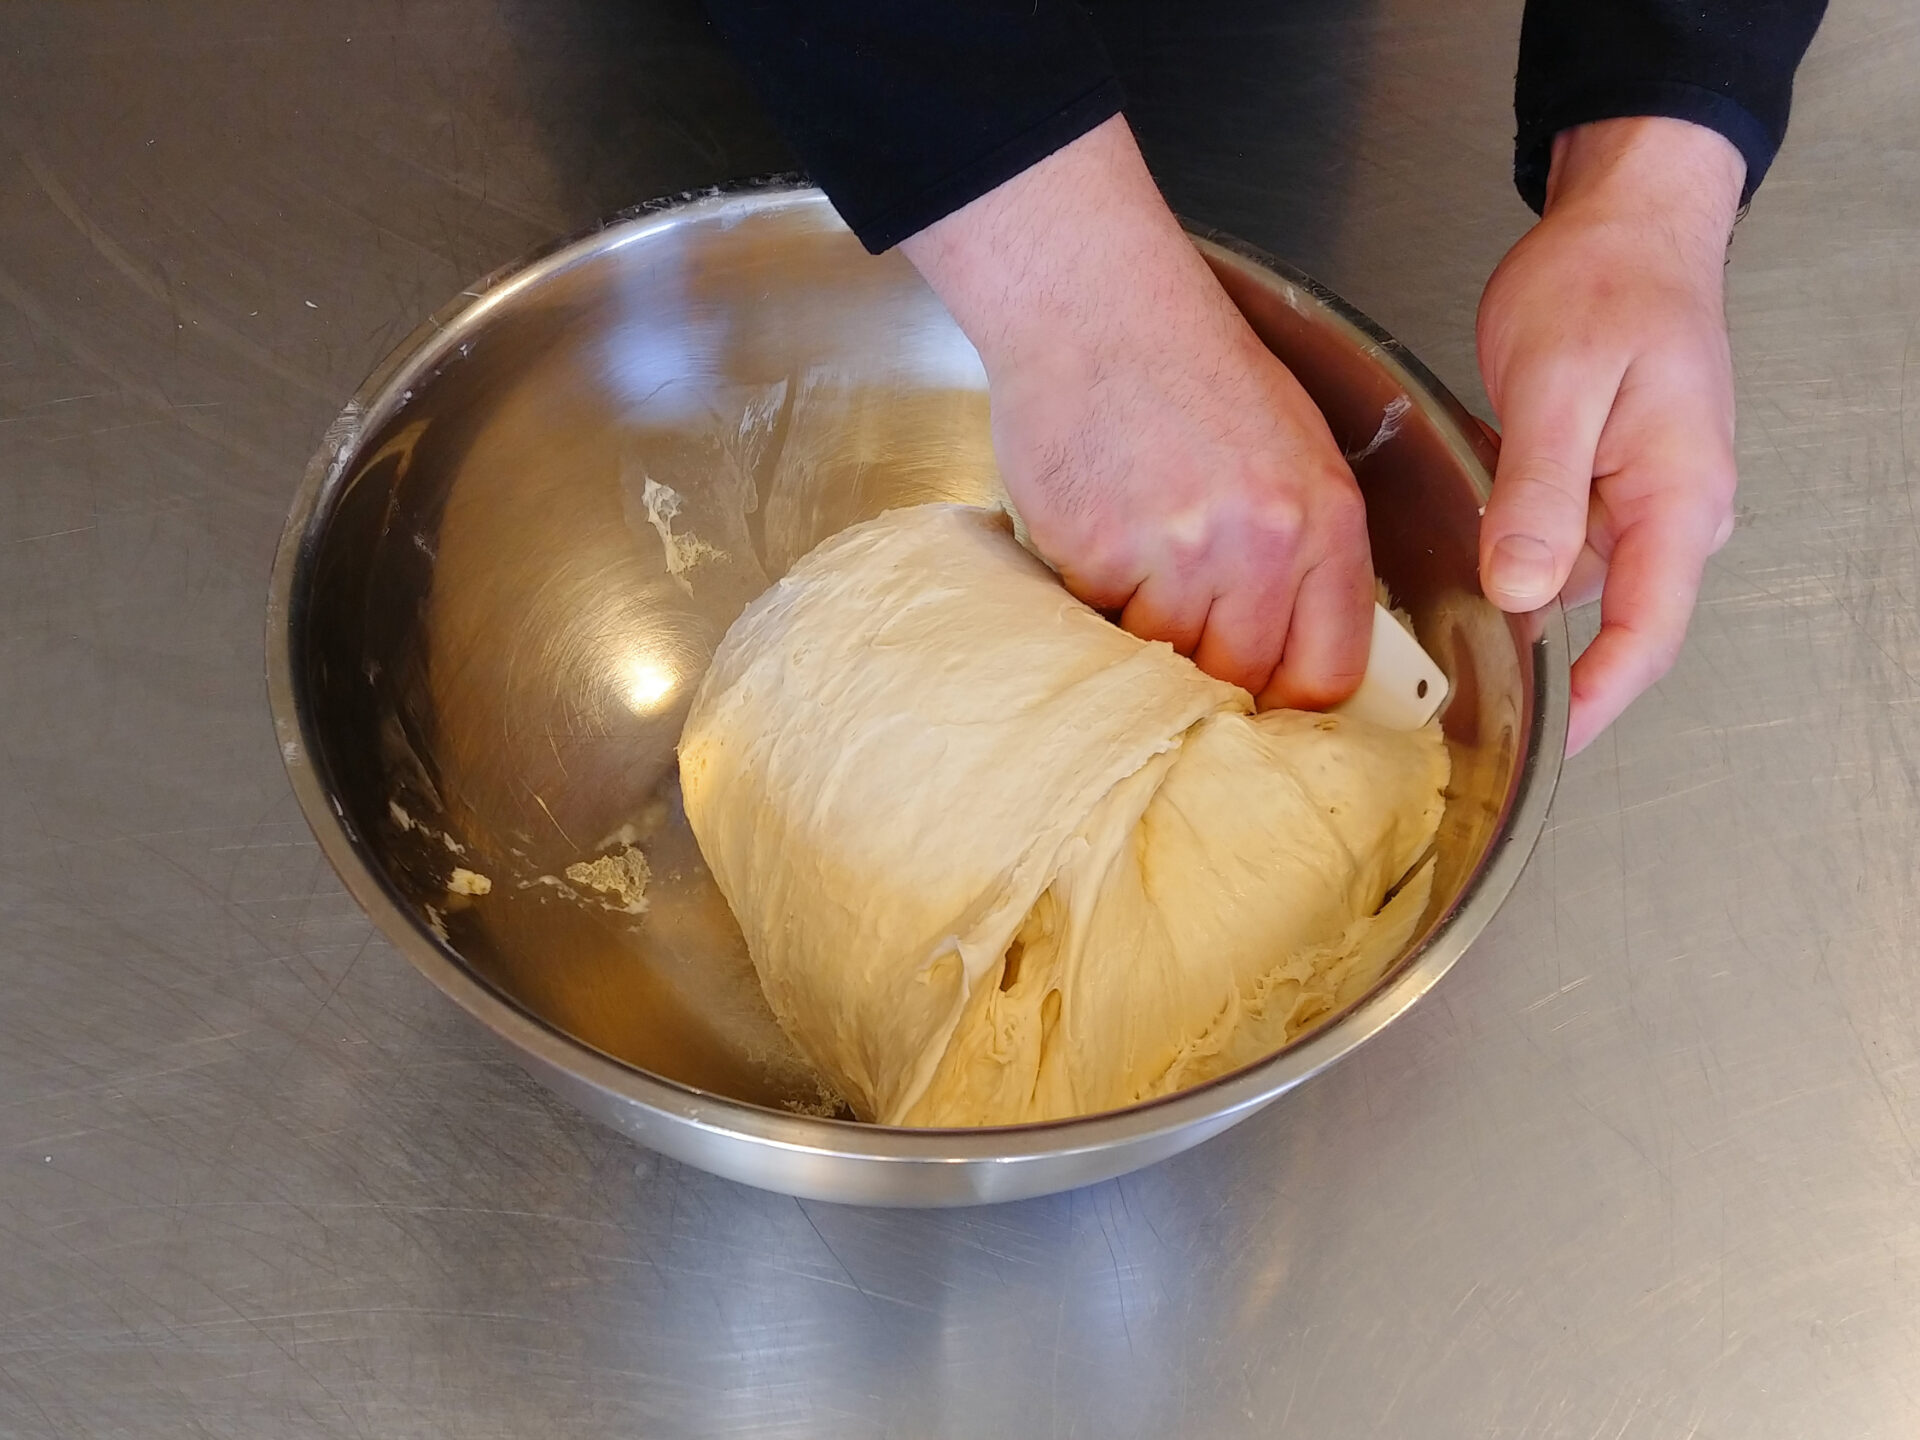
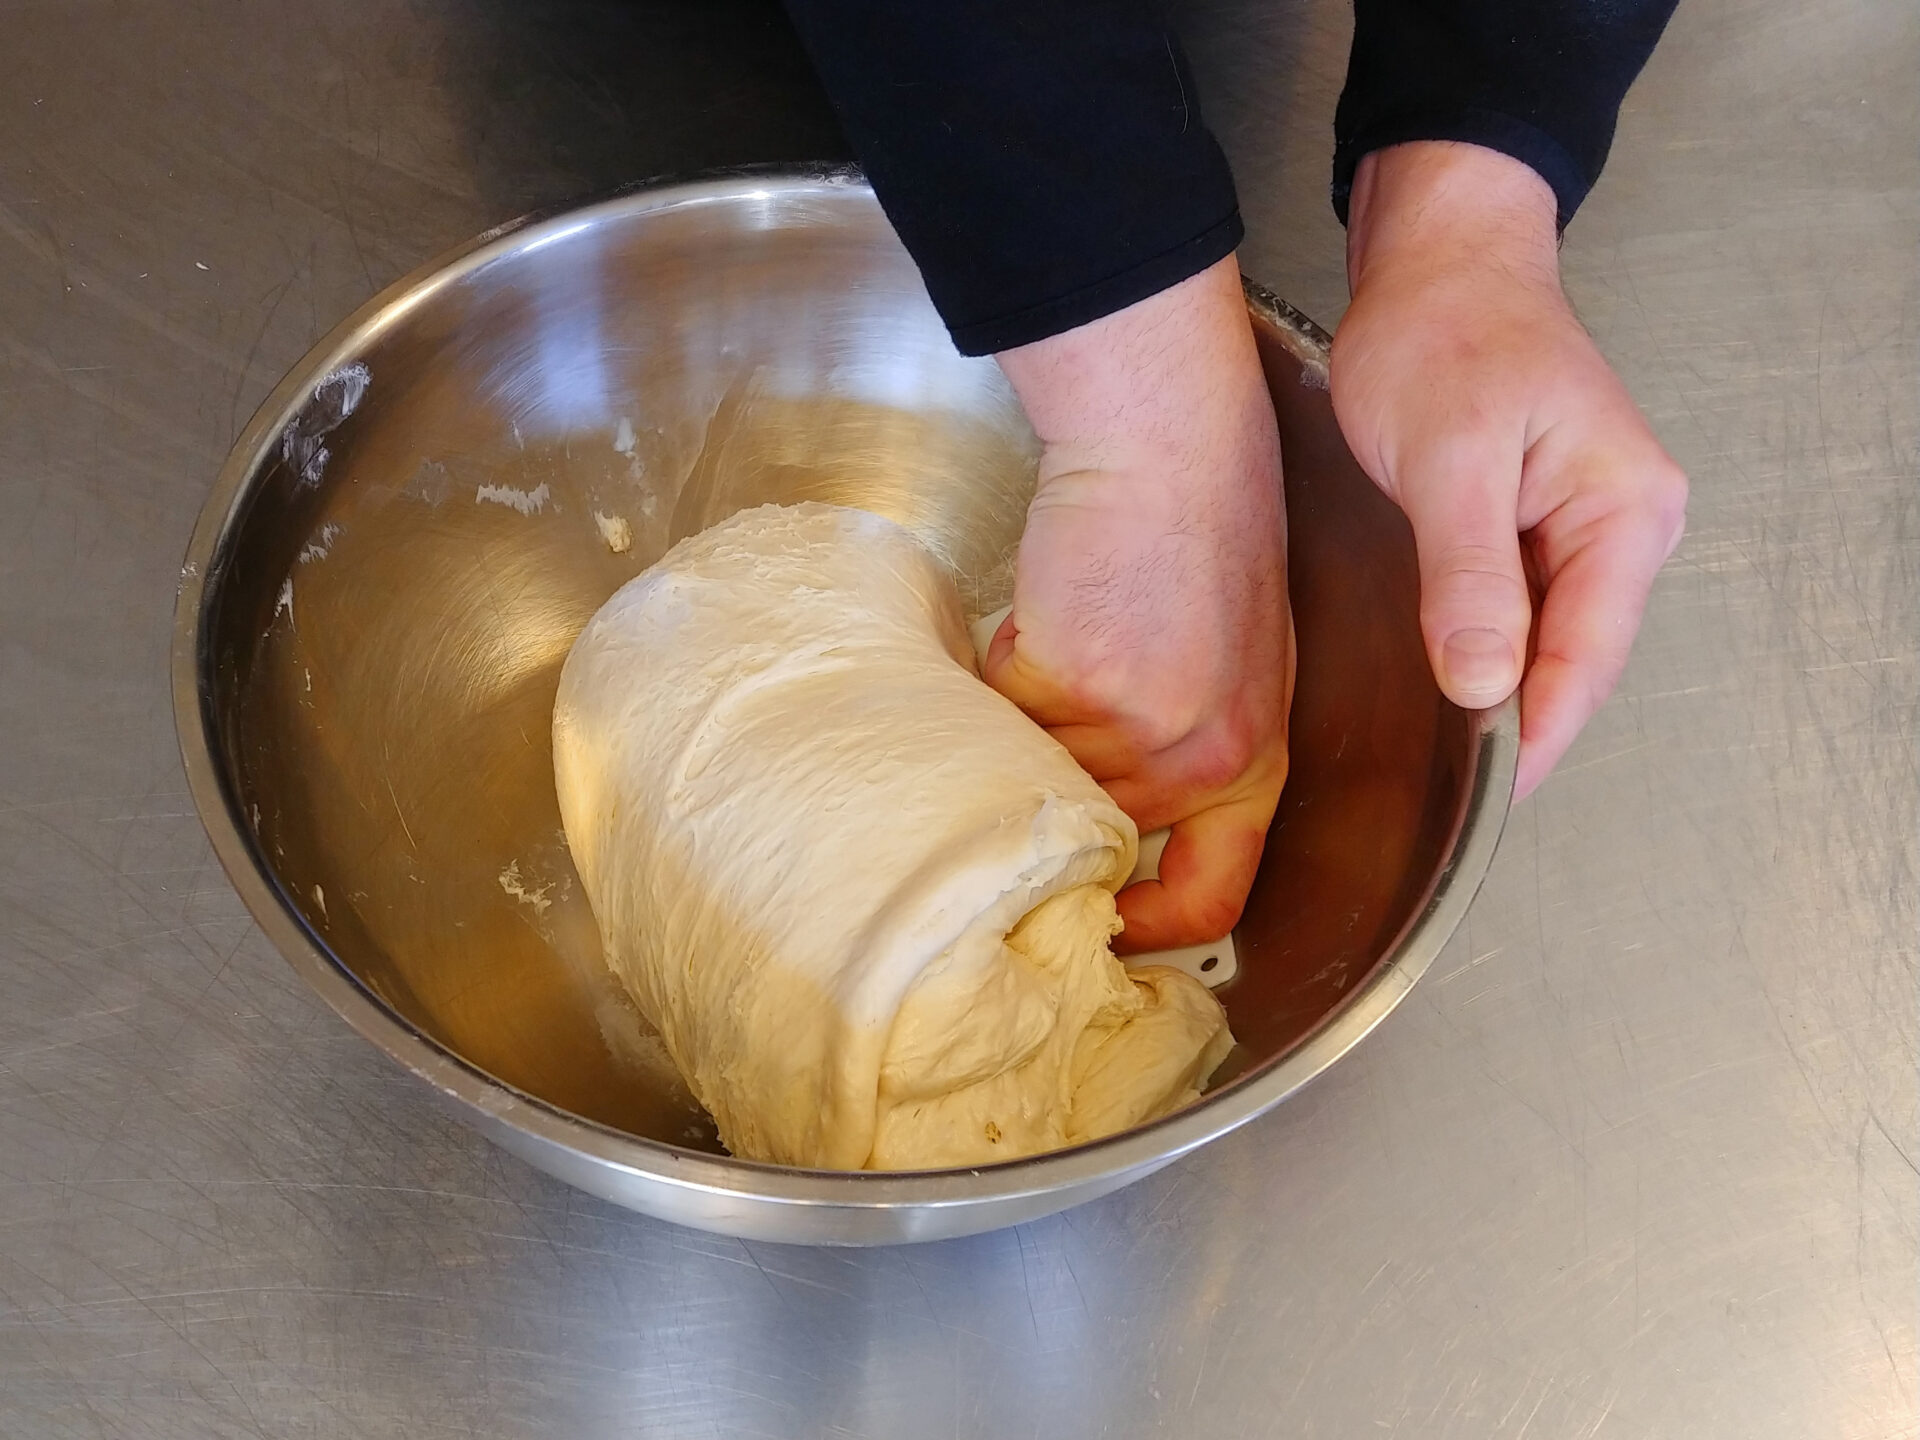
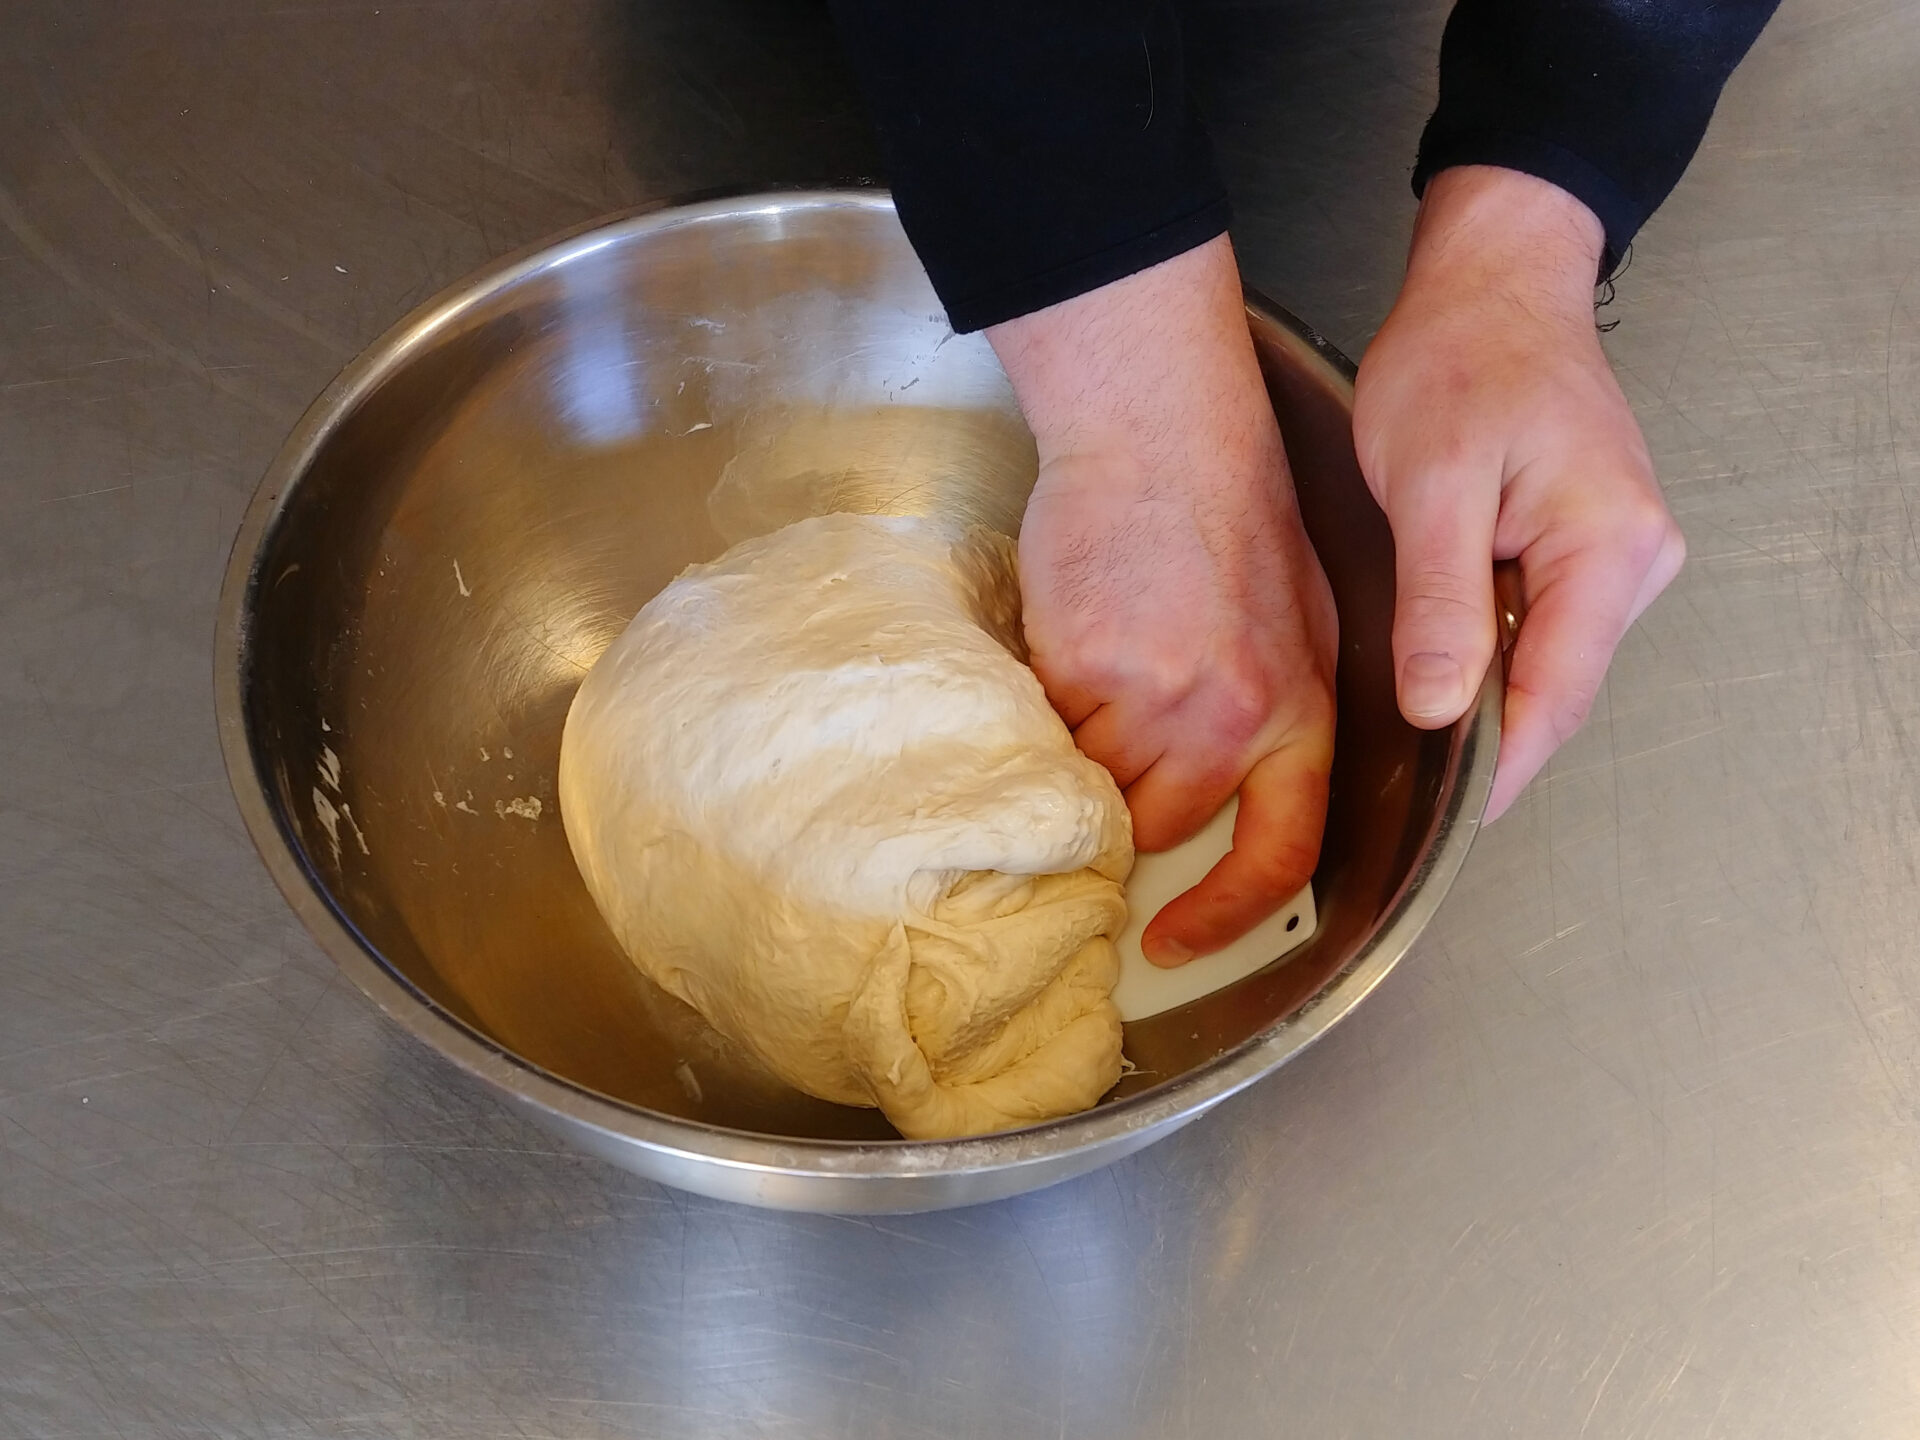
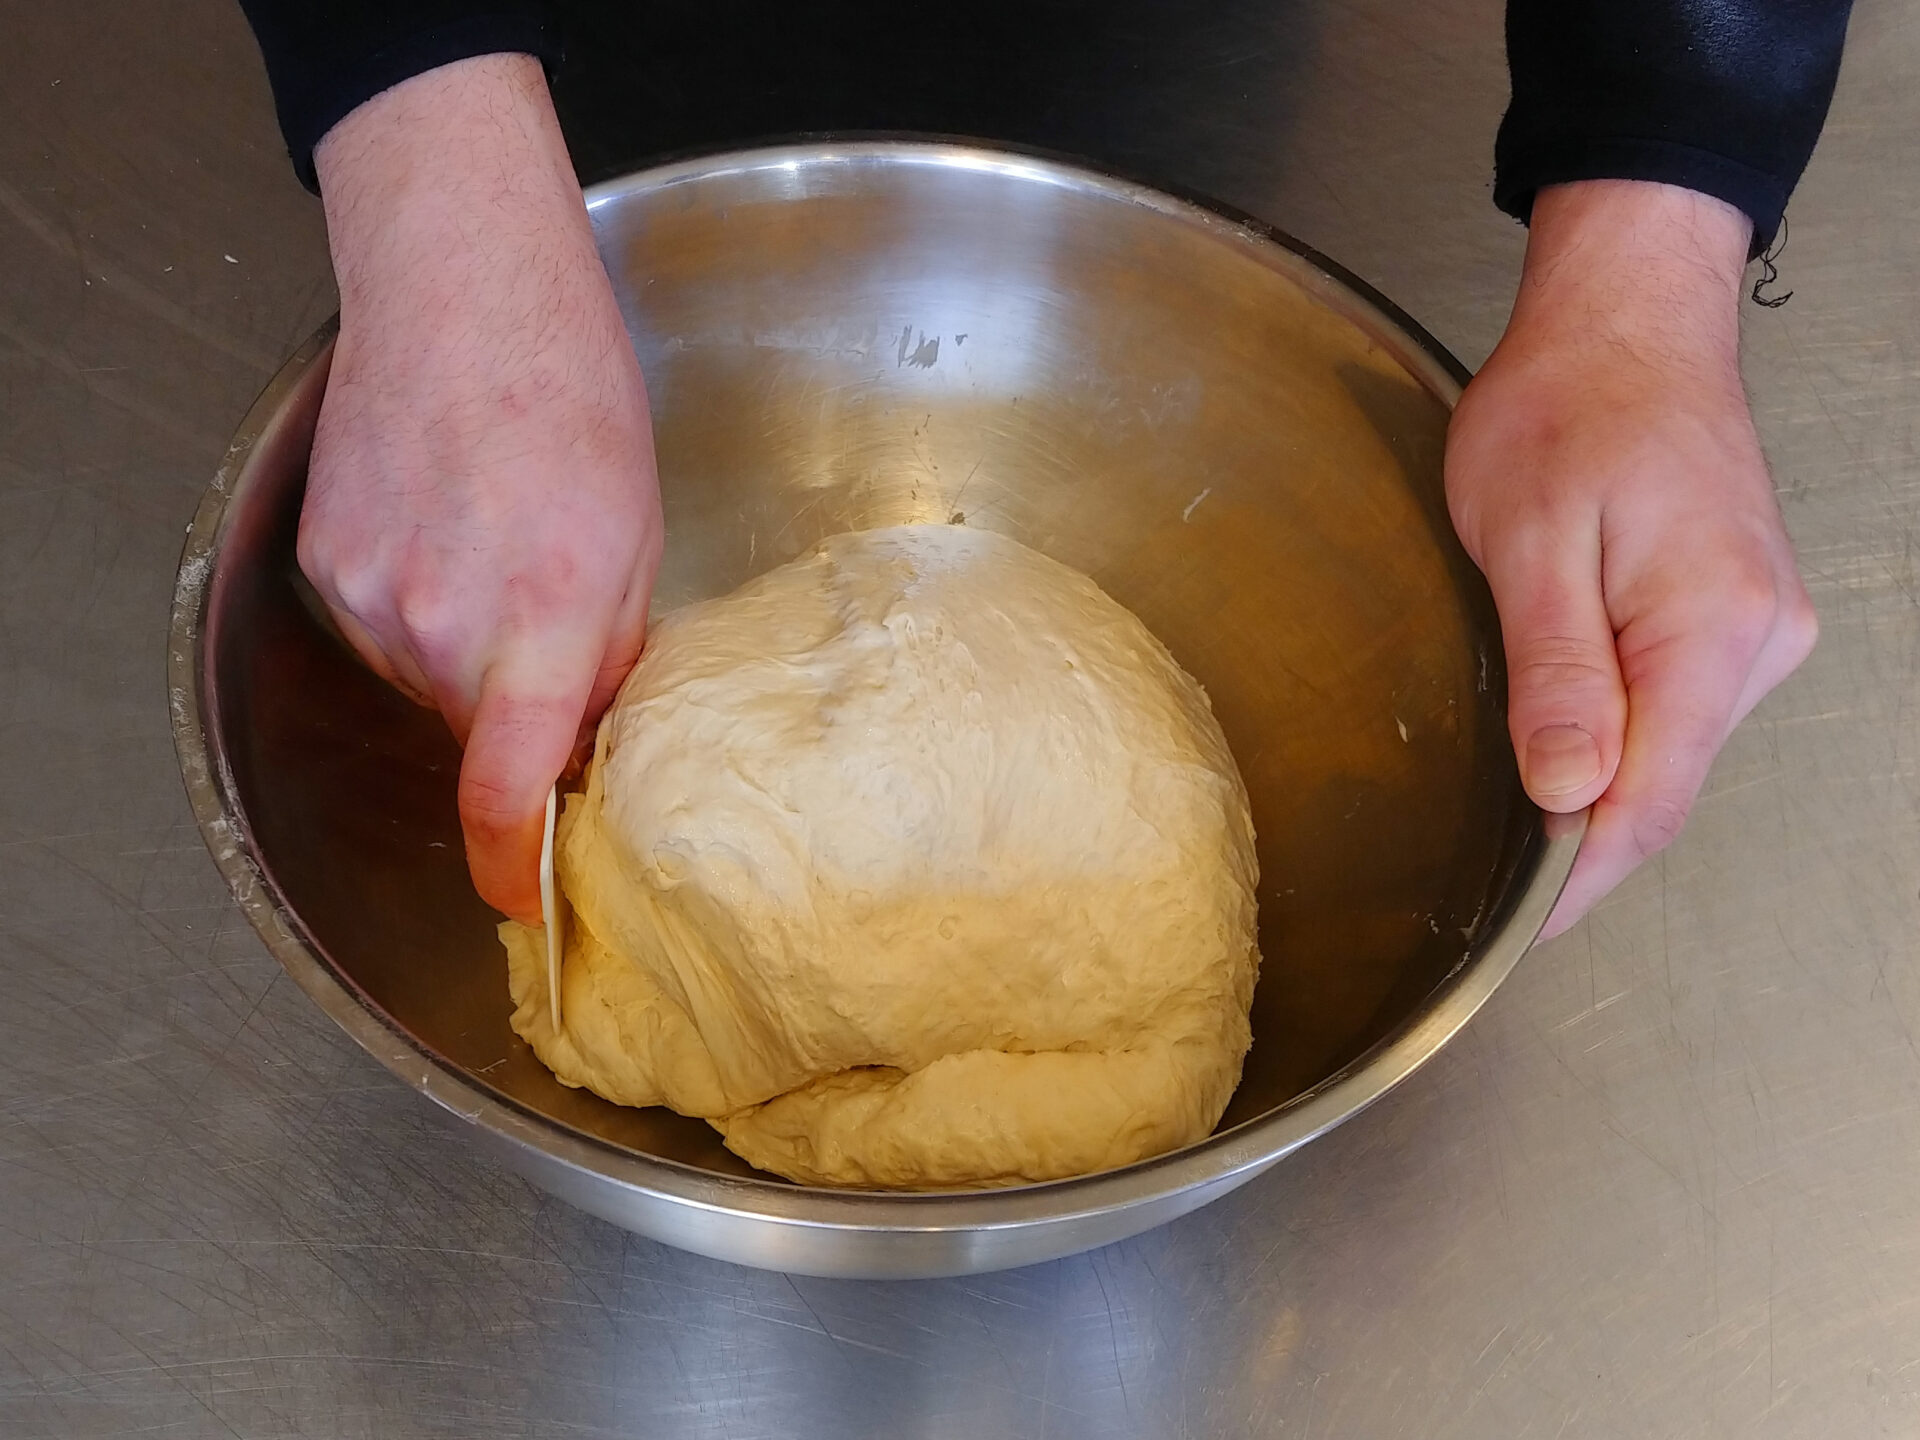
Deflate the dough right in the bowl using a dough scraper, folding the dough from one side, then over the other side of the dough, and finally press it down. Repeat this process a few times from all sides of the dough. After deflating, let the dough rise until it doubles in size before another deflation (about 1 – 2 hours). The deflation process is best to repeat at least 3 times, but more would be even better.
Note:
Intervals between deflating can be even longer (even overnight), so it’s better to make it fit with your schedule. If you want to rise your bread longer, keep it at room temperature (not in a warm place) and use a significantly larger bowl to provide the dough enough space while its’ rising. Make sure that the total rising time (including all deflations) won’t be longer than 24 hours.
3.Shaping:
Shape into a loaf of bread or baguette.
3.1.
Shape bread:
Note:
Work on a surface (counter top) that has no flour on it.
3.1.1.
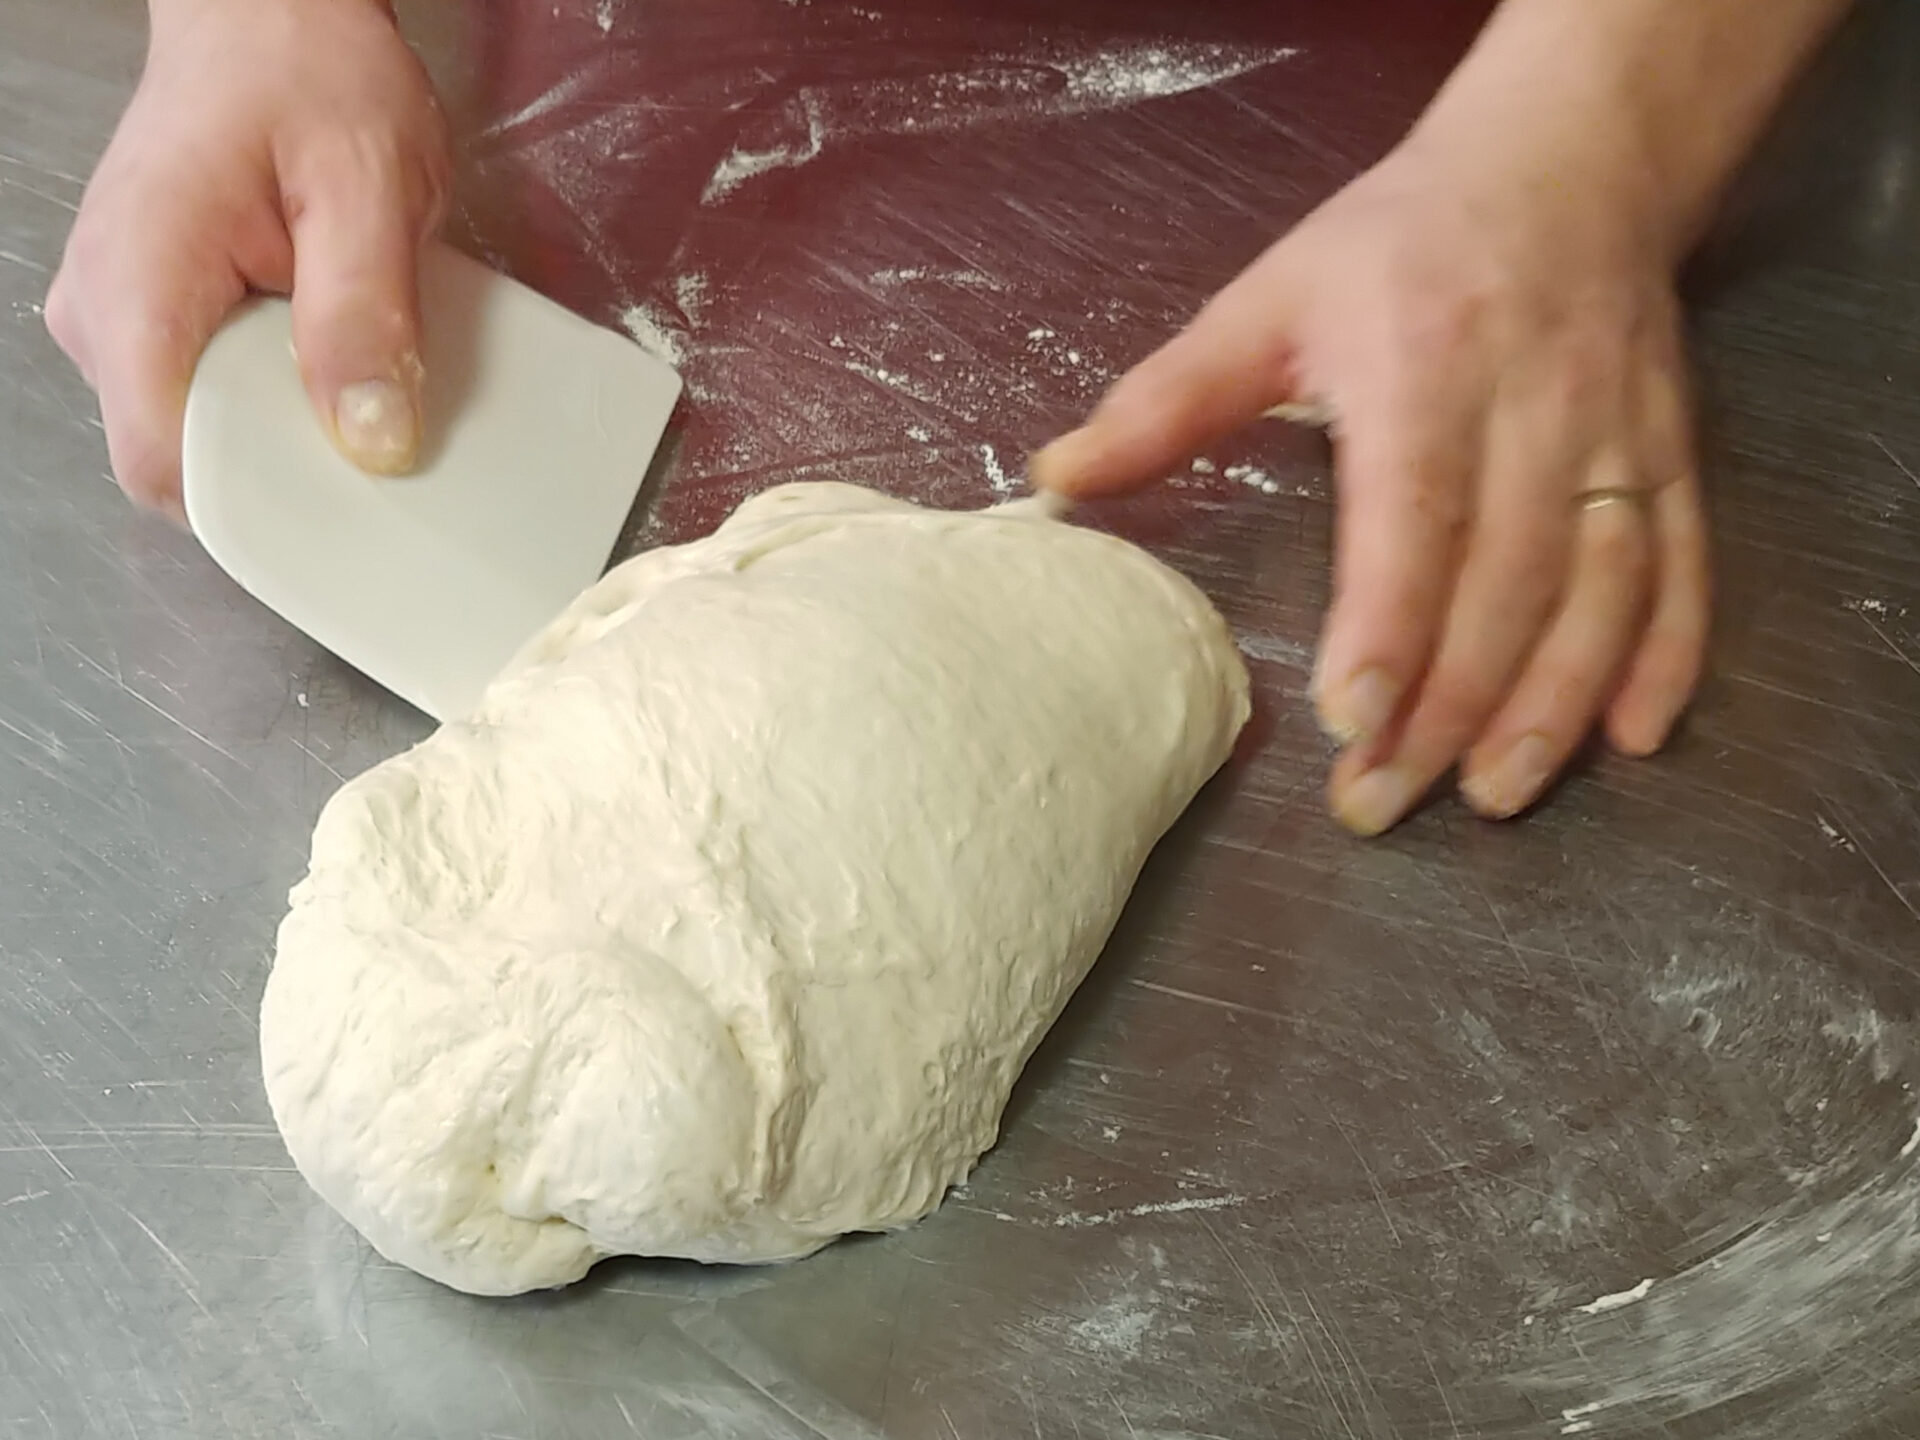
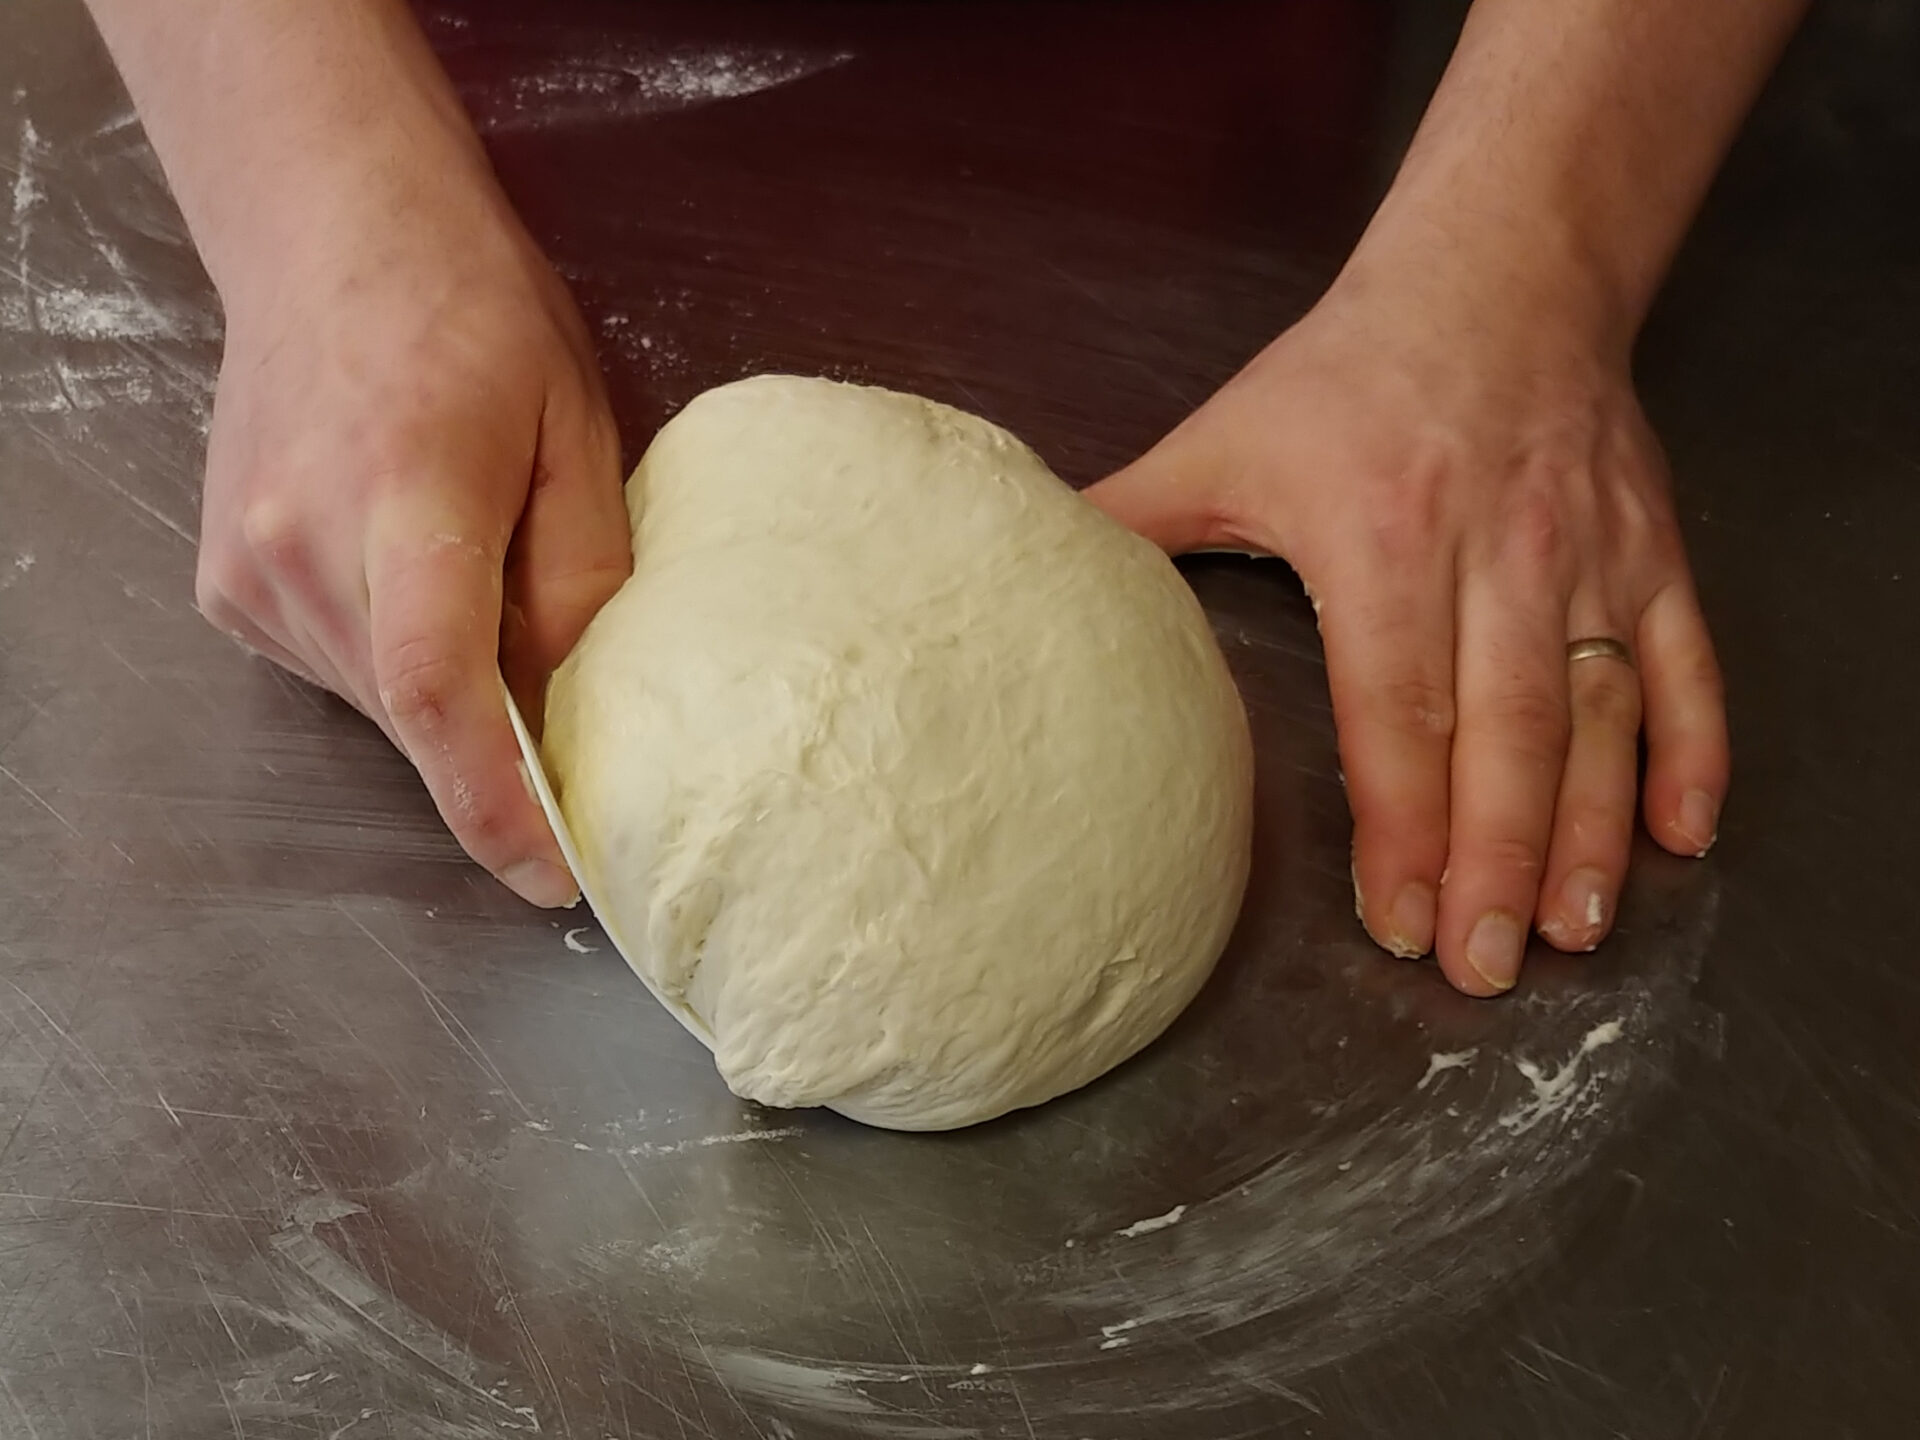
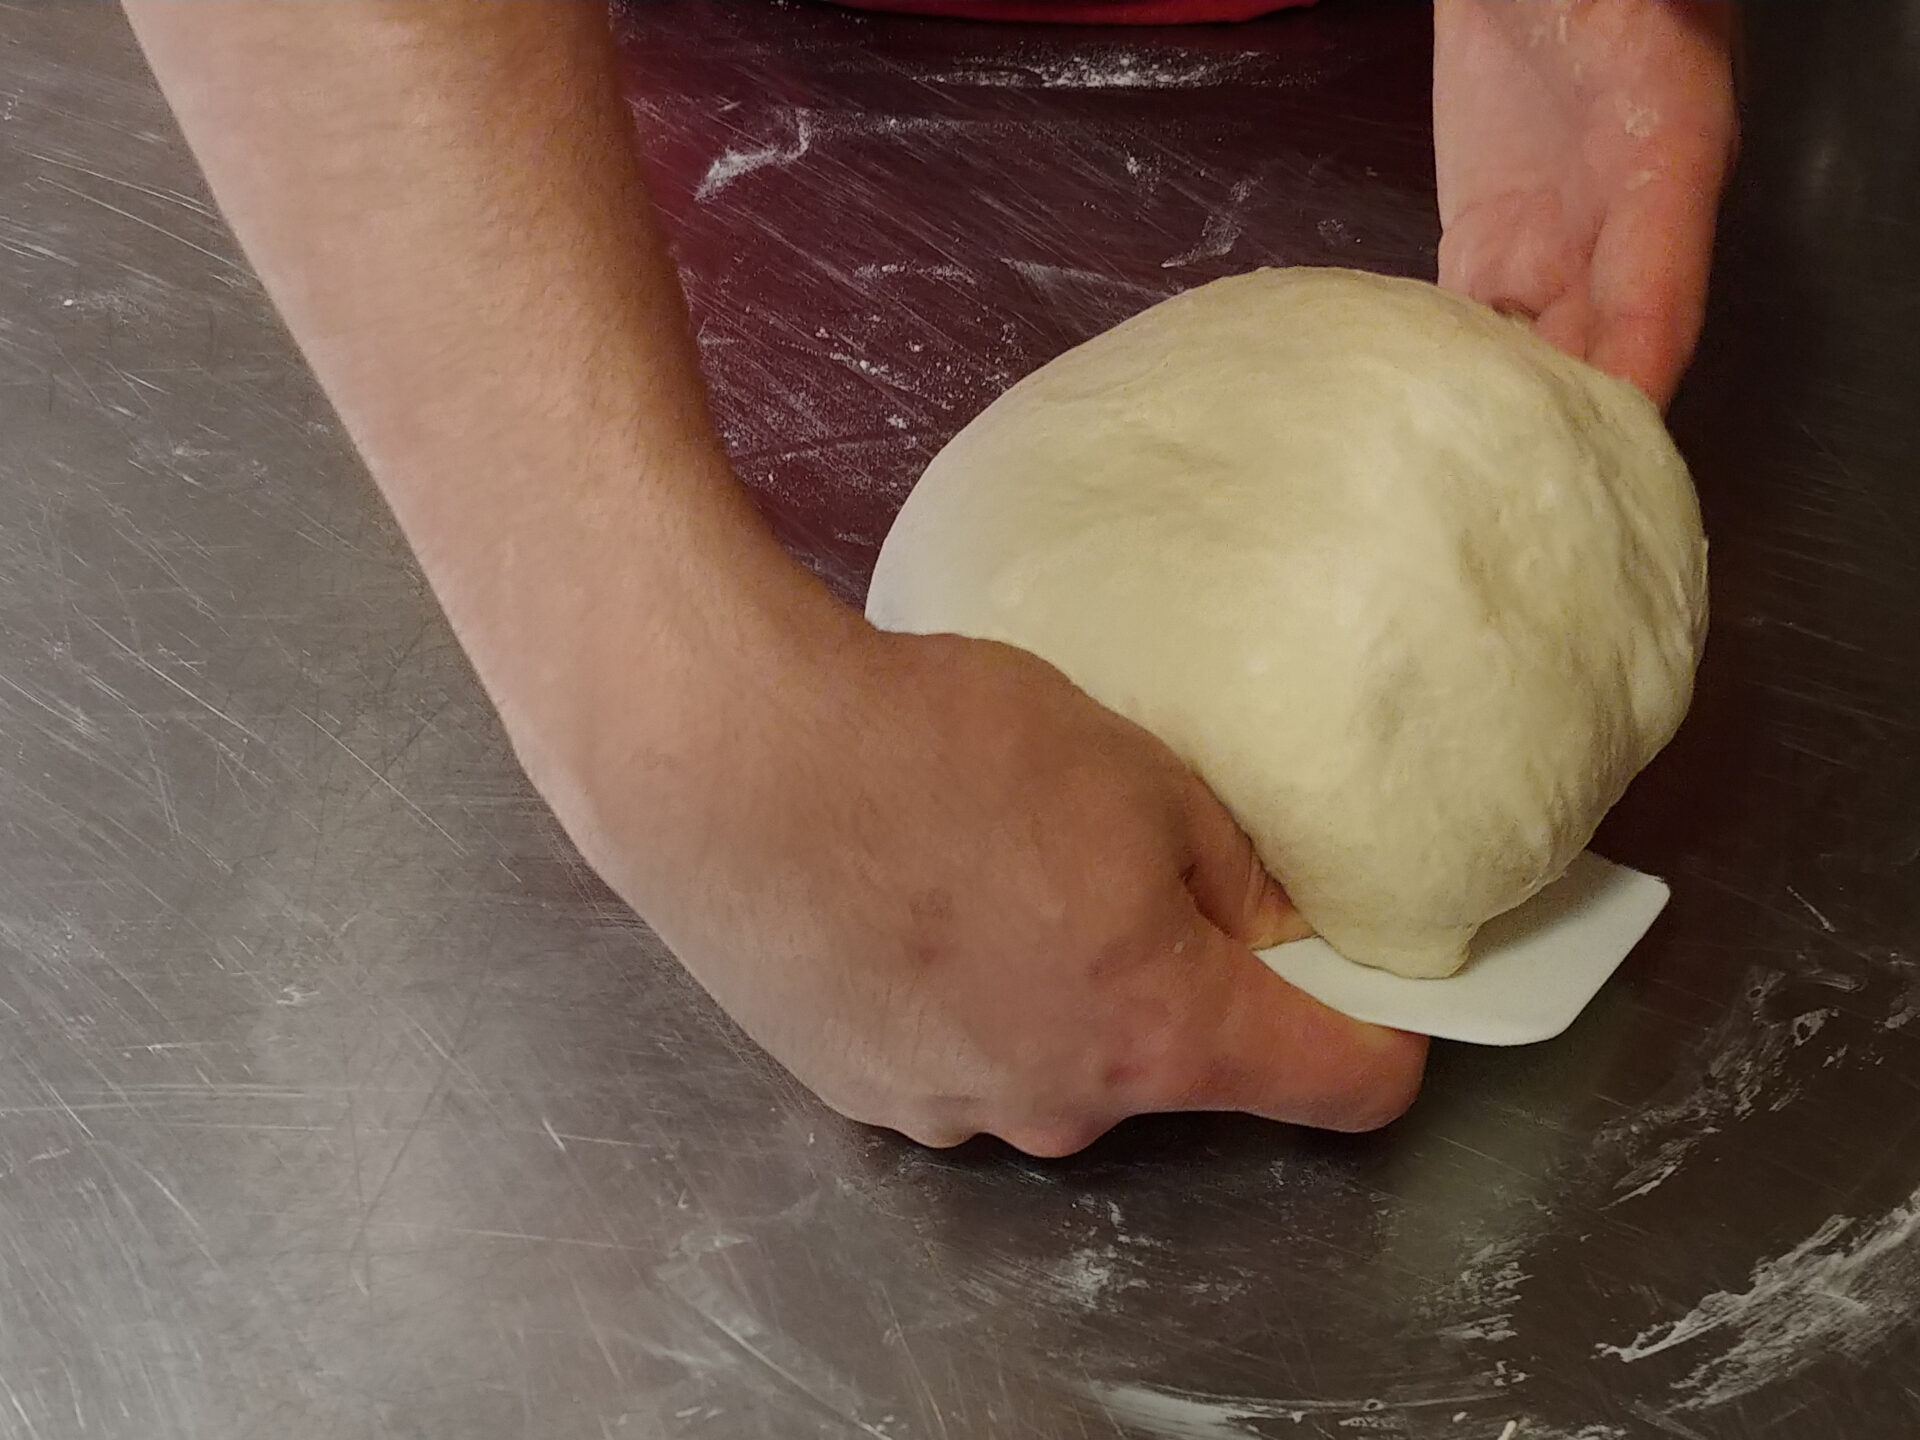
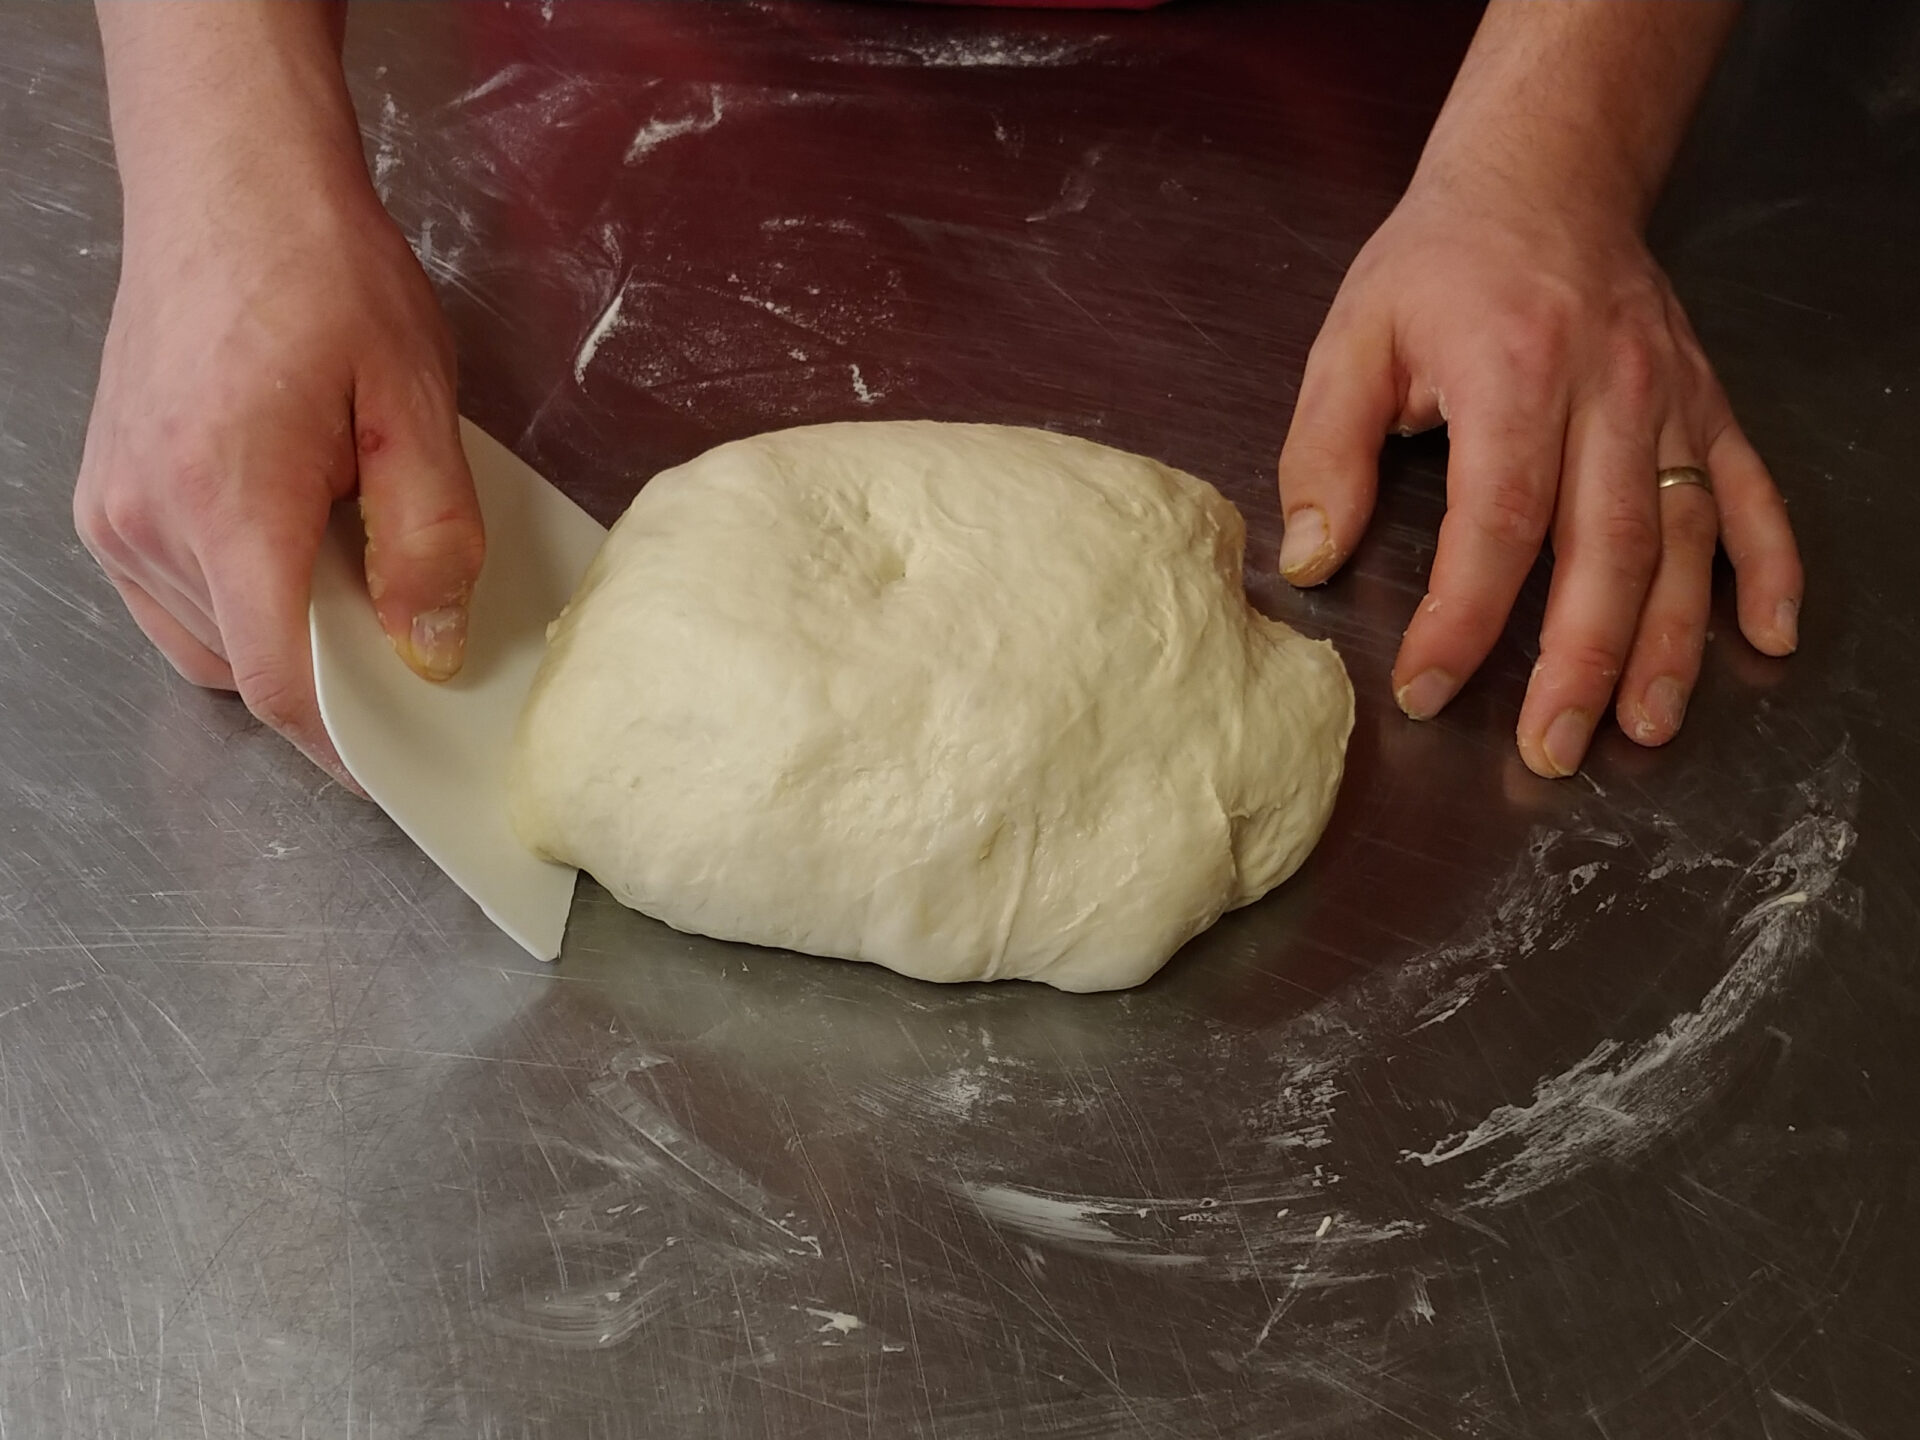
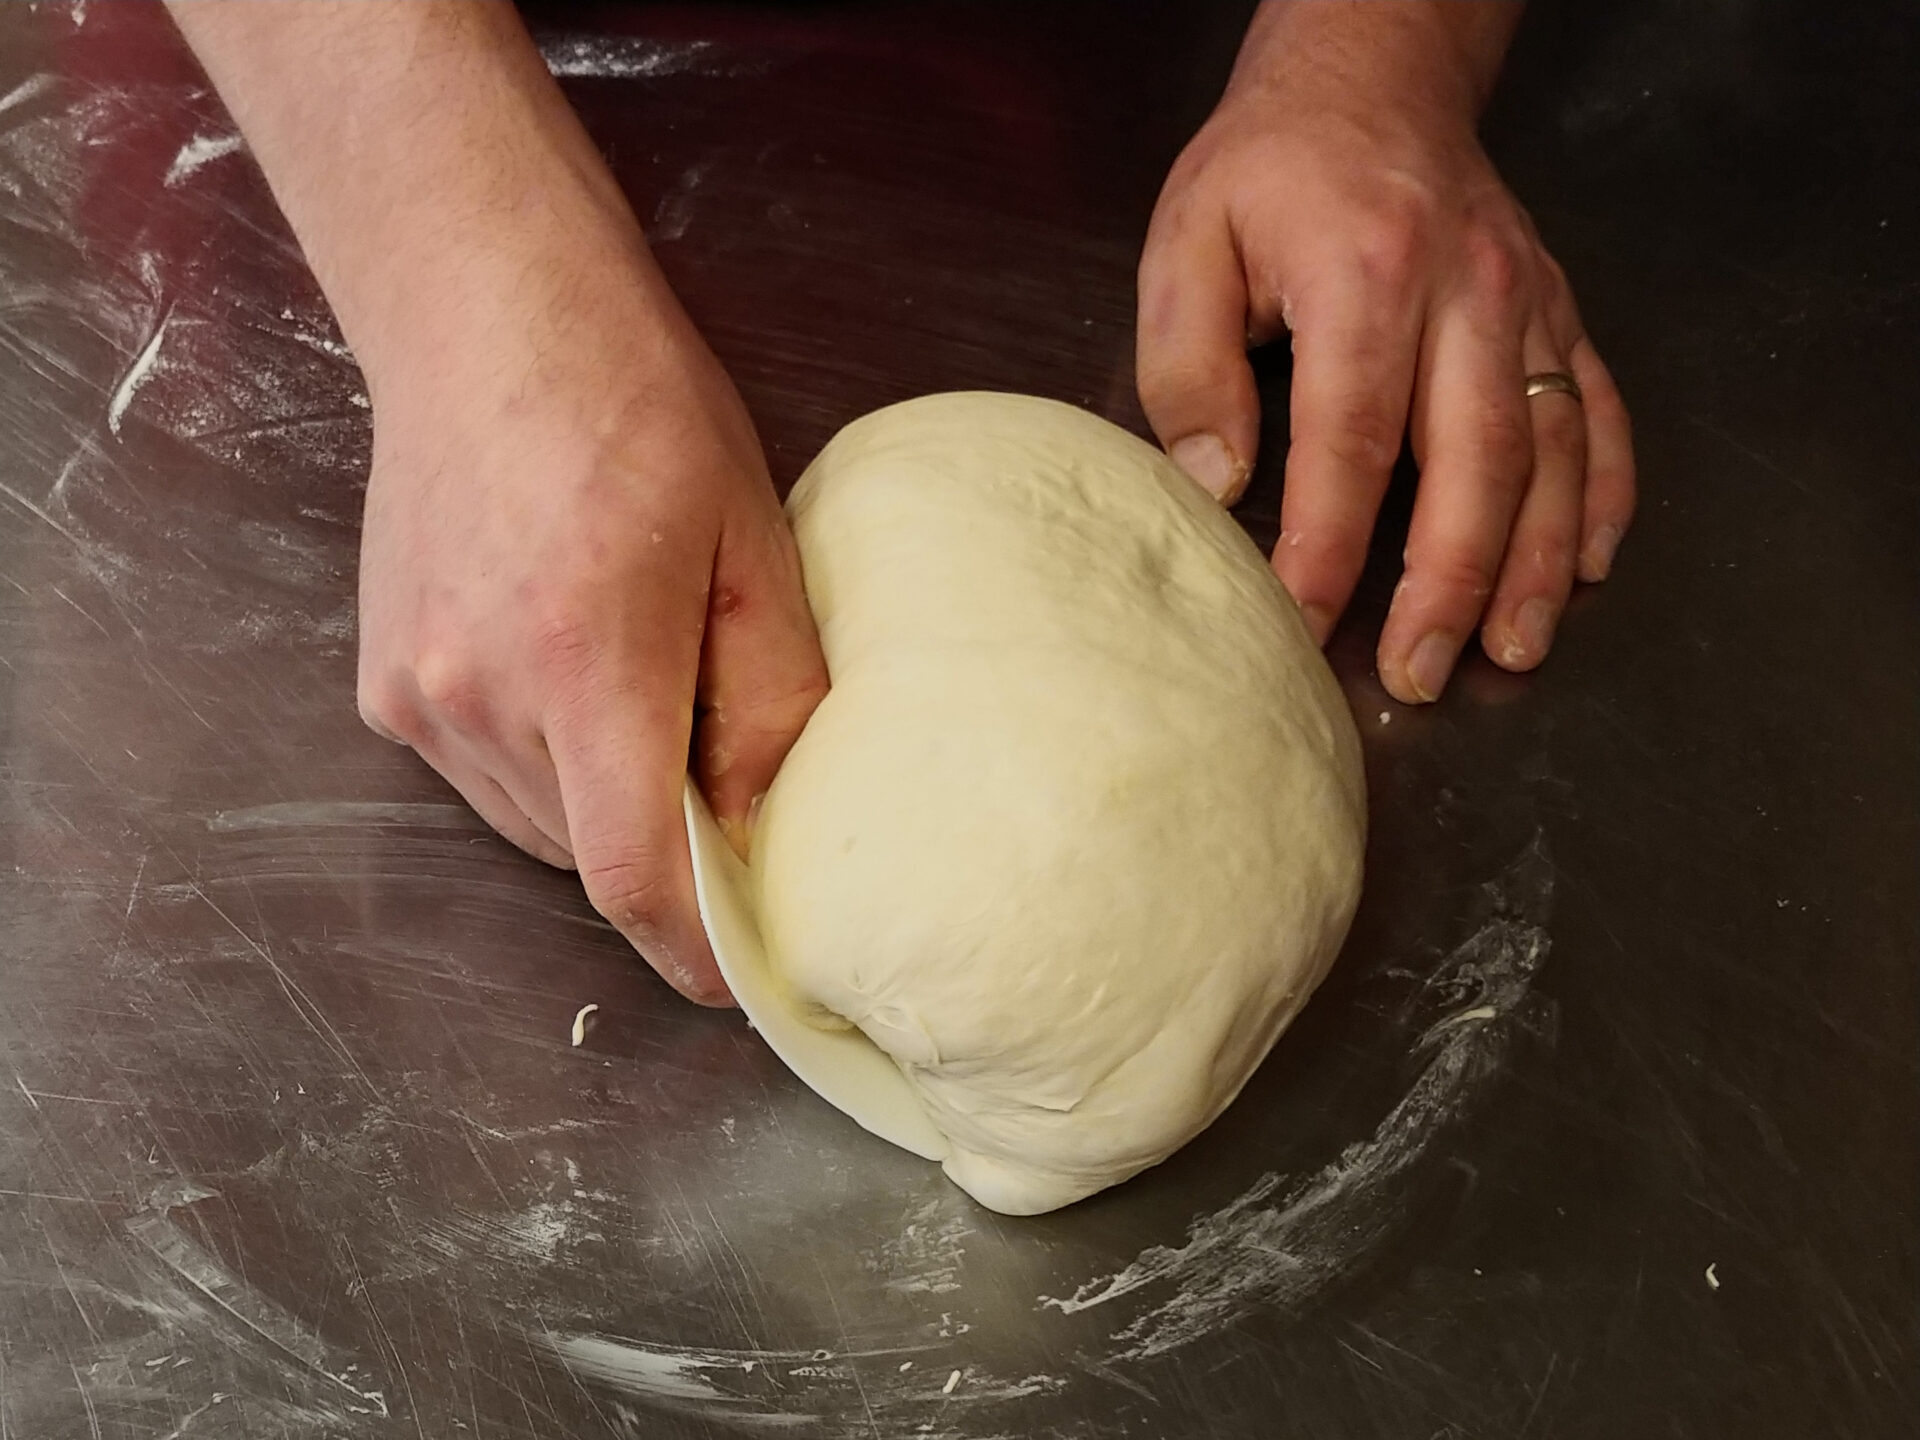
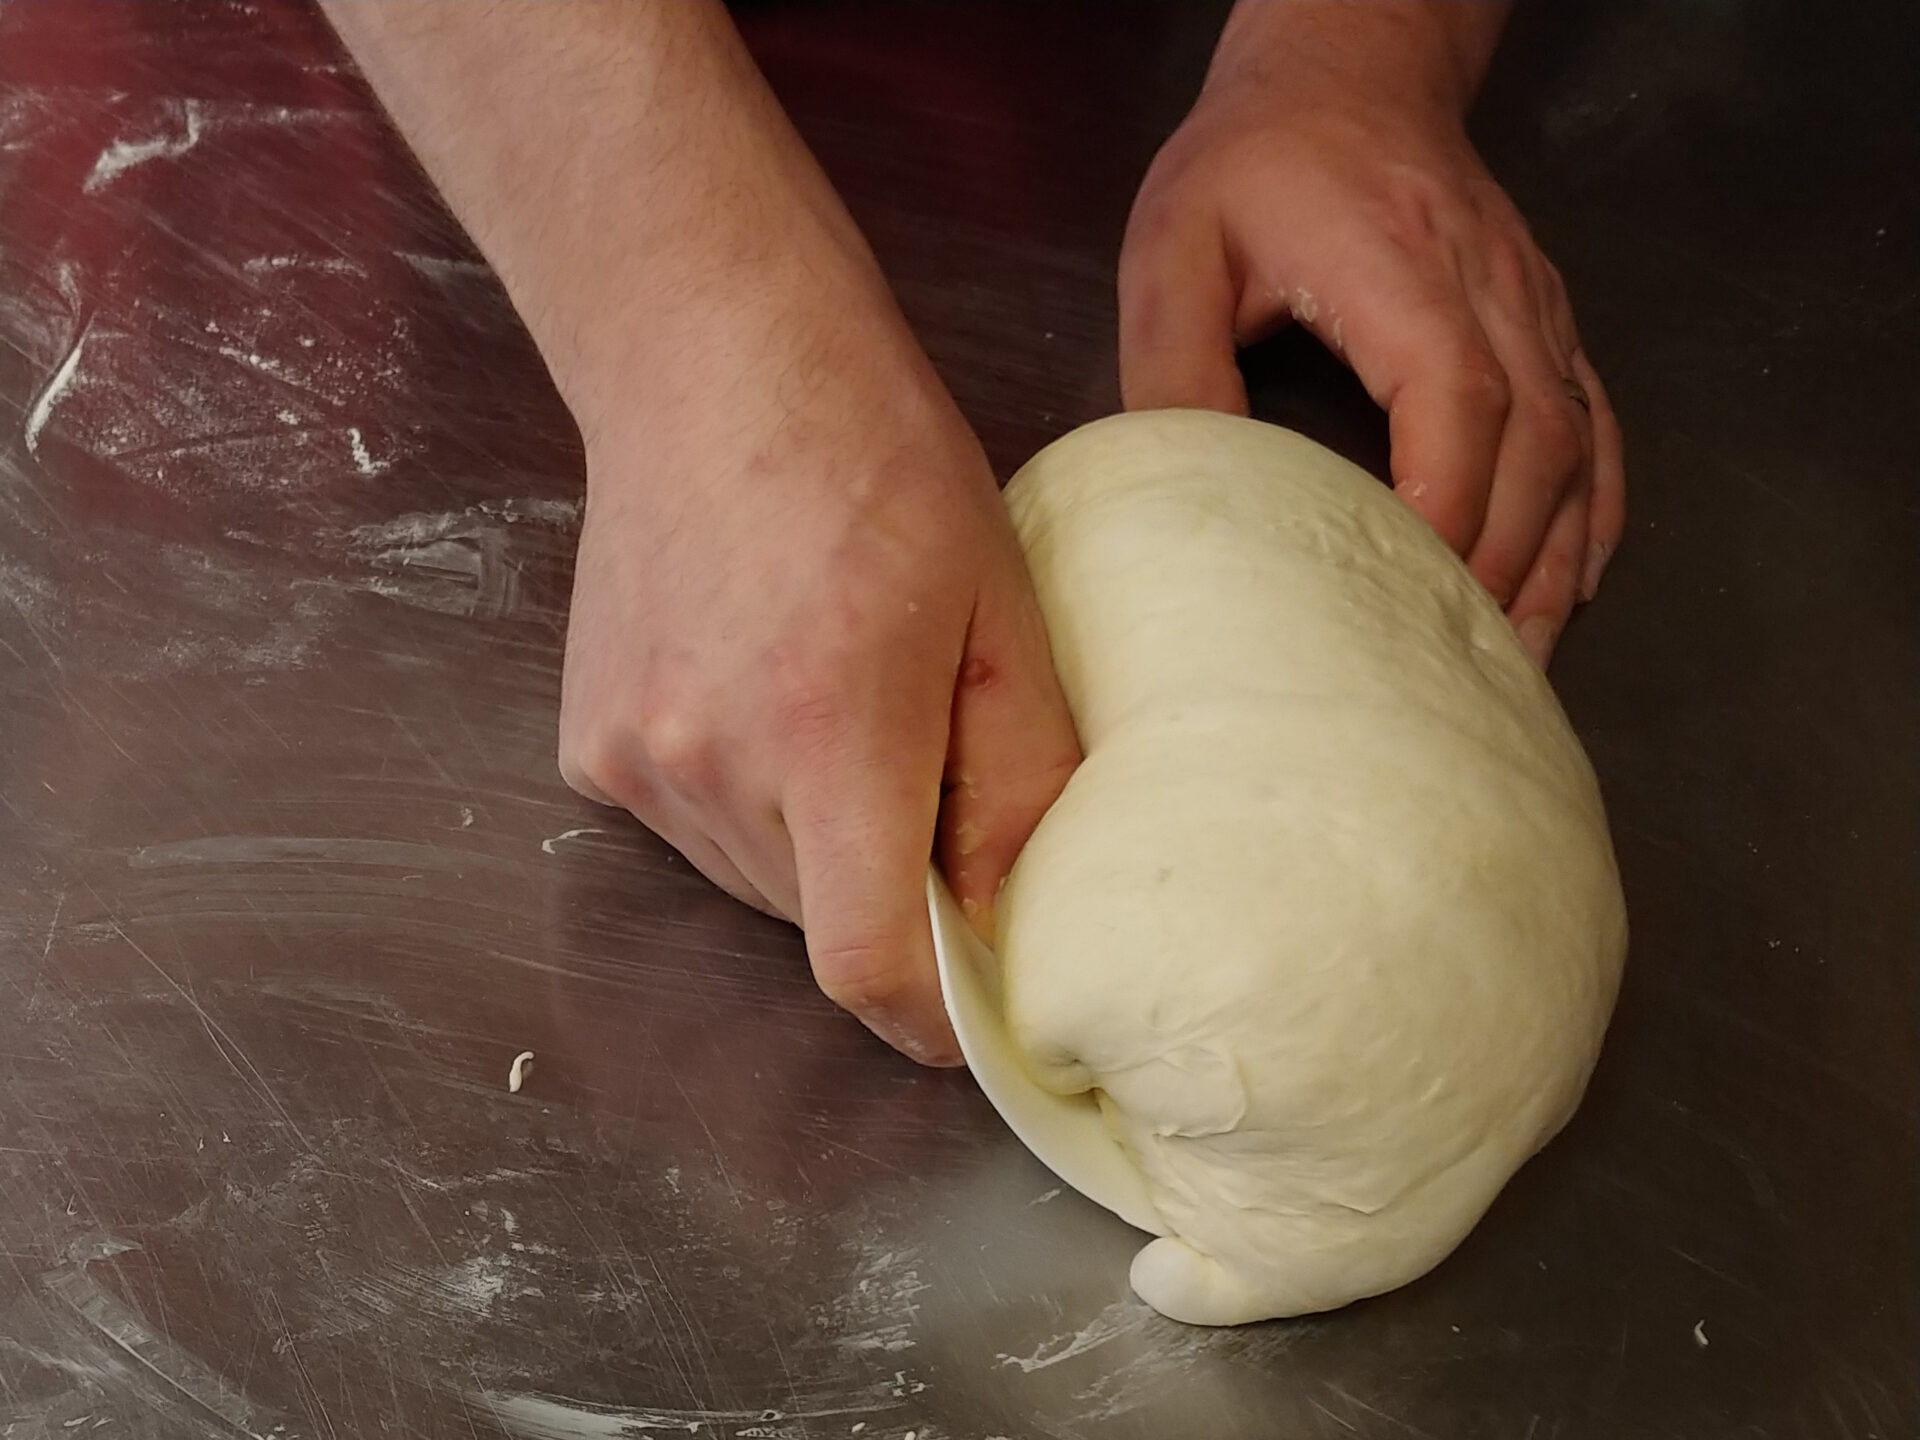
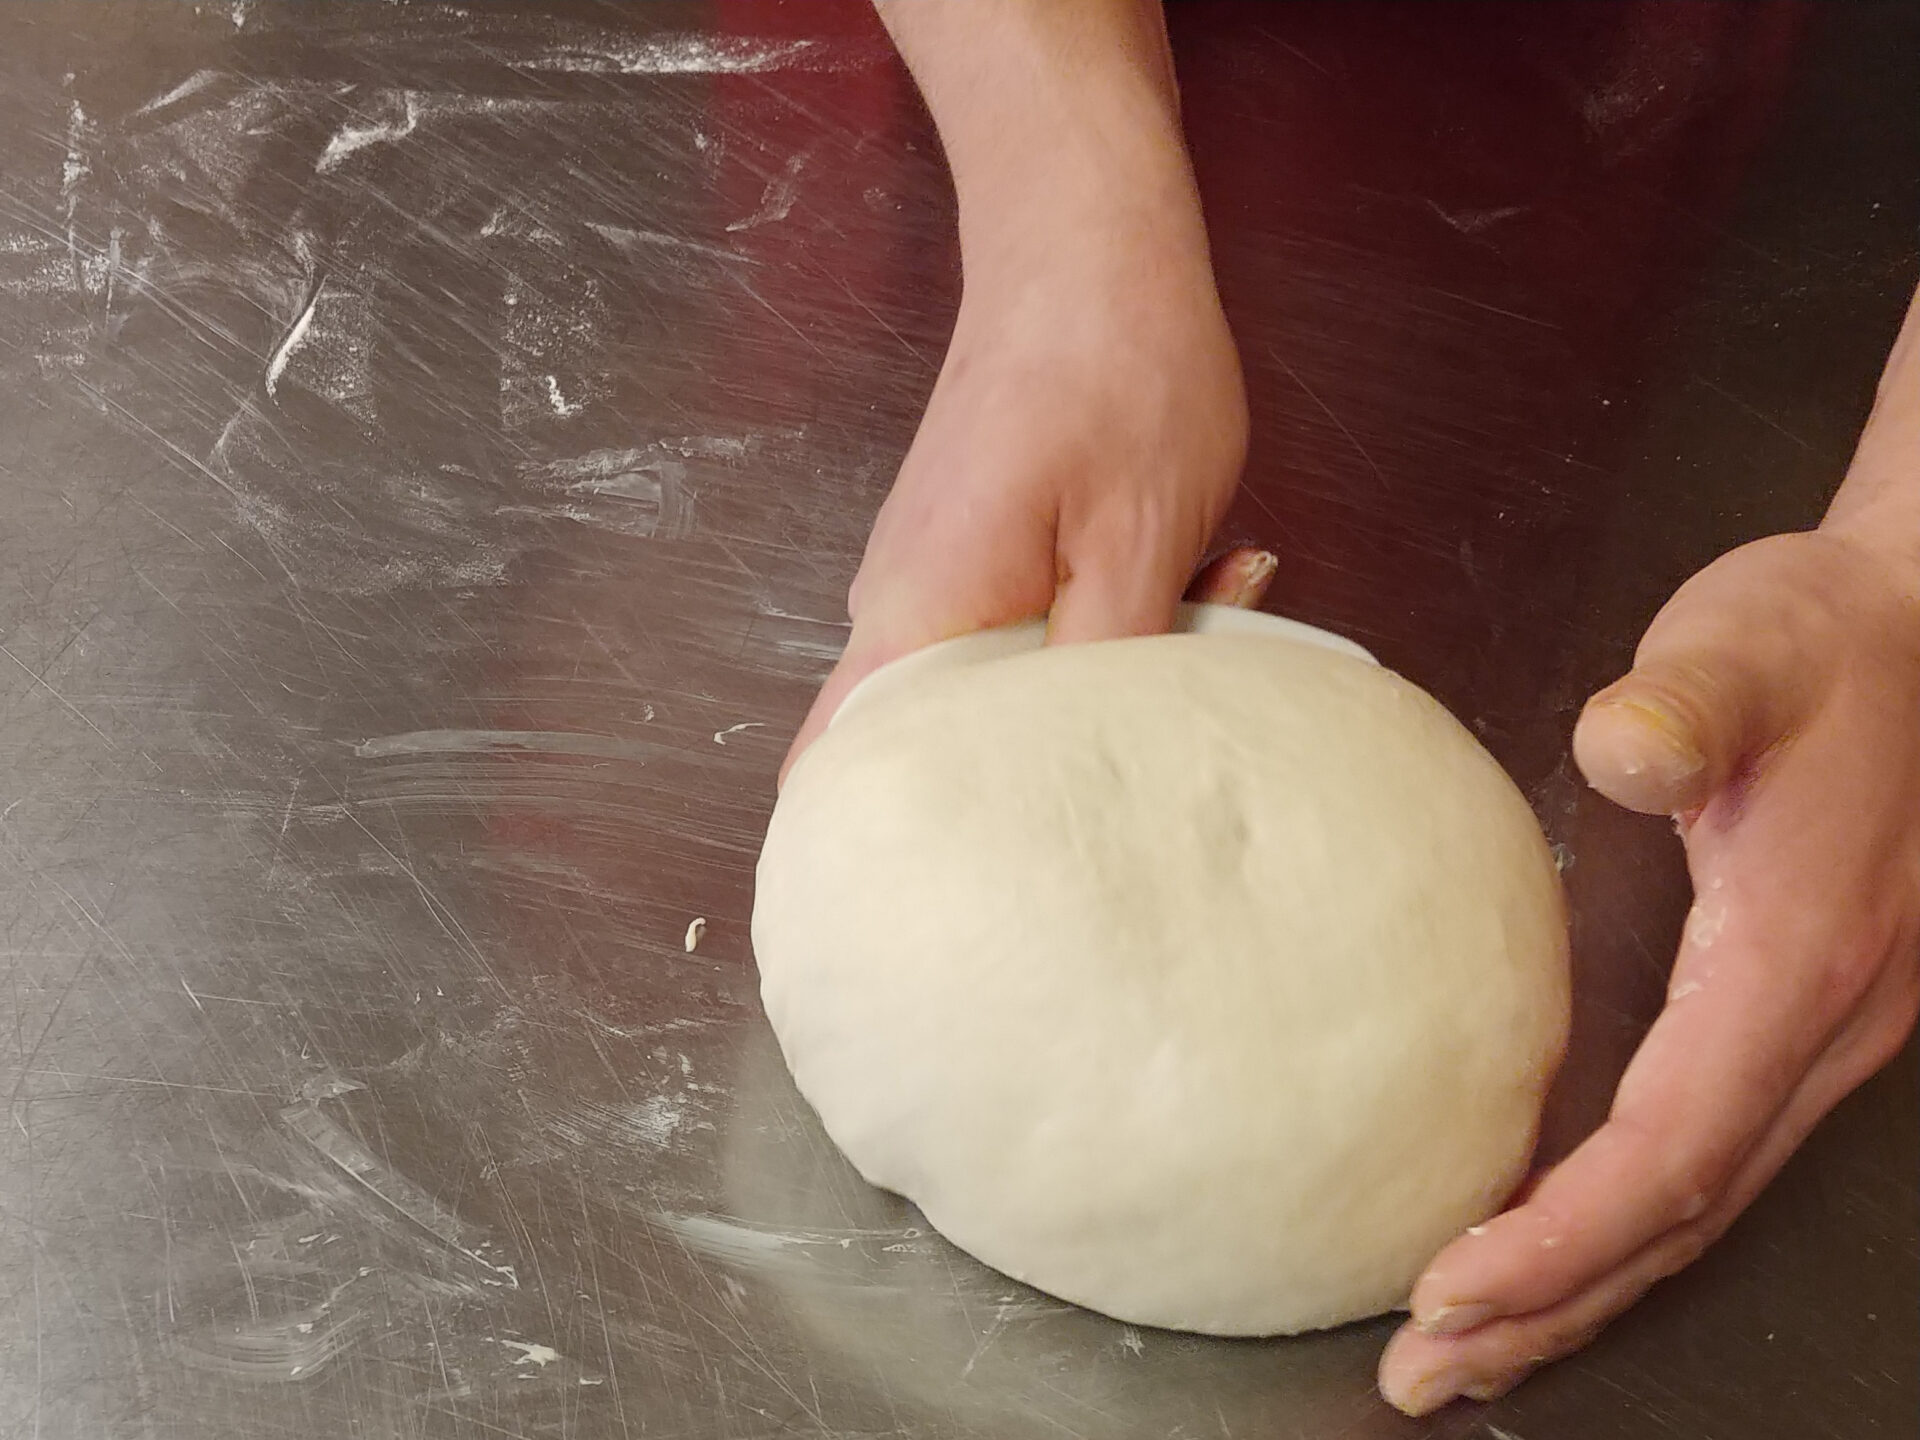
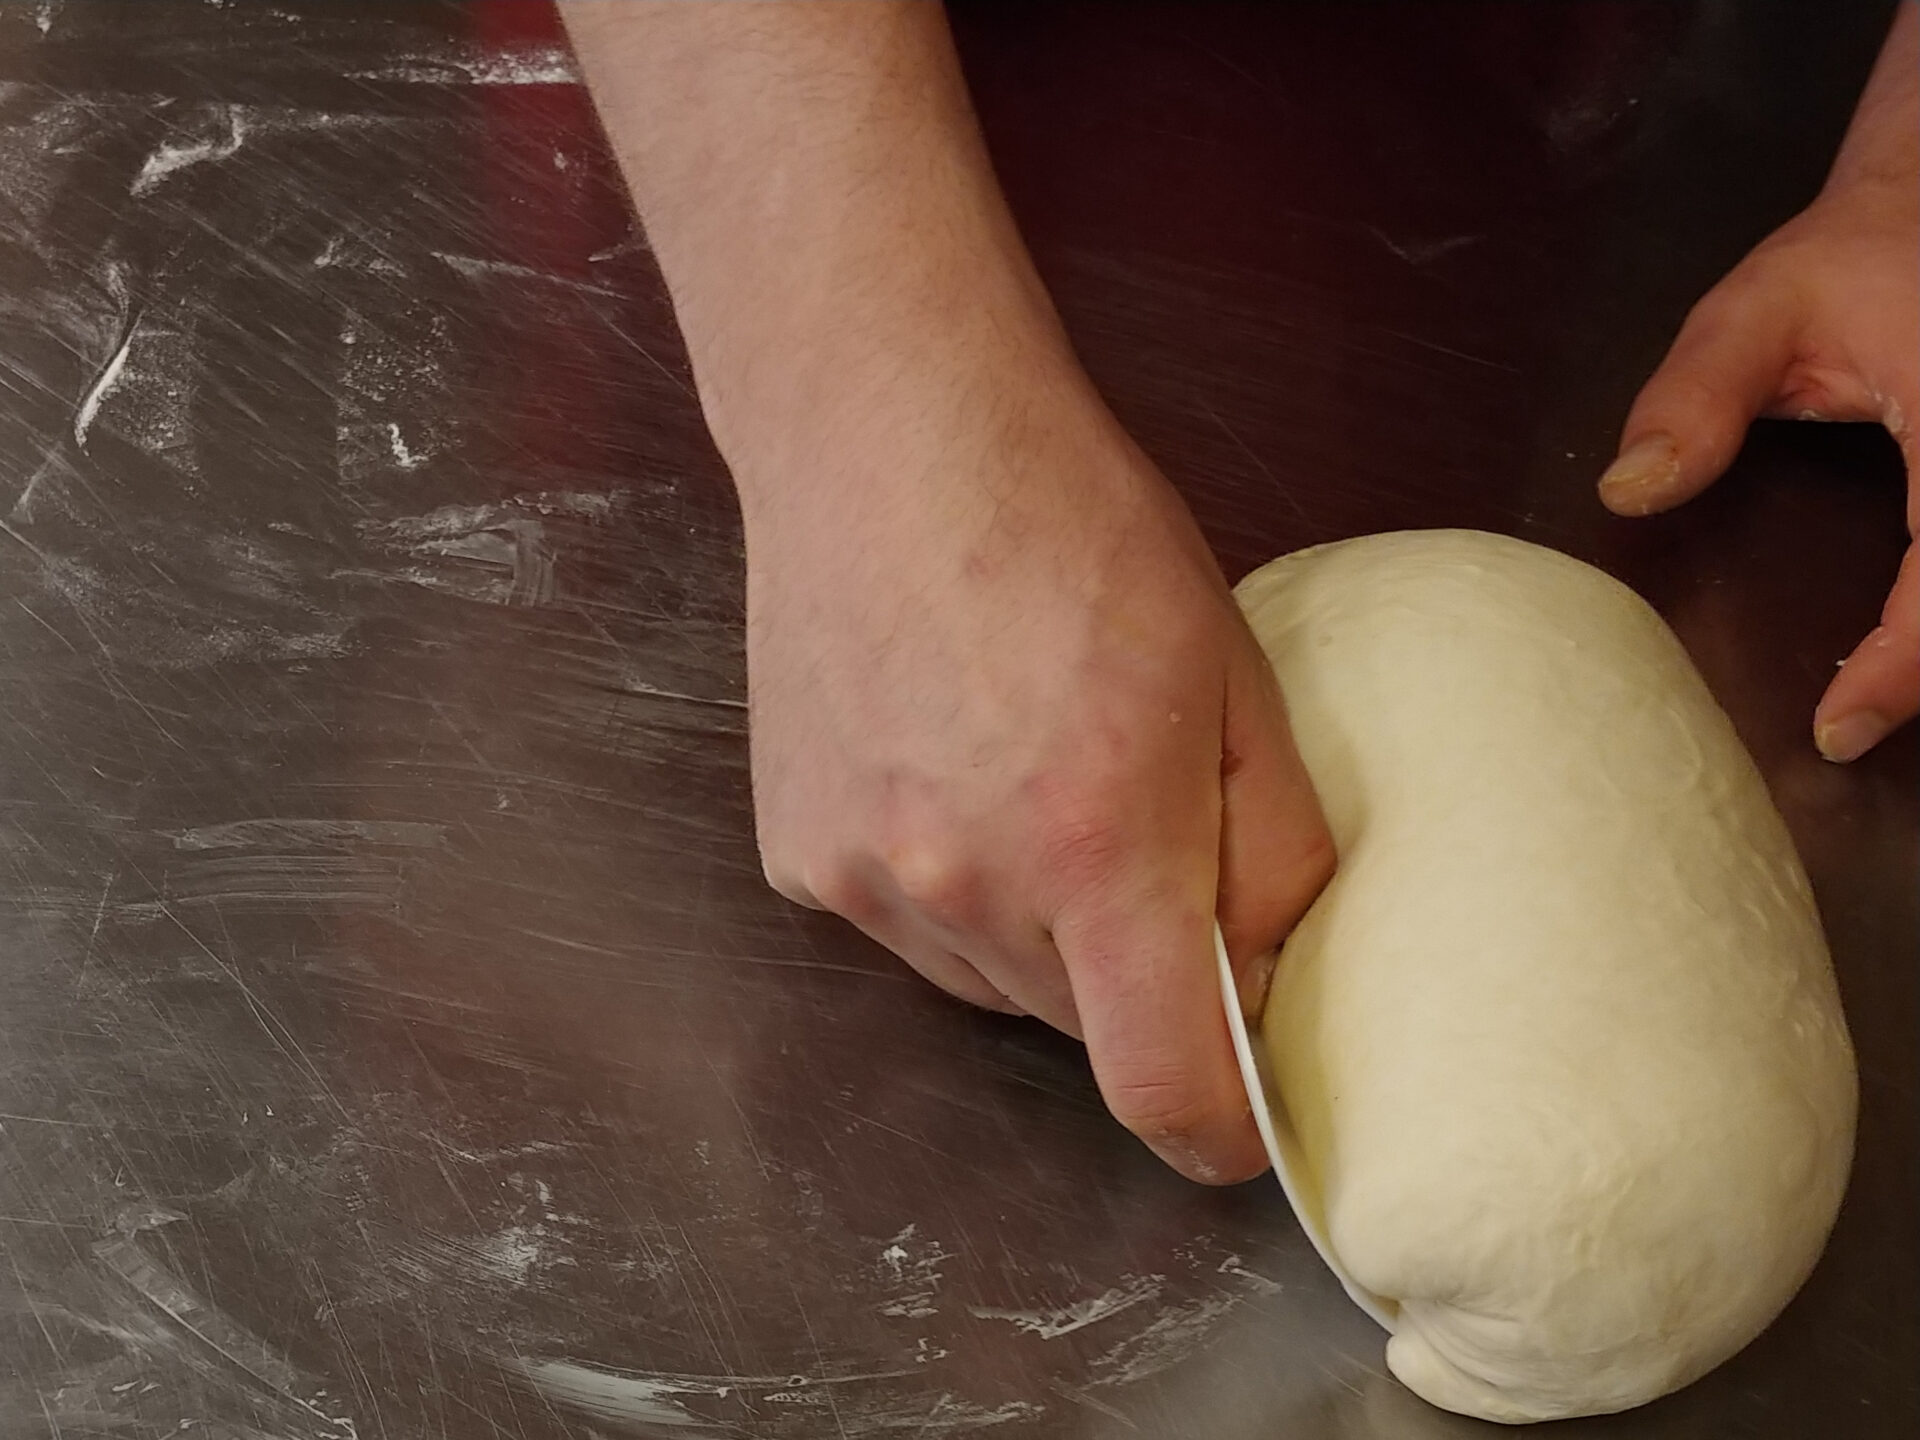
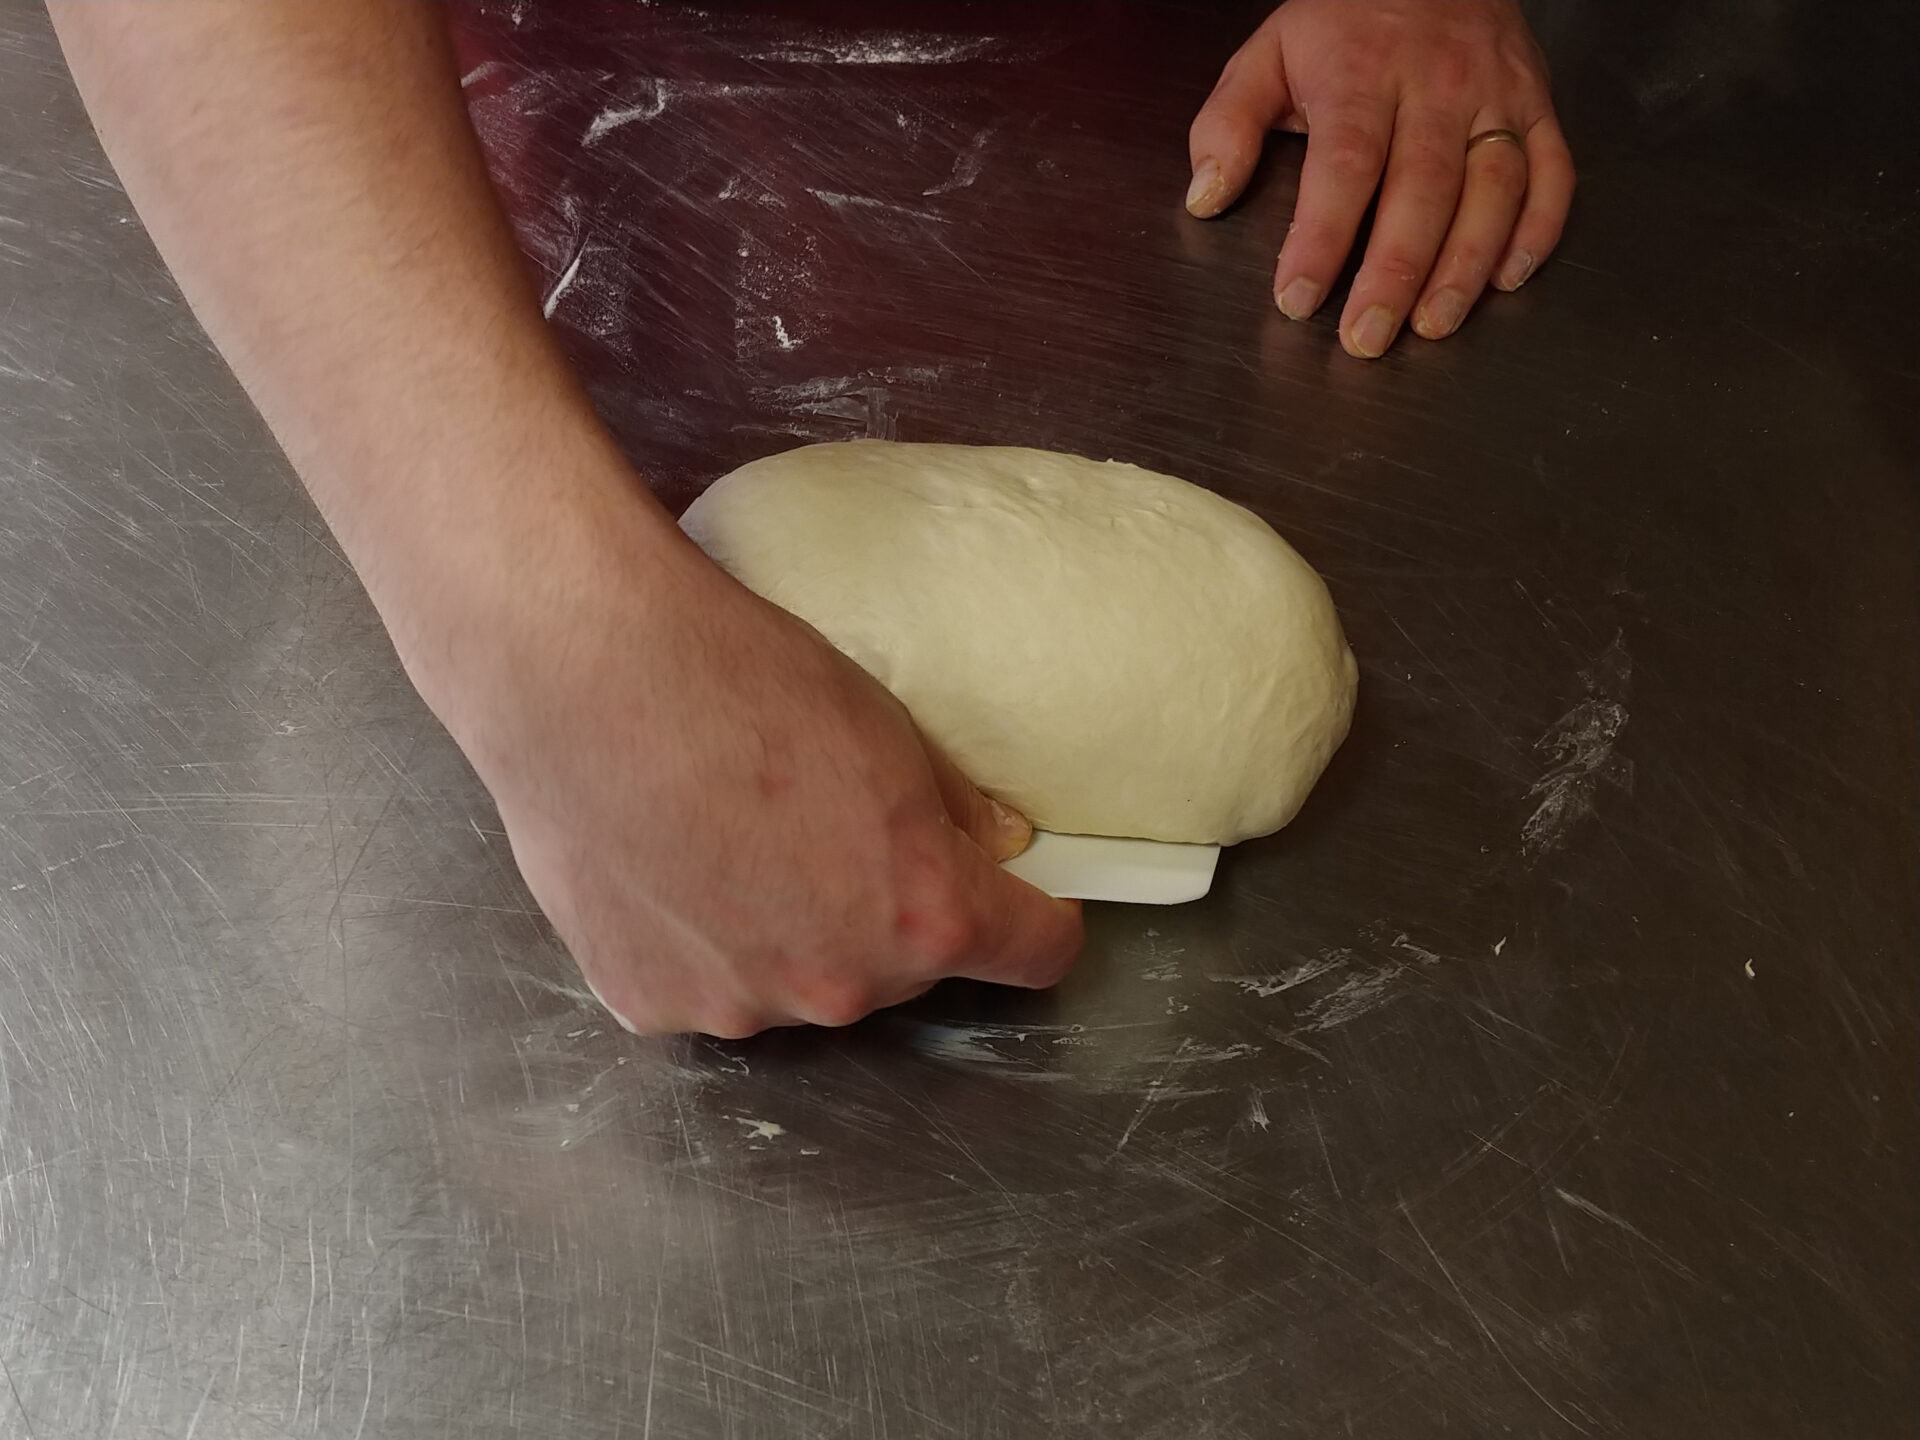
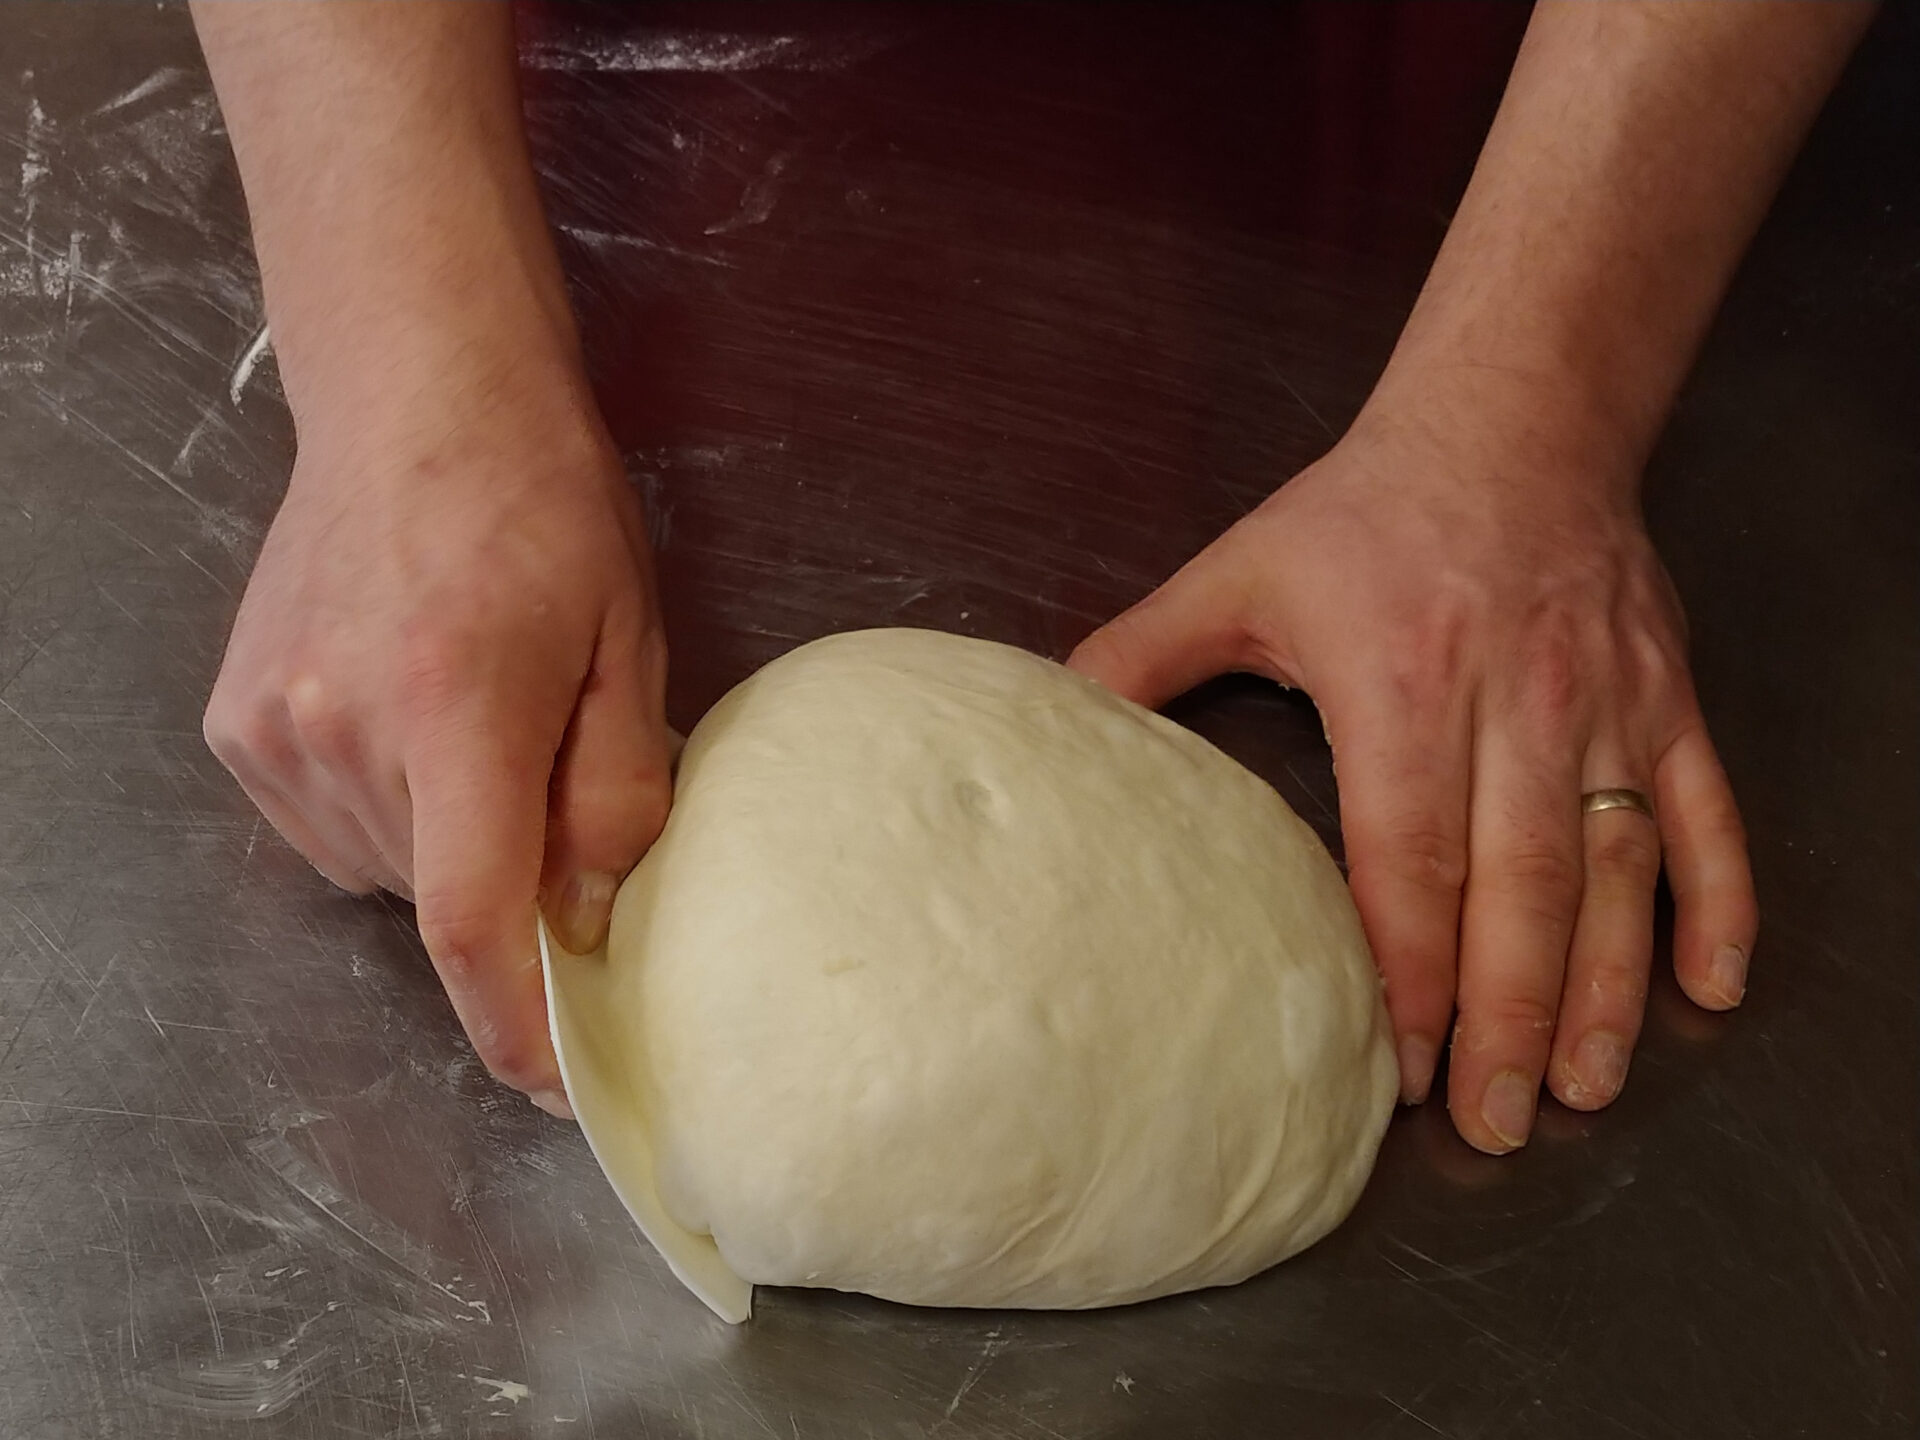
Place the dough on a surface and form the bread loaf by stretching the dough. To stretch the dough, place the bowl scraper at a slight angle against the bottom part of the dough while making sure that the bottom of the bowl scraper is touching the table.
3.1.2.
Then, keeping one hand on the top of the dough, push the scraper to move the dough slightly. The dough will roll slightly and stretch at the same time.
3.1.3.
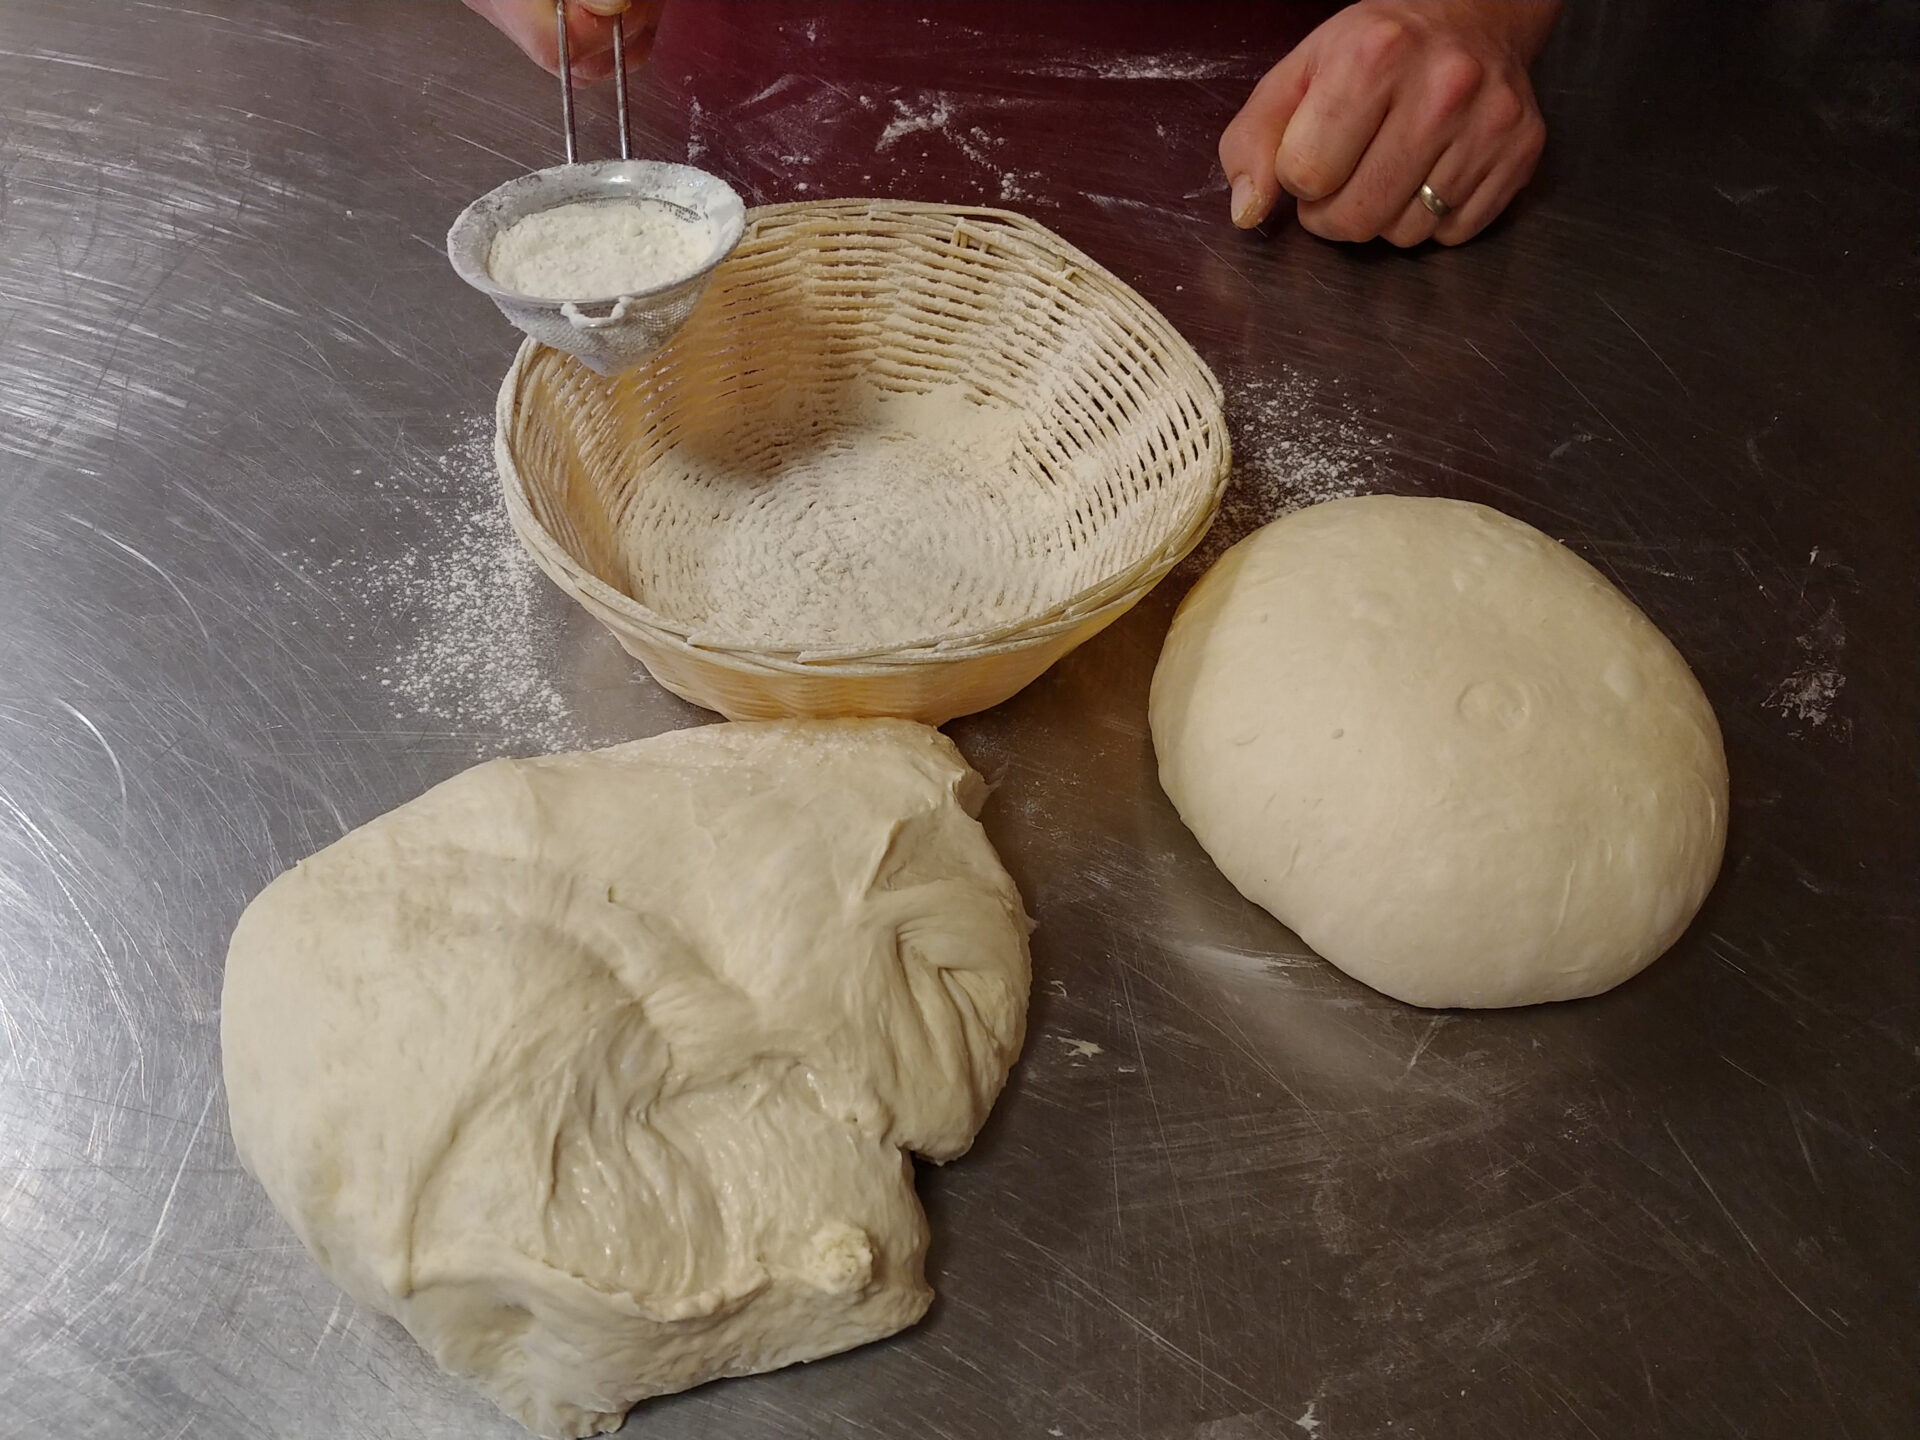
Repeat this step a few times until a loaf of bread is shaped. Each time, turn the dough about 90° to the right (usually about 2 times from each of the four sides).
3.1.4.
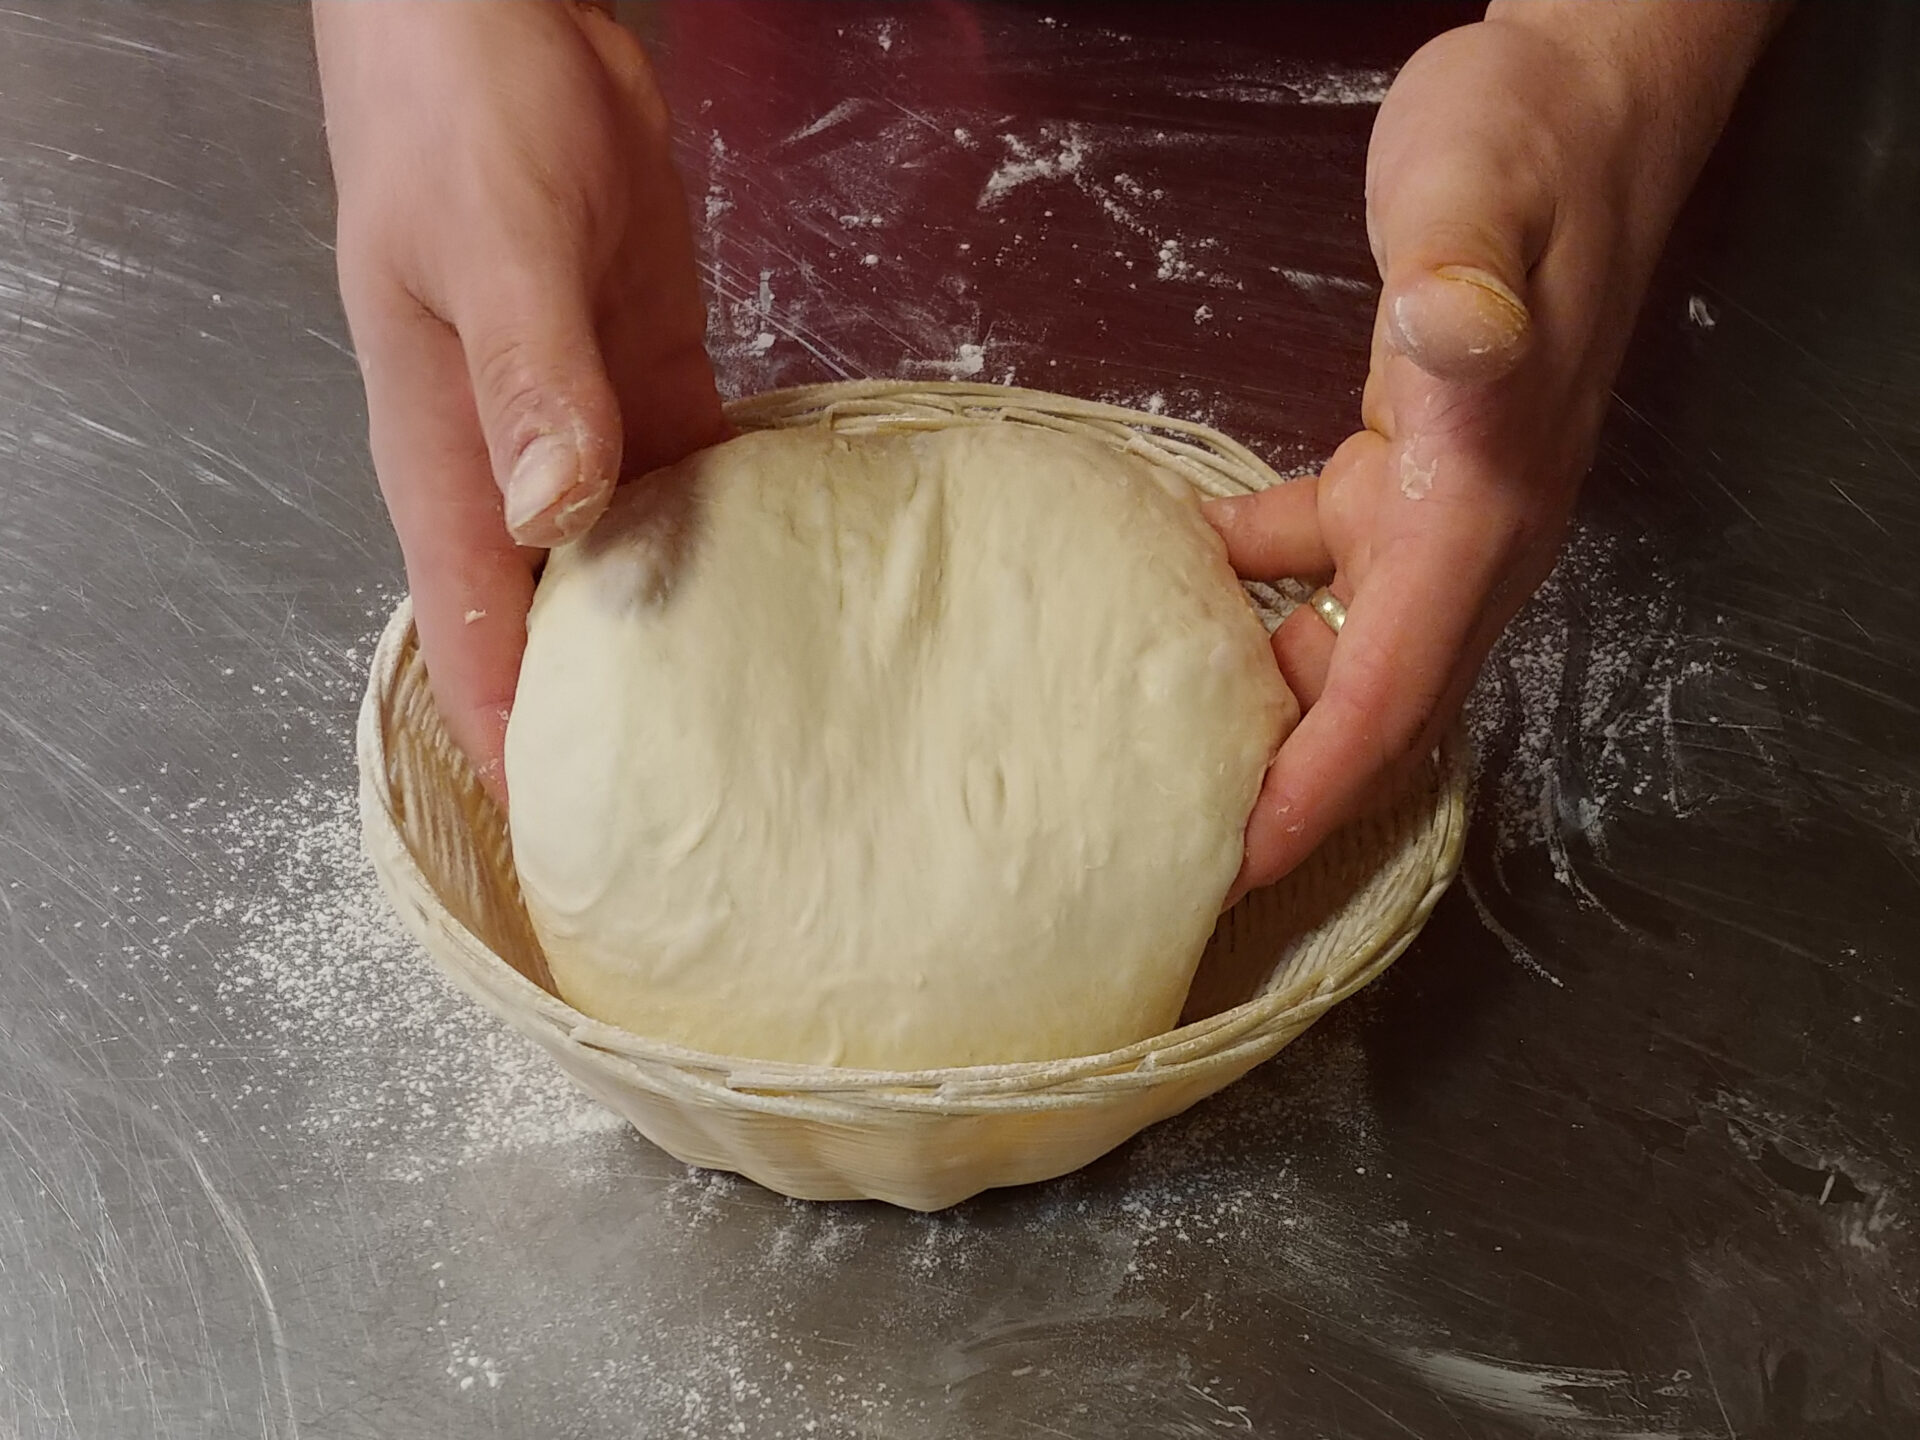
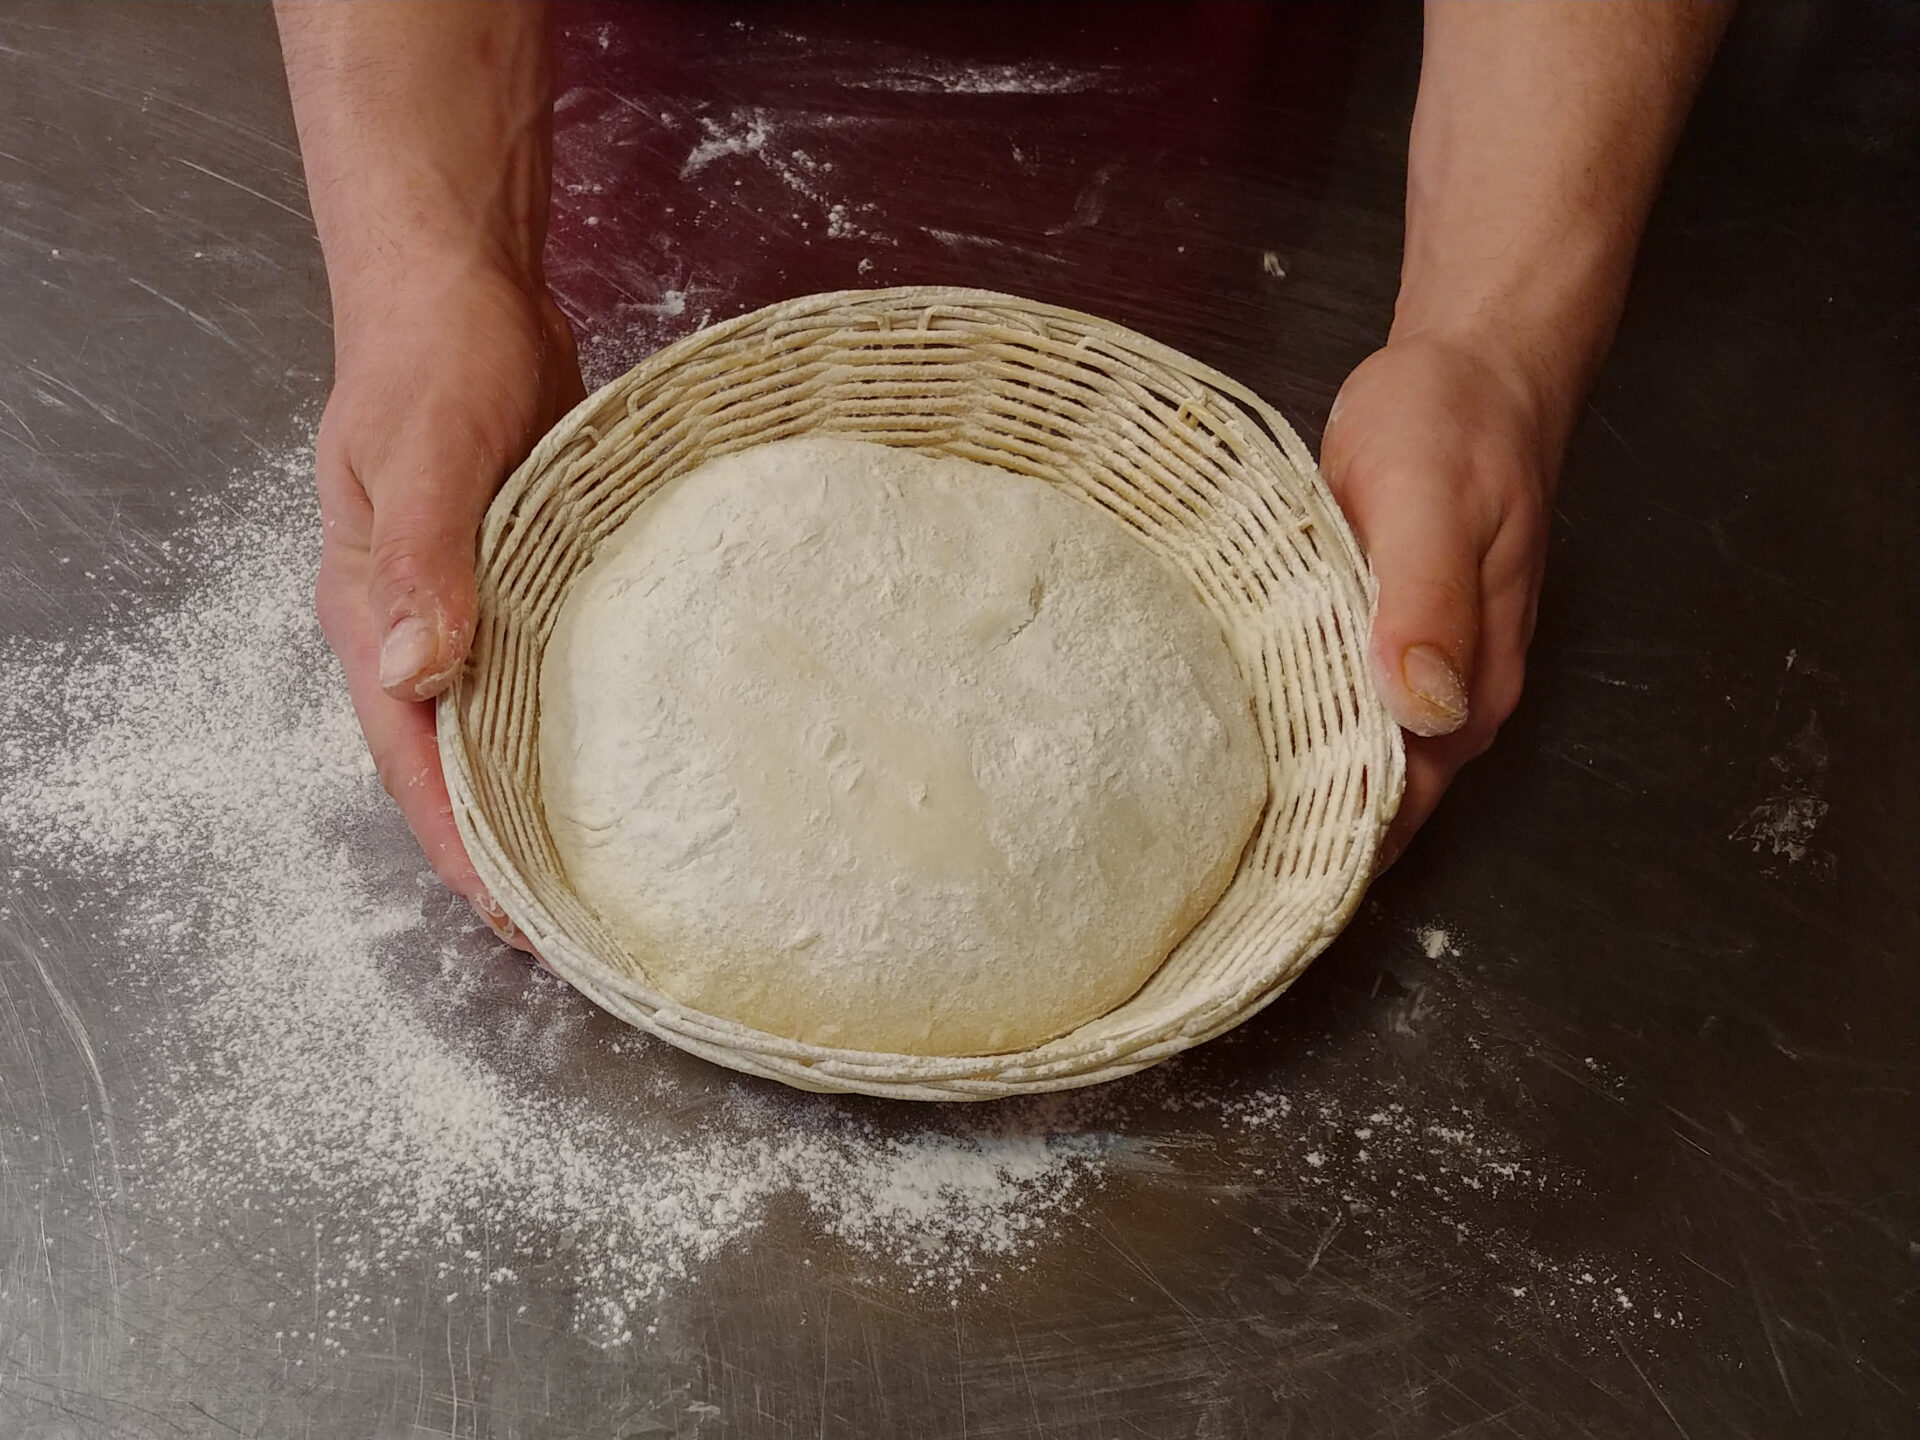
Generously flour the proofing basket and place the shaped loaf in it.
3.2.
Optionally shape like a baguette:
Note:
Work on a surface (counter top) that has no flour on it.
3.2.1.
Place dough on a surface and split into four even pieces using a dough scraper and scale (if you prefer smaller baguettes, you can separate it to even more parts than four).
3.2.2.
Form each piece into compact dough balls by stretching the dough. To stretch the dough, place the bowl scraper at a slight angle against the bottom part of the dough while making sure that the bottom of the bowl scraper is touching the table.
3.2.3.
Then, keeping one hand on the top of the dough, push the scraper to move the dough slightly. The dough will roll slightly and stretch at the same time.
3.2.4.
Repeat this step a few times until a nice dough ball is shaped. Each time, turn the dough about 90° to the right (usually about 2 times from each of the four sides).
3.2.5.
Place on a lightly floured surface and lightly flour the top. Cover the balls with a kitchen towel. Let rise for about 30 minutes.
3.2.6.
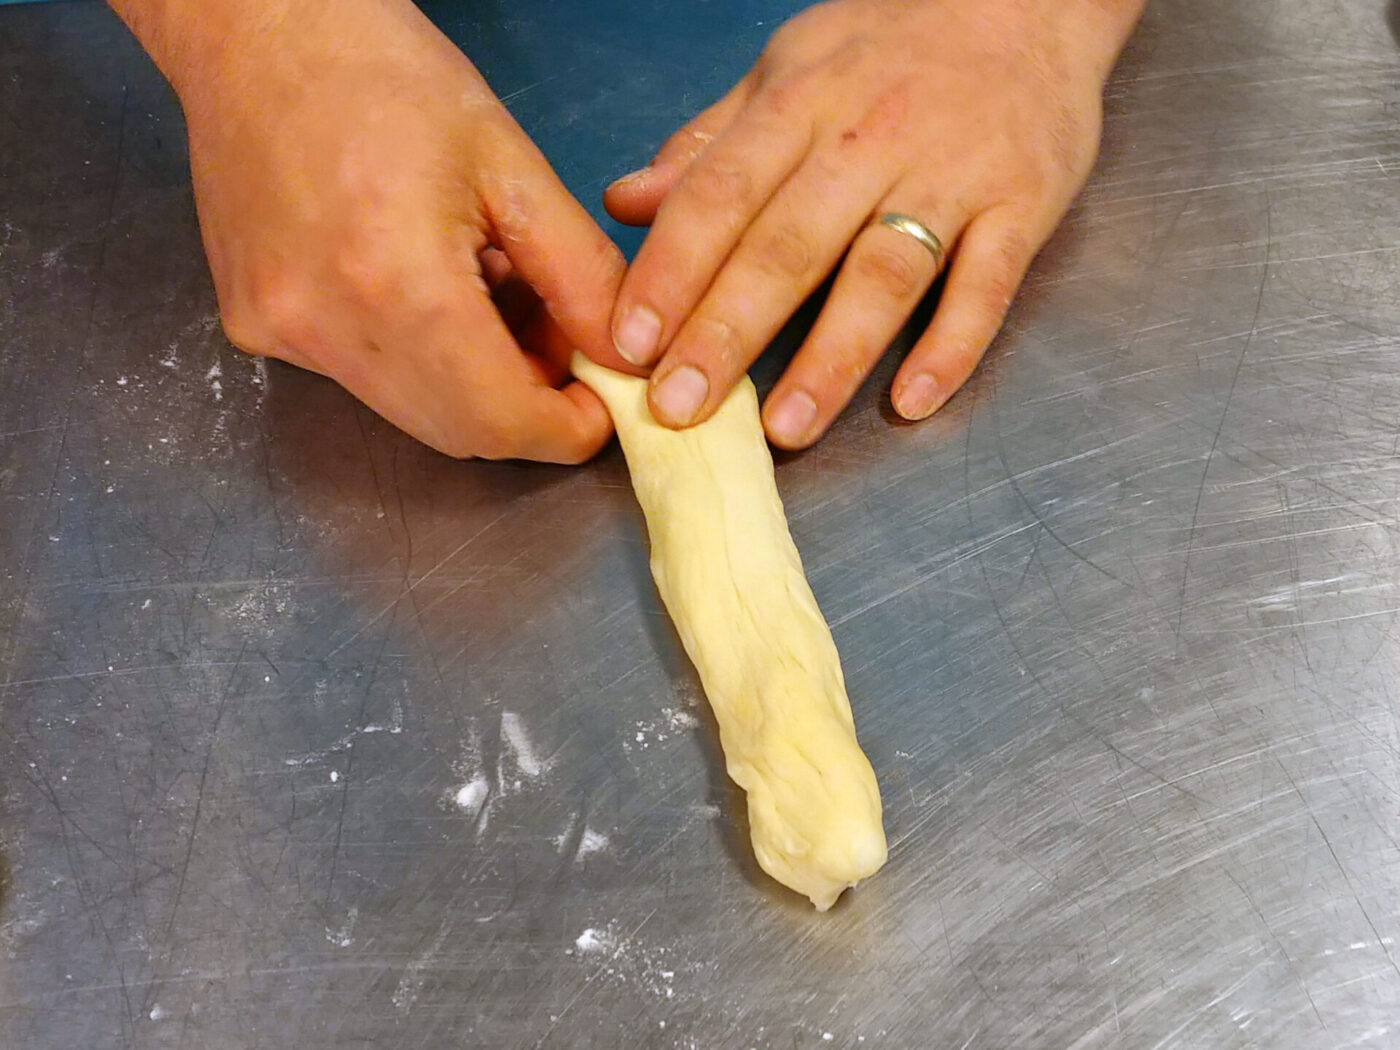
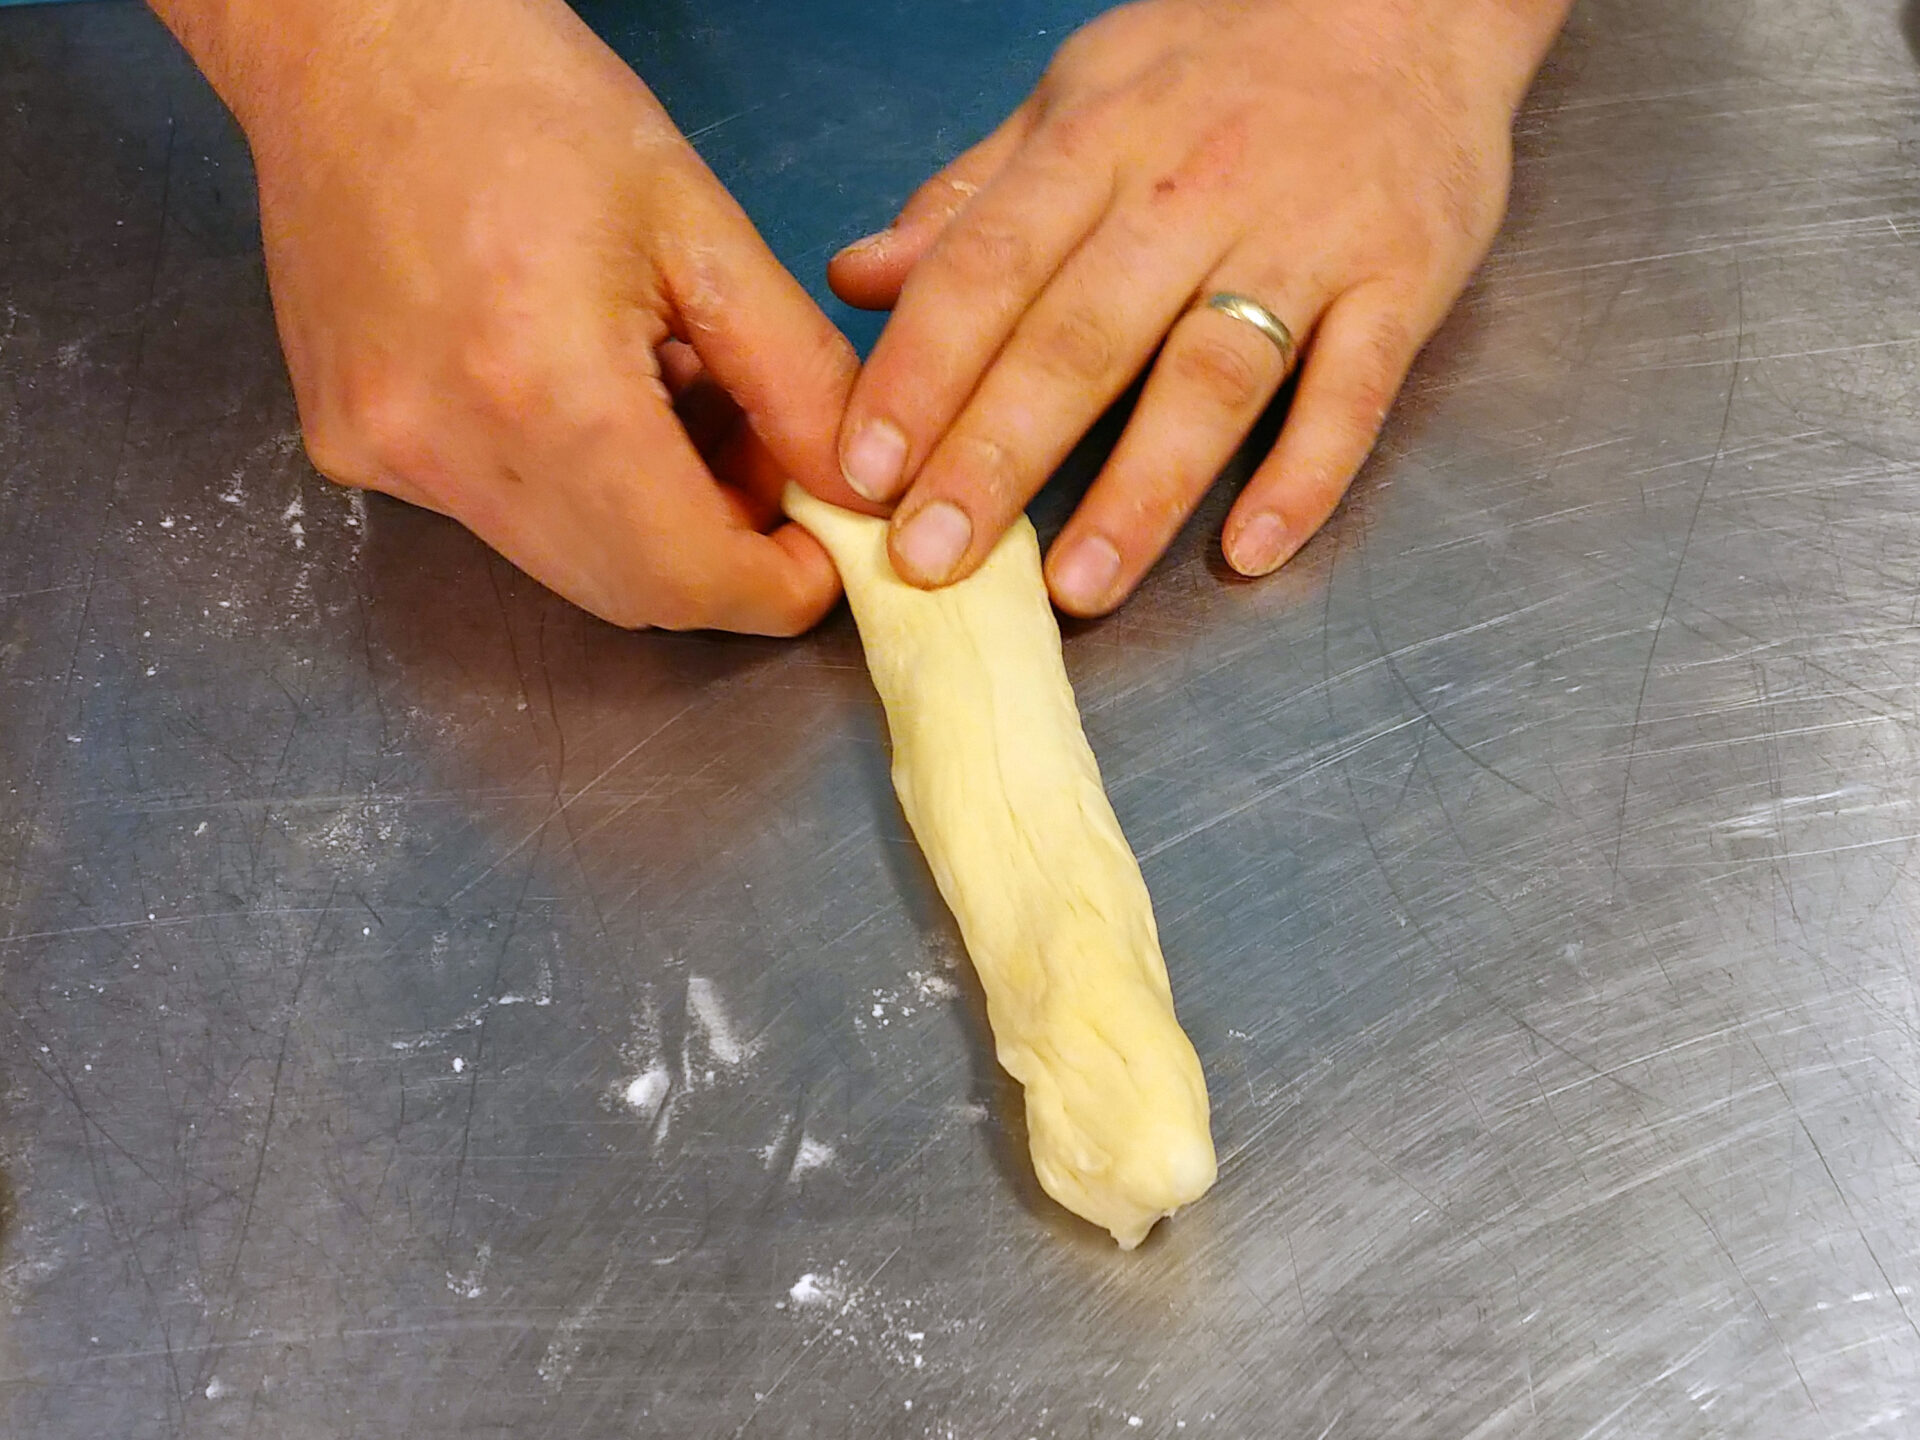
Start forming baguettes using your hands, roll each dough ball on a lightly floured surface into a long and skinny roll (no more than 1 ½” thick).
3.2.7.
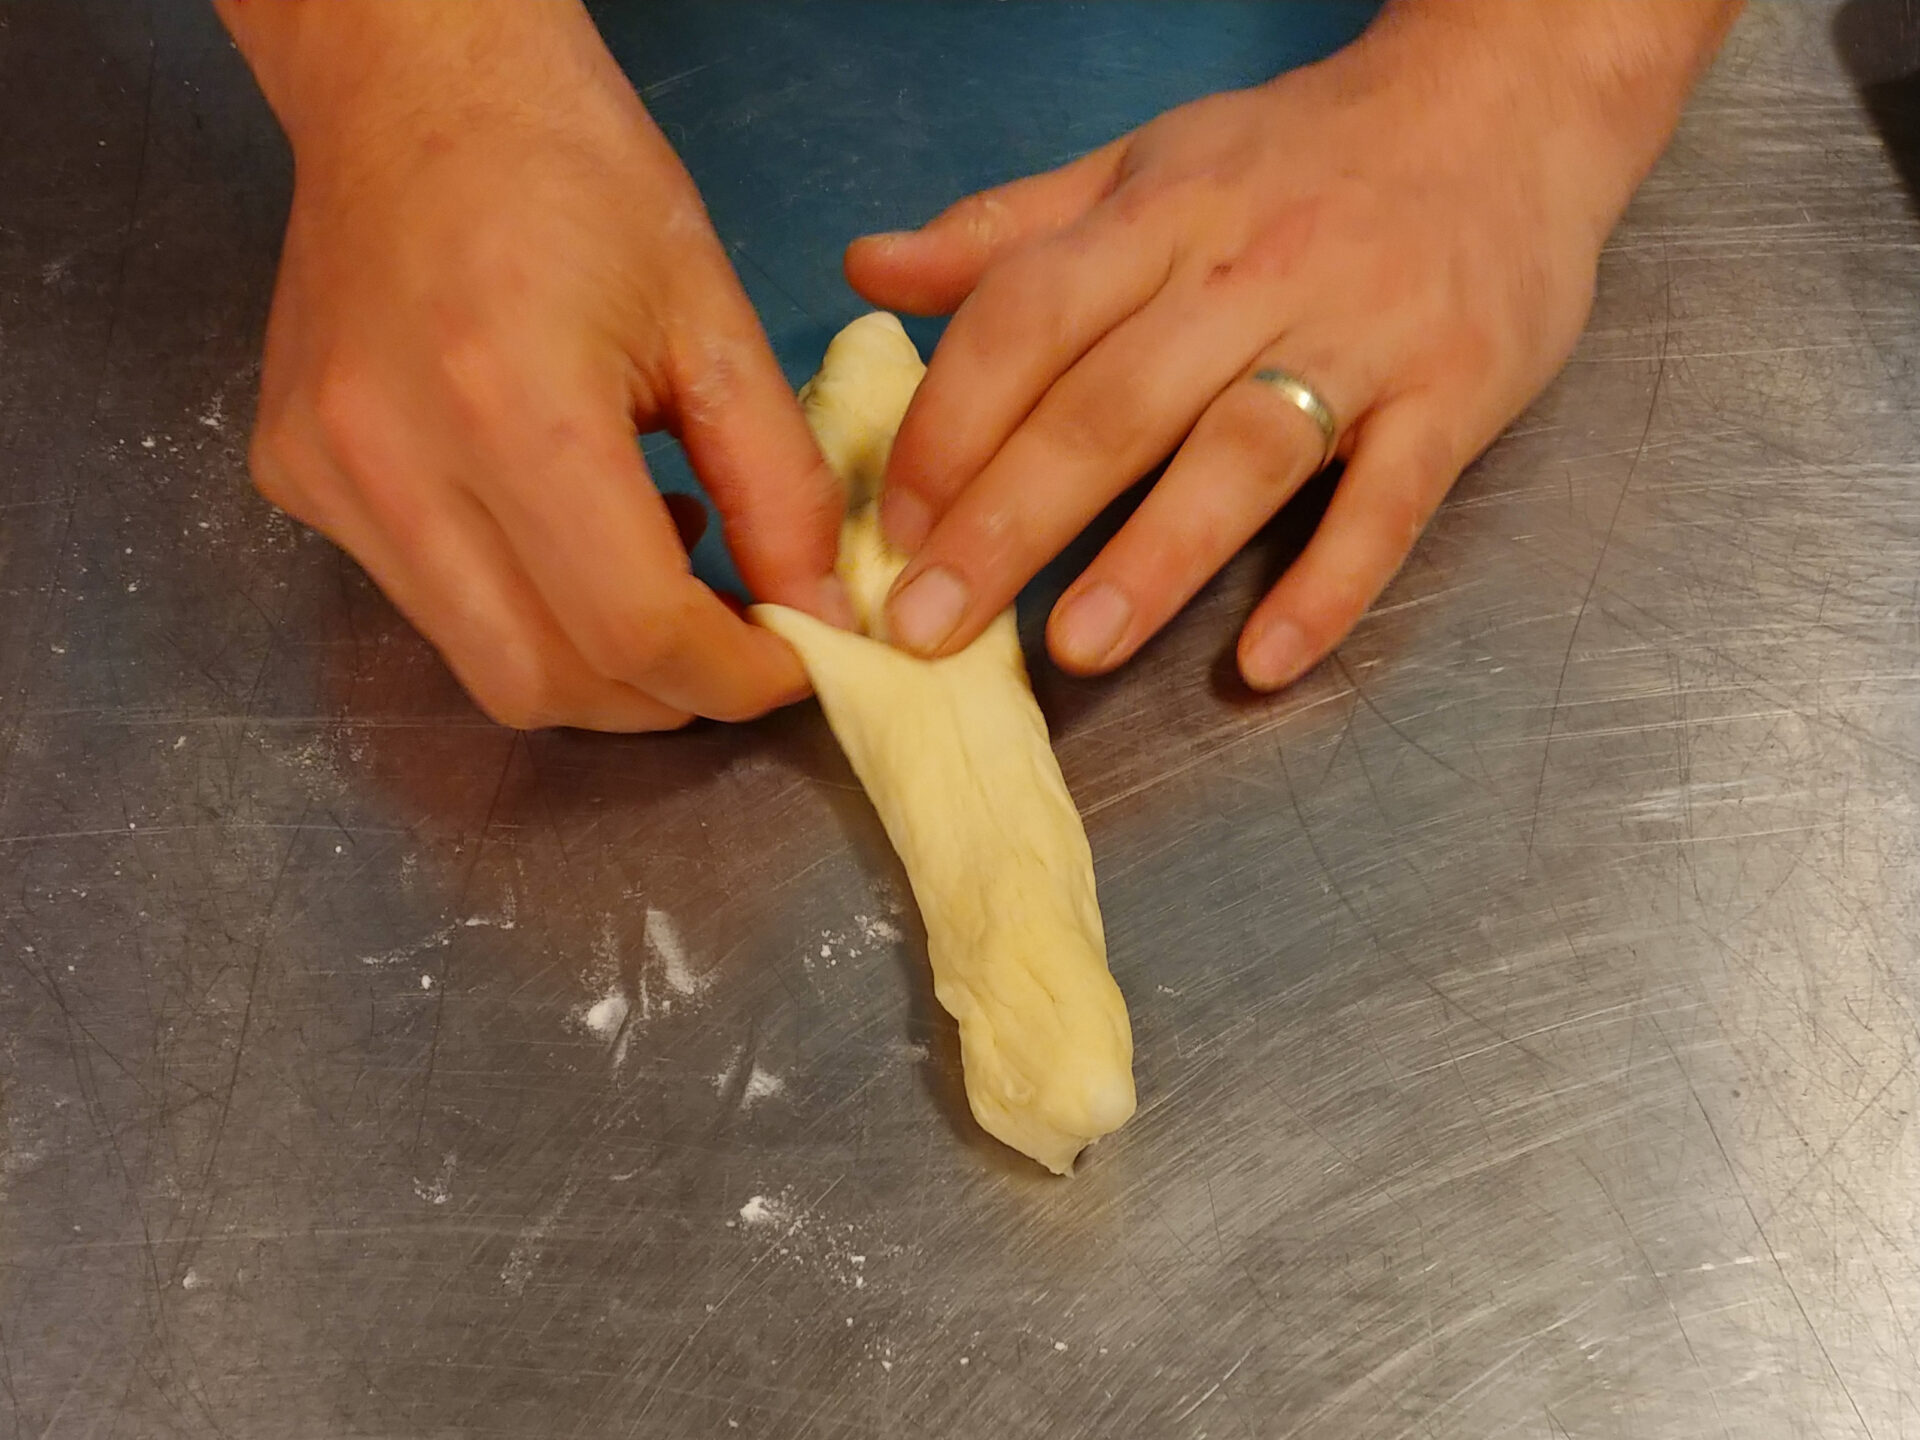
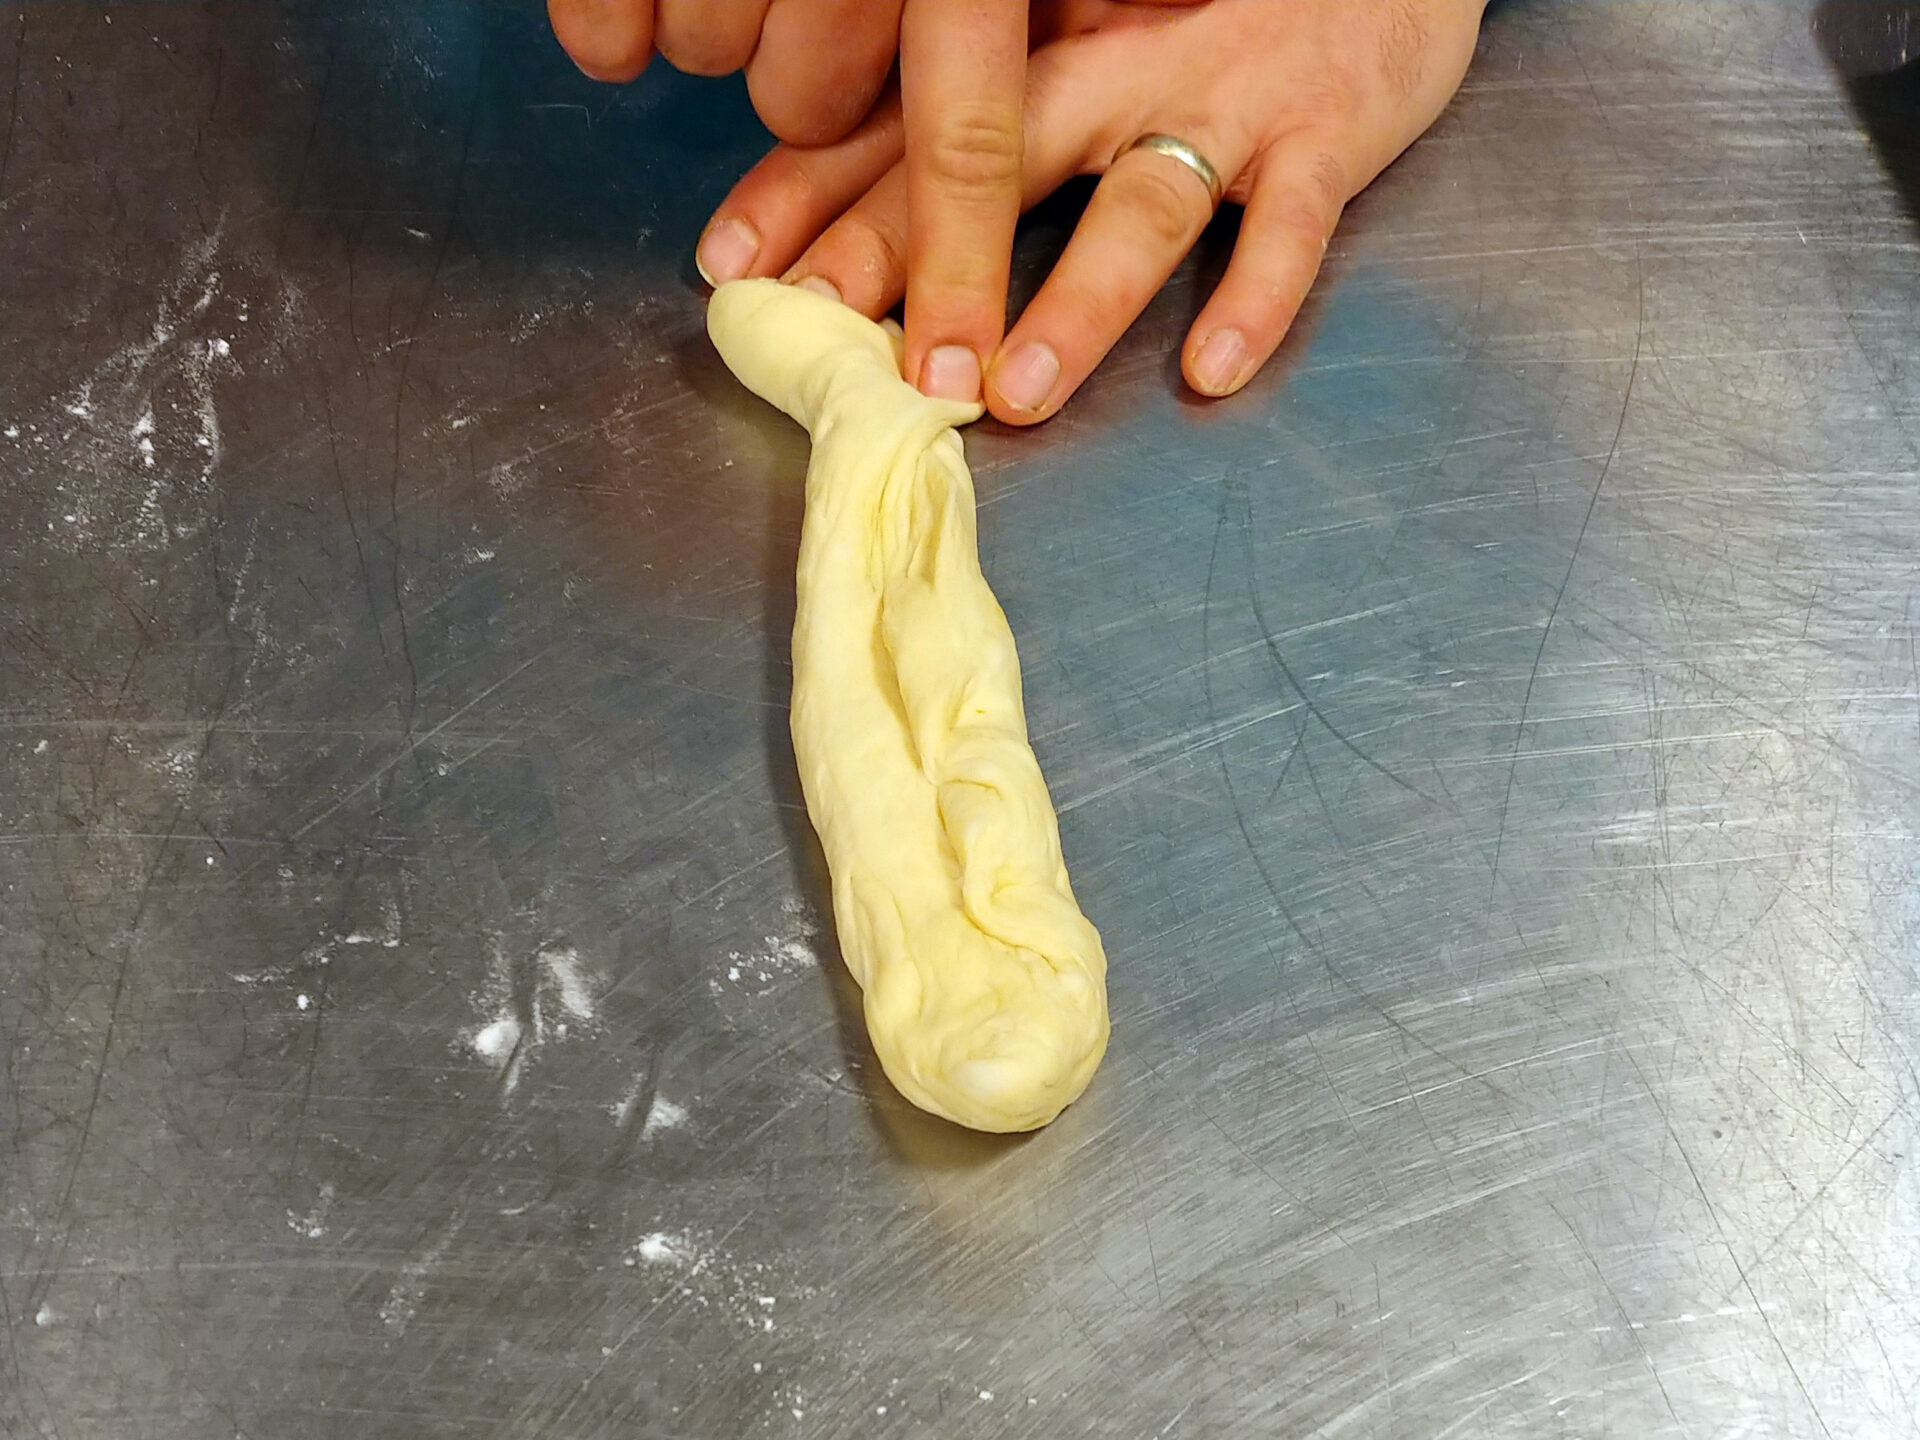
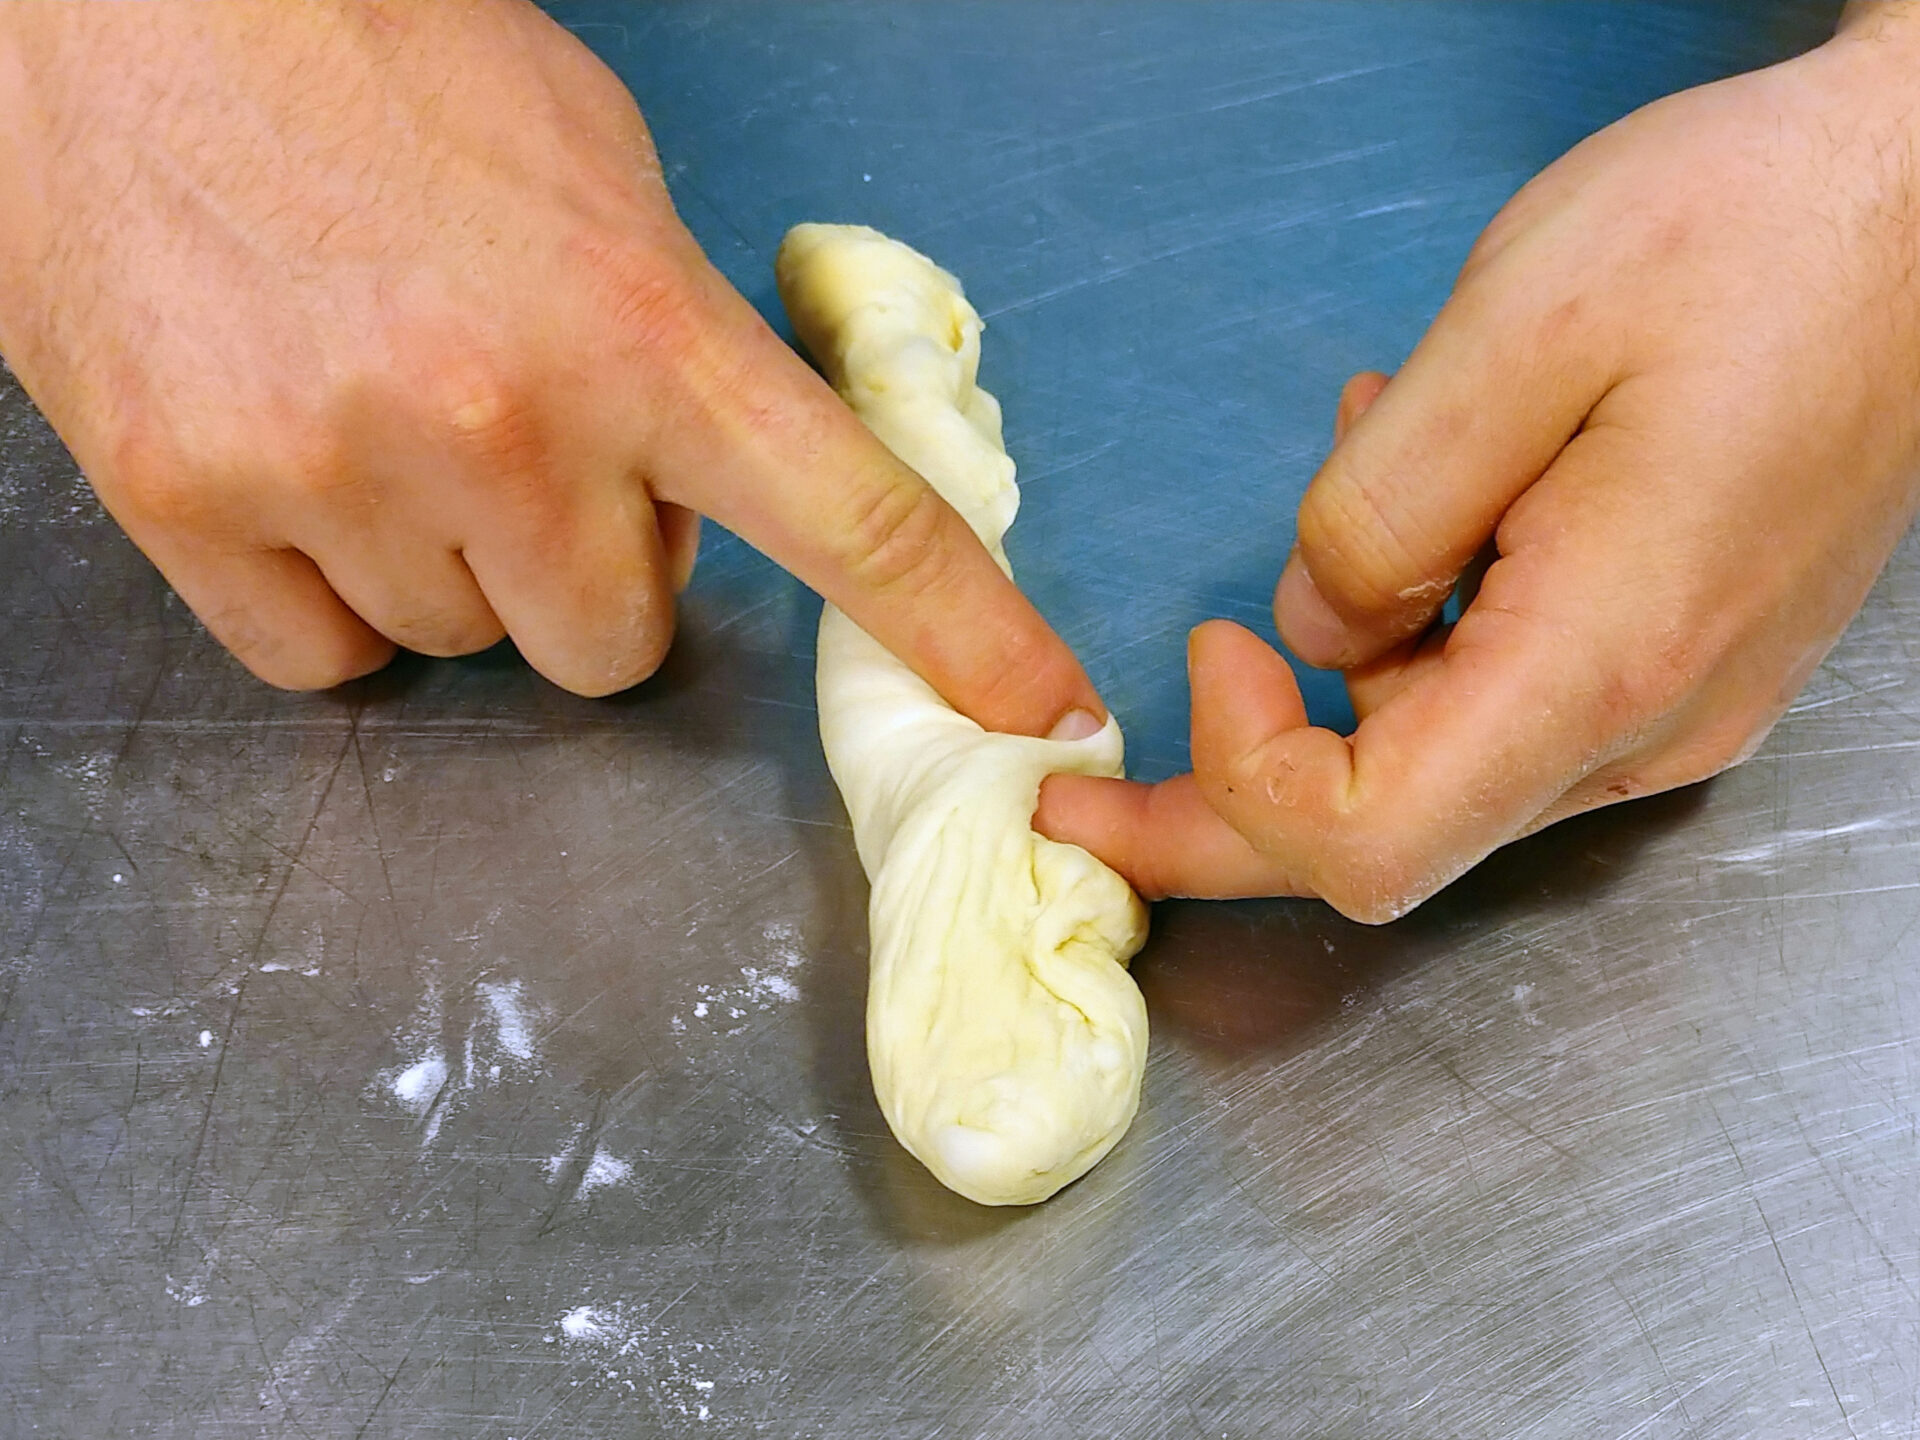
Then, lengthwise, fold the dough by taking one side and folding into the center.
3.2.8.
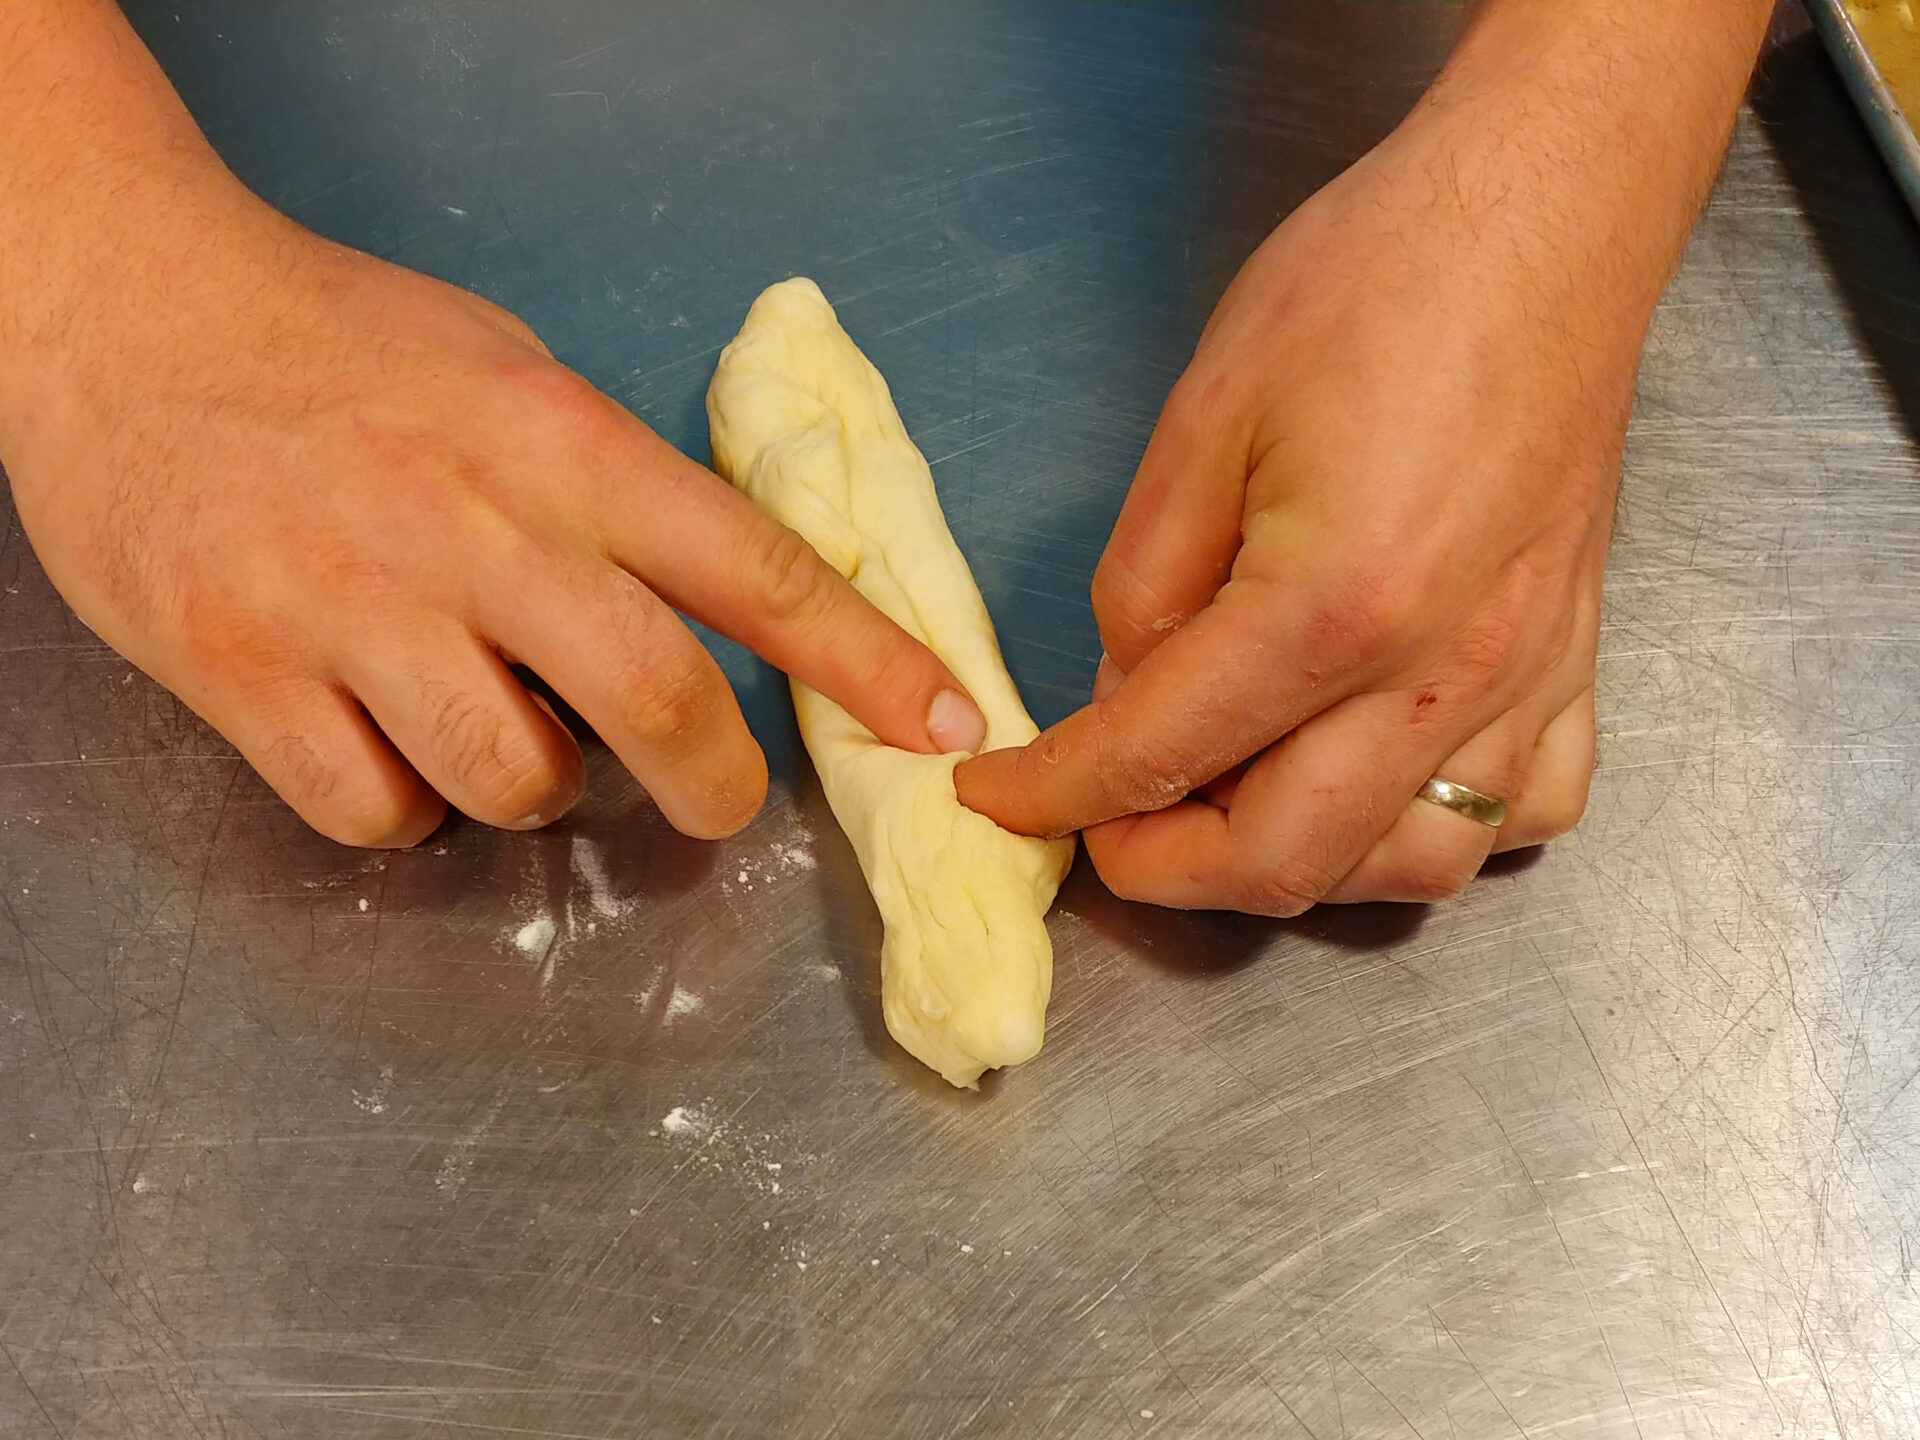
Turn the dough 180° and fold the dough into the center again, but this time into the other side, over the folded side.
3.2.9.
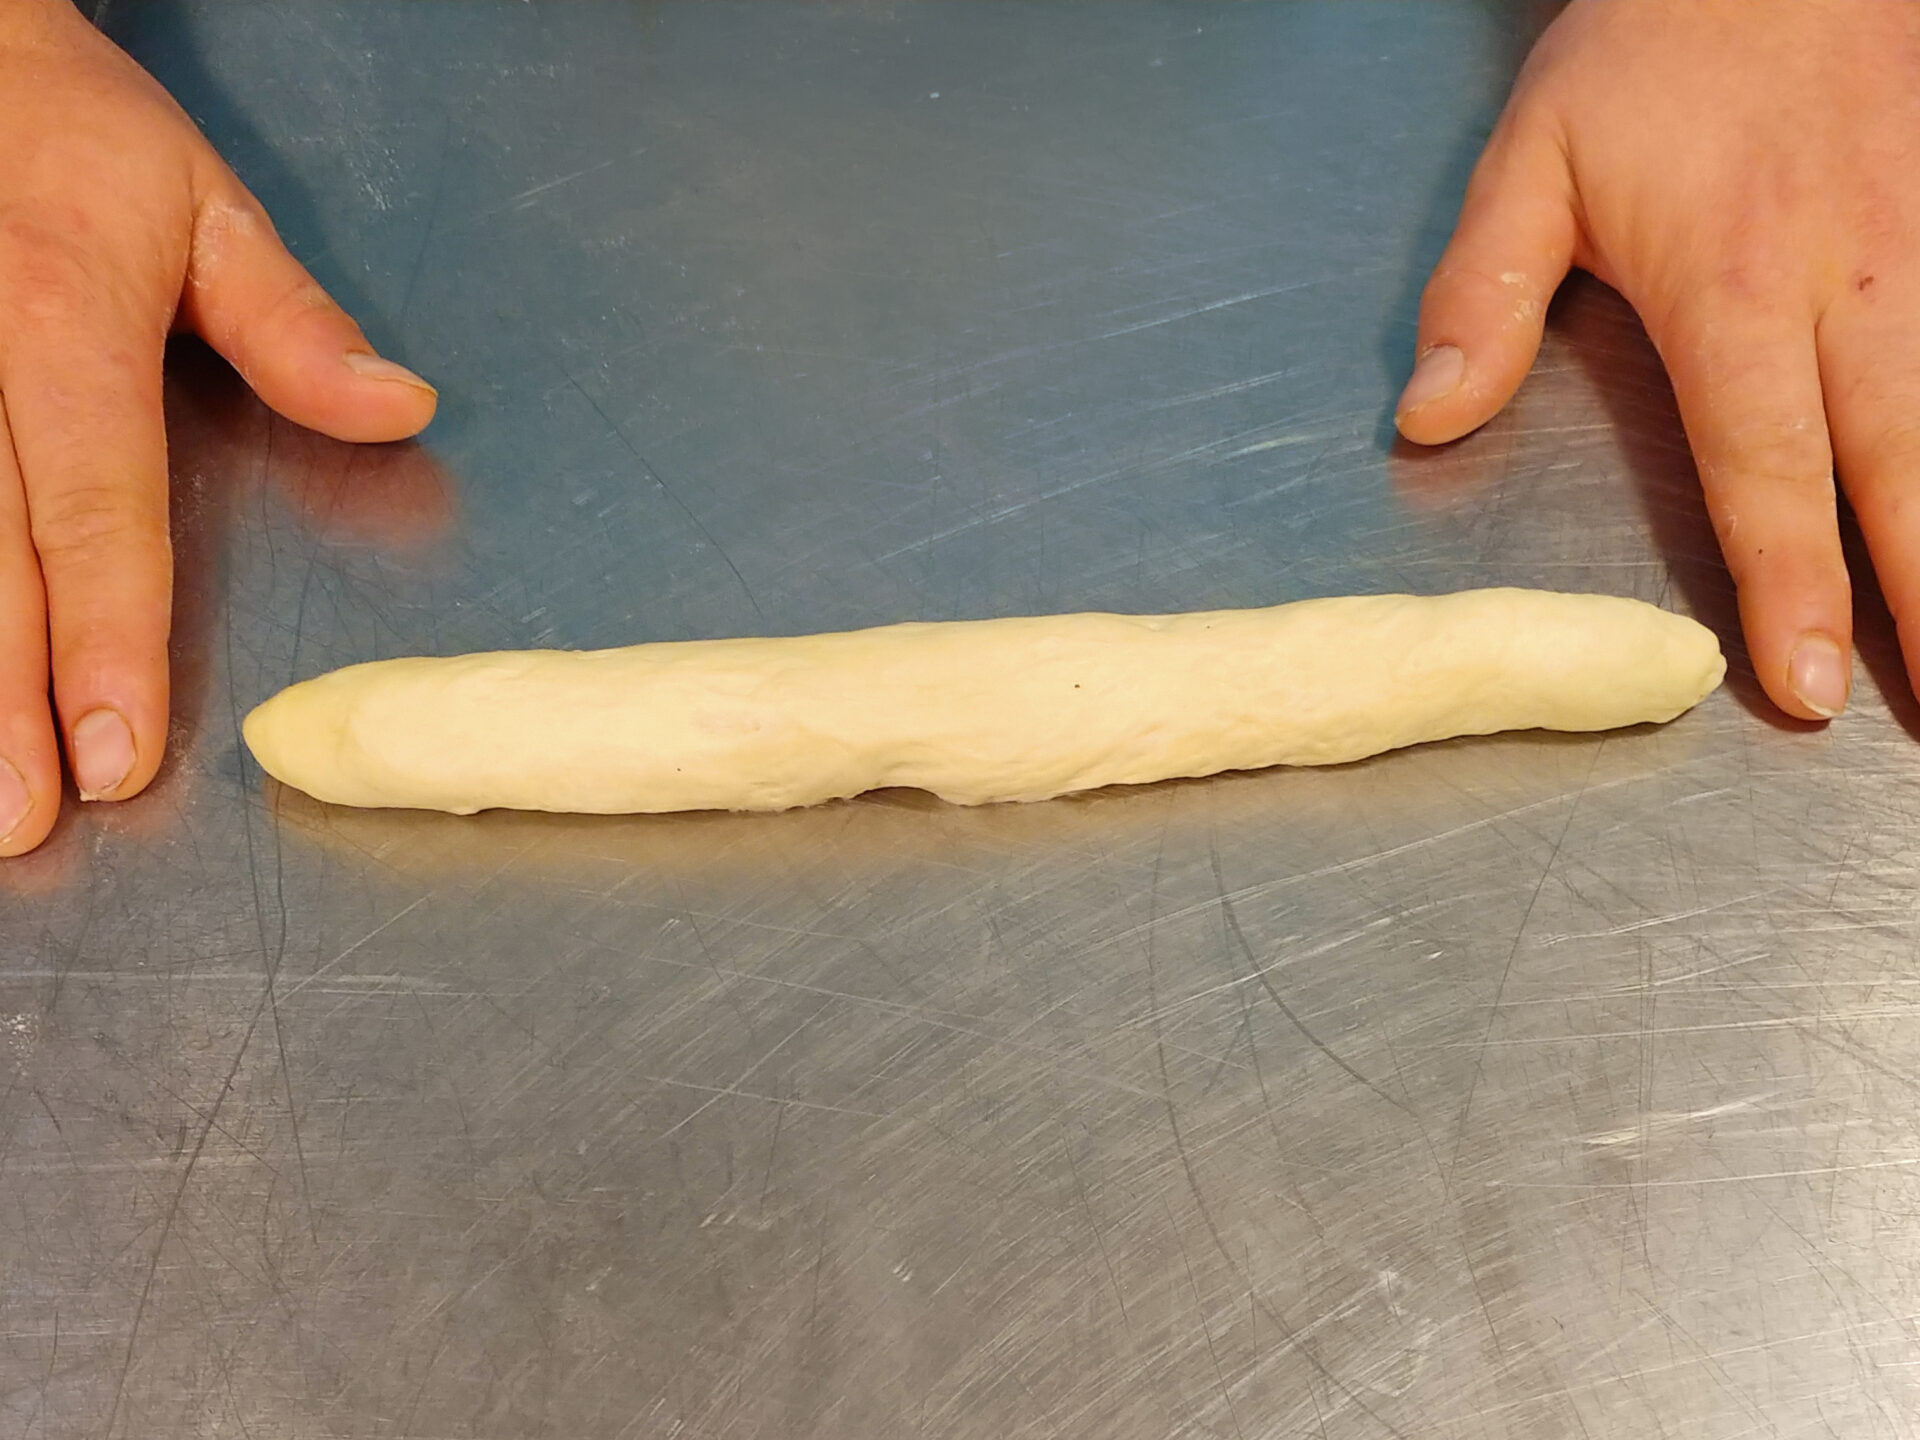
Then, briefly roll it to a preferable thickness of 1”.
4.Proofing:
4.1.
Let your bread loafs proof in a proofing basket in a warm place for about 30 minutes before baking (do not go much longer than that). If you are preparing baguettes, let them proof no more than 15 minutes.
5.Baking:
Bake in the oven or on the grill with a pizza stone and pizza paddle.
5.1.
Oven baking:
5.1.1.
Preheat oven to 450°F with the first upside-down baking sheet in the center of your oven (without parchment paper) and a small heatproof bowl with water (in the bottom of the oven).
5.1.2.
Flip the raised bread from the basket onto a second upside-down baking sheet that is covered with parchment paper. If are you preparing baguettes, they are already there.
5.1.3.
Score the top of the bread with a razor (4 – 6 cuts on the top of the bread or 2 – 4 on the top of each baguette).
5.1.4.
Carefully slide the parchment paper with the bread (or baguettes) from the baking sheet to another baking sheet located in the oven.
5.1.5.
Add ice cubes to a small heatproof bowl with water. Optionally, add other ice cubes during baking for a crispier crust.
5.1.6.
Bake until done (about 20 – 40 minutes, depending on the thickness and shape of the bread, or 5 – 12 minutes, depending on the shape of the baguette). Test with a toothpick.
5.1.7.
5.2.
Grill baking:
5.2.1.
Preheat the grill to 500°F. While preheating, keep a pizza stone on one side and a small heat-proof bowl with water on the other. Keep the temperature about 500°F, and if possible, focus on less direct heat with the fire, preferably on the side of the pizza stone.
5.2.2.
Flip the raised bread from the basket onto a lightly floured pizza paddle. If you are preparing baguettes, gently load them onto the pizza paddle by slowly sliding the pizza paddle under.
5.2.3.
Score the top of the bread with a razor (4 – 6 cuts on the top of the bread or 2 – 4 on each baguette).
5.2.4.
Carefully slide the bread or baguettes from the pizza paddle onto the pizza stone on the grill.
5.2.5.
Add ice cubes into a small heatproof bowl with water. Optionally, add other ice cubes during baking for a crispier crust.
5.2.6.
Bake until done (about 20 – 40 minutes, depending on the thickness and shape, or 5 – 12 minutes, depending on the shape of the baguette). Test with a toothpick.
You can freeze bread for later usage (it stays great in a freezer for up to a half year). Defrost in only 3 – 4 hours.
From Humble Dough to Rustic Delight: Rustic Bread or Baguettes
Read moreThere’s something truly magical about the aroma of freshly baked bread wafting through the air. It speaks of comfort, warmth, and a connection to time-honored traditions. Today, we’re going beyond simply enjoying that aroma; we’re diving headfirst into the world of bread baking, crafting a rustic loaf and classic French baguettes that will rival any artisan bakery.
This recipe isn’t just about following instructions; it’s about unlocking your inner baker, understanding the nuances of dough, and experiencing the sheer satisfaction of transforming simple ingredients into edible masterpieces. Whether you’re a seasoned baker or a curious novice, this journey promises to be both rewarding and delicious.
Rustic Bread or Baguettes: Four Ingredients and a World of Possibilities
At its core, this recipe celebrates the beauty of simplicity. With just four essential ingredients – bread flour, yeast, salt, and water – we’ll create a dough that’s bursting with potential. But don’t let the simplicity fool you; this dough is a blank canvas for your creativity. Add herbs, spices, or even peppers to customize your bread and make it truly your own.
The Knead for Speed: Mixing and the Magic of Gluten
Our adventure begins with a kitchen mixer and its trusty hook attachment. This dynamic duo will do the heavy lifting, kneading the dough and developing the gluten that gives bread its structure and elasticity. As the mixer works its magic, you’ll witness the transformation from a shaggy mass to a smooth, supple dough.
Patience is a Virtue: The Rise and Fall of Dough
Now comes the time to exercise patience, a crucial ingredient in any bread baking endeavor. We’ll allow our dough to rise in a warm place, witnessing its gradual expansion as the yeast works its magic. This rising process, known as proofing, is where the dough develops its flavor and airy texture.
But the journey doesn’t stop there. We’ll deflate the dough, folding it onto itself to further enhance its strength and texture. This process, repeated several times, is key to achieving a bread with a beautiful crumb and a satisfying chew.
Shaping the Dream: From Loaf to Baguette
With our dough well-rested and full of potential, it’s time to shape our creations. Whether you opt for a rustic loaf or slender baguettes, the process is a tactile experience, connecting you to the dough and allowing you to shape your vision.
For the loaf, we’ll gently stretch and fold the dough, creating a taut surface and a well-defined shape. For baguettes, we’ll divide the dough into portions, rolling and shaping them into long, slender forms.
The Final Act: Baking to Perfection
The culmination of our efforts lies in the baking process. Whether you choose the gentle heat of an oven or the fiery kiss of a grill, the transformation is mesmerizing. As the bread bakes, the aroma will fill your kitchen, teasing your senses and building anticipation.
A crucial tip for achieving a crisp crust is to introduce steam into the baking environment. This can be done by adding ice cubes to a heatproof bowl in the oven or grill. The steam creates a moist environment that allows the crust to develop its characteristic crunch.
A Feast for the Senses: Rustic Bread or Baguettes
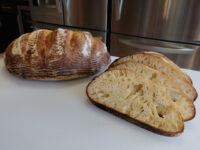
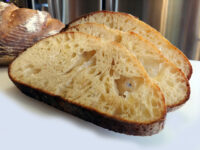
Finally, the moment we’ve all been waiting for: slicing into the freshly baked bread and savoring its texture and flavor. The crust crackles invitingly as you cut through it, revealing a soft, airy interior. Whether enjoyed on its own or paired with your favorite dips and spreads, this bread is a testament to the power of simple ingredients and the joy of baking.
Beyond the Rustic Bread or Baguettes.: Embracing the Journey
This recipe is more than just a set of instructions; it’s an invitation to explore the world of bread baking, to connect with a timeless tradition, and to unleash your creativity in the kitchen. So gather your ingredients, embrace the process, and experience the satisfaction of creating something truly special with your own hands. Happy baking!
Read less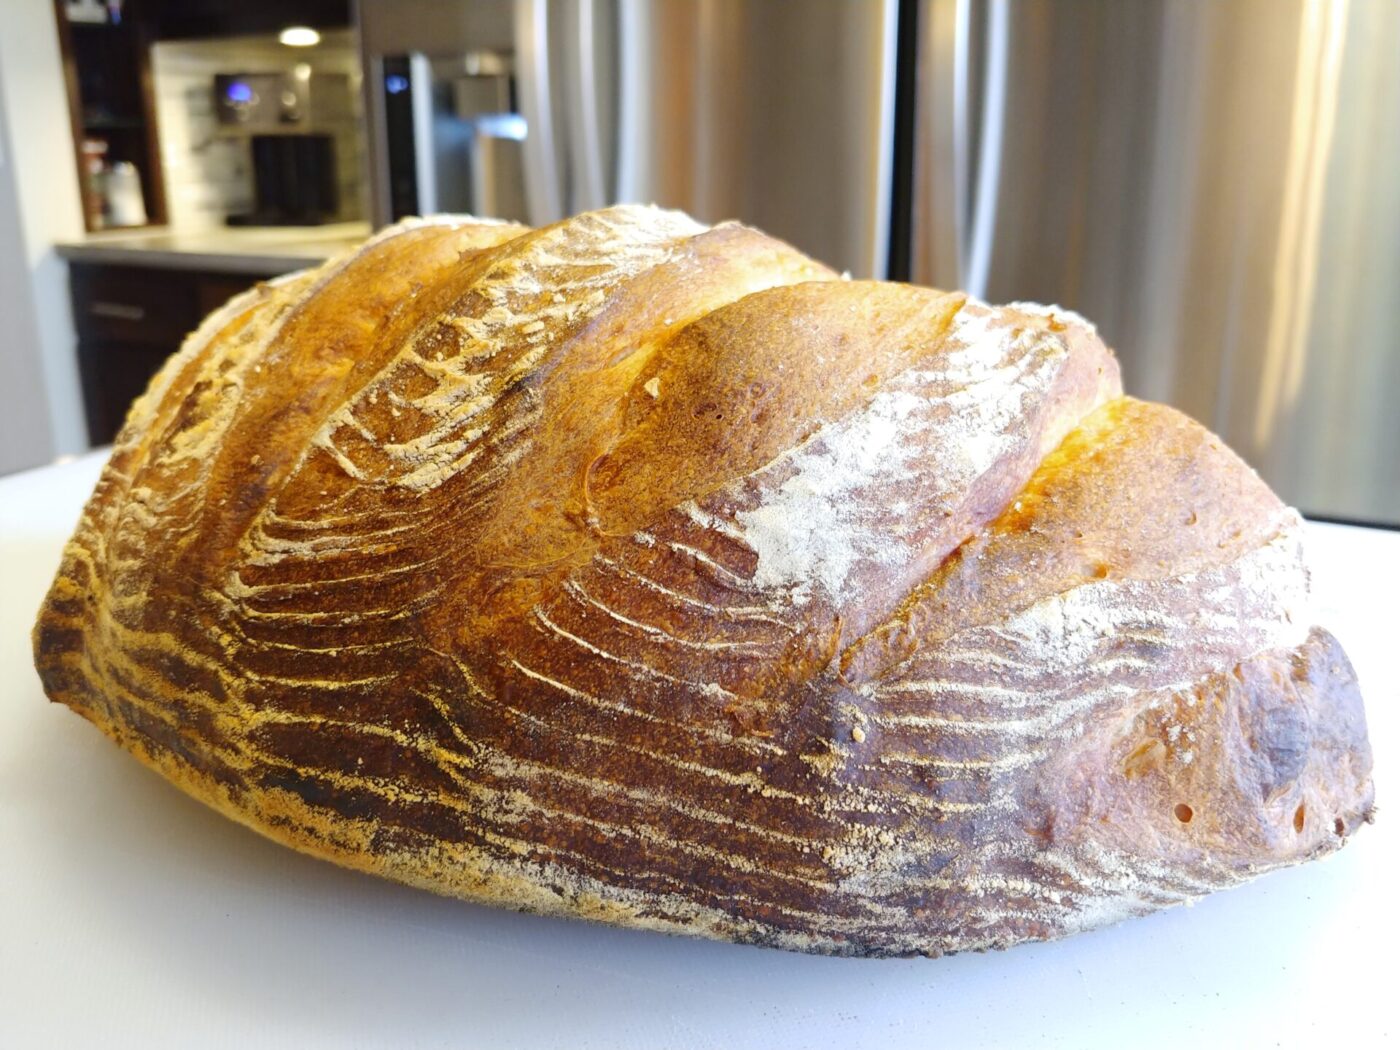
Popular questions
Can I really use this one bread dough to make both a large loaf and baguettes?
Yes, you absolutely can! That's one of the things I love most about my Rustic Bread or Baguettes recipe. The bread dough we prepare using bread flour and active dry yeast is incredibly versatile. The instructions I've provided in the recipe guide you through the two different shaping methods. You can follow the steps to form one beautiful, large loaf of rustic bread, or you can follow the steps to divide the dough and shape it into 3 or 4 classic baguettes</strong>. The key is to follow the specific proofing and baking times I've listed for each shape, as they are different.
Share
Click on the icons below to share "Title of the item to share"