
Main Course Recipes

Turkey with Gravy

10 - 12 servings
NEW

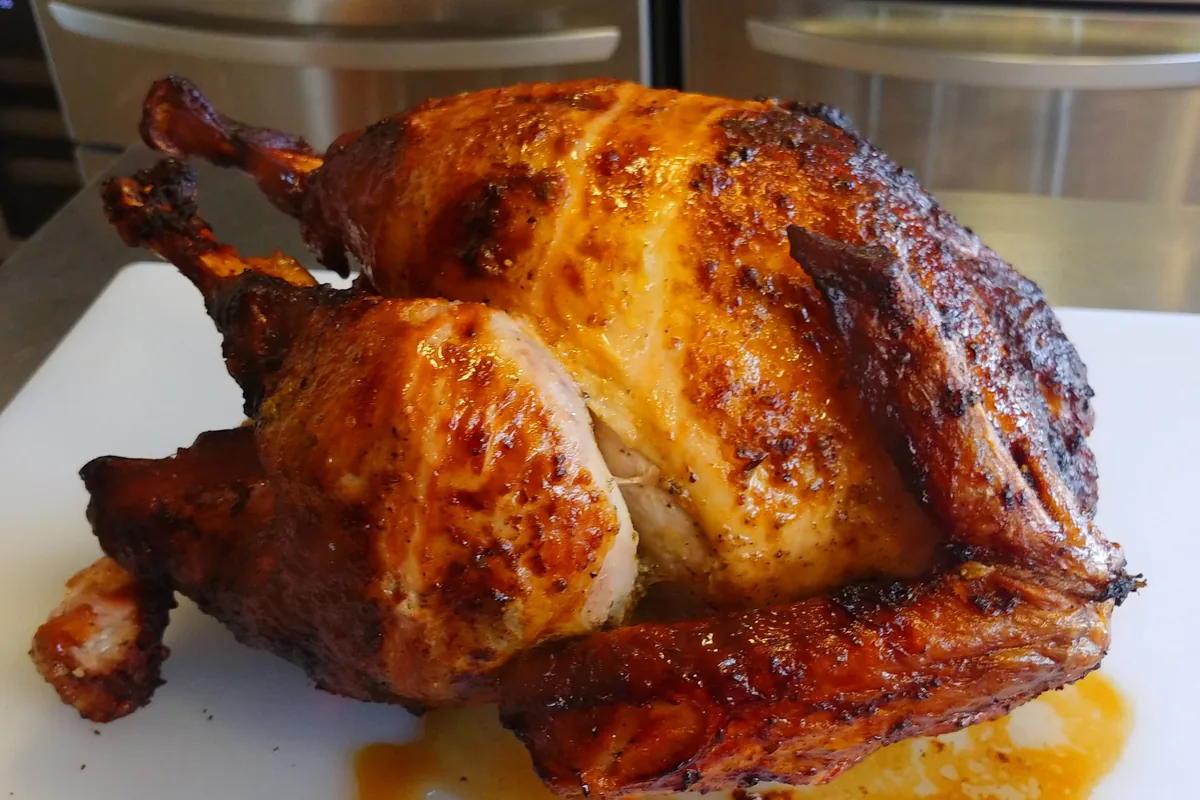
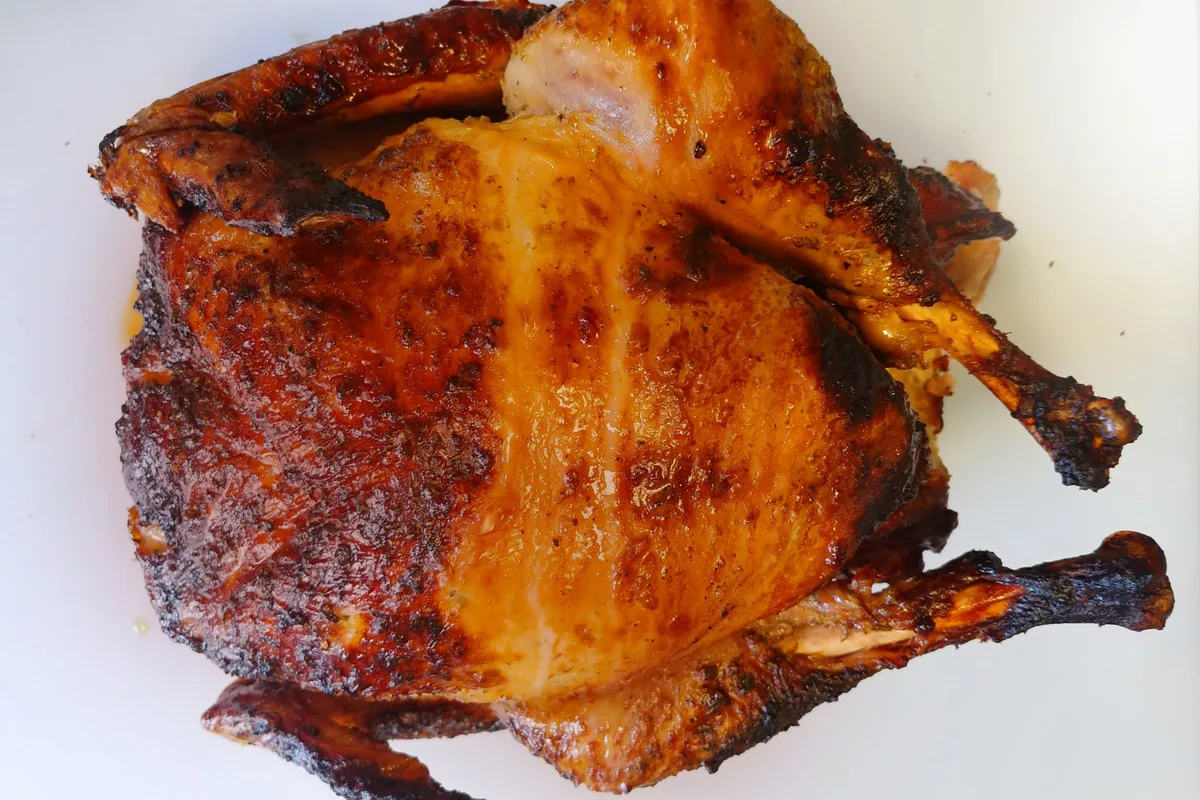
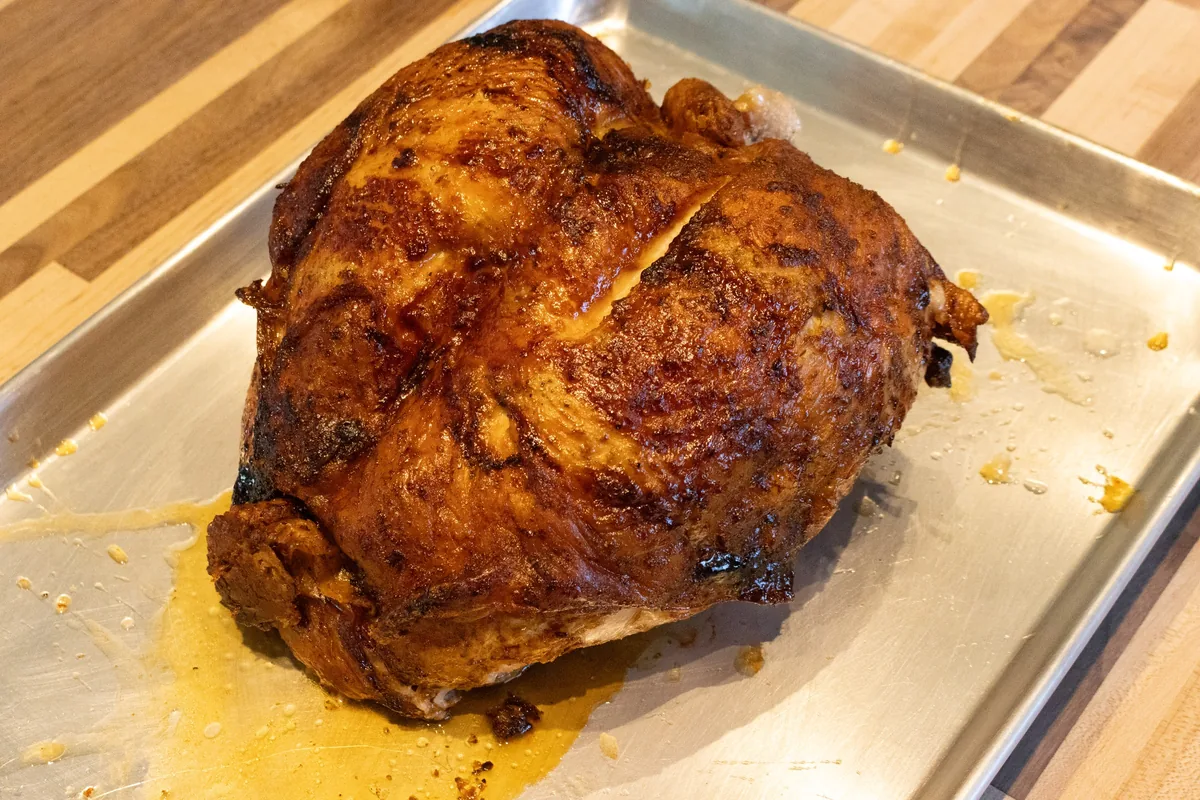
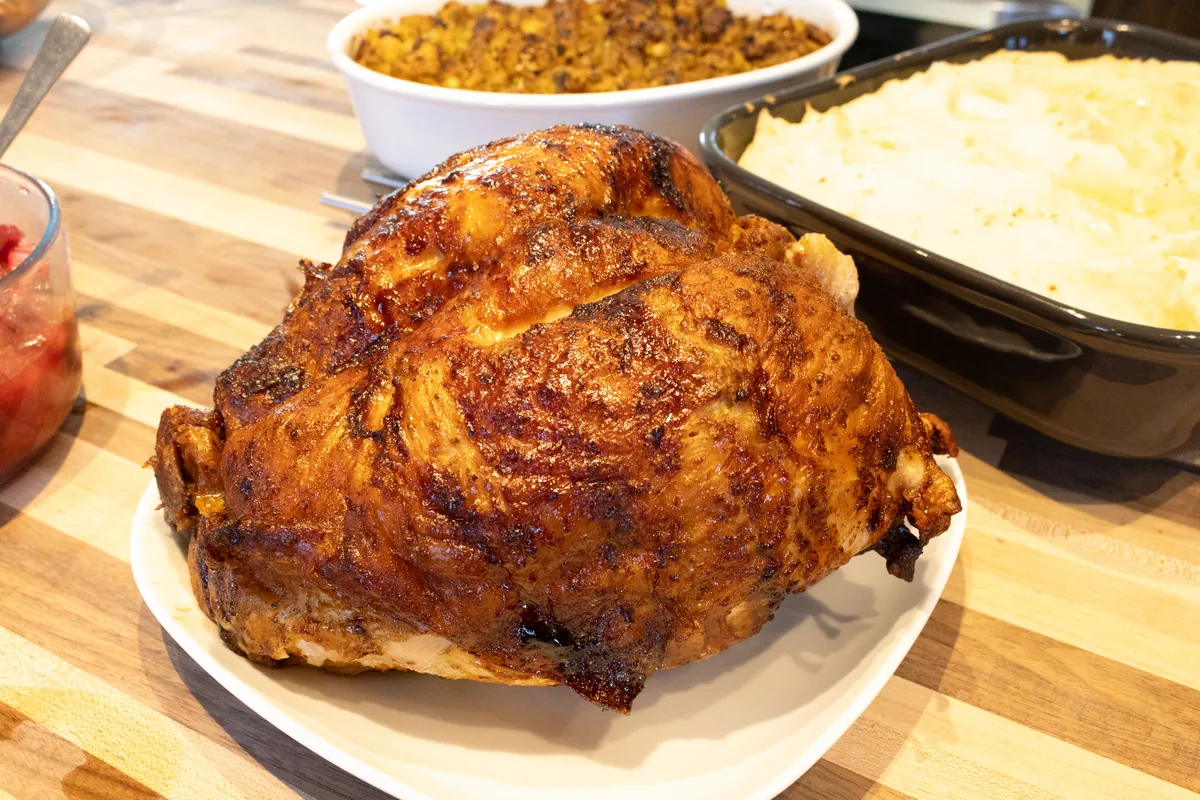
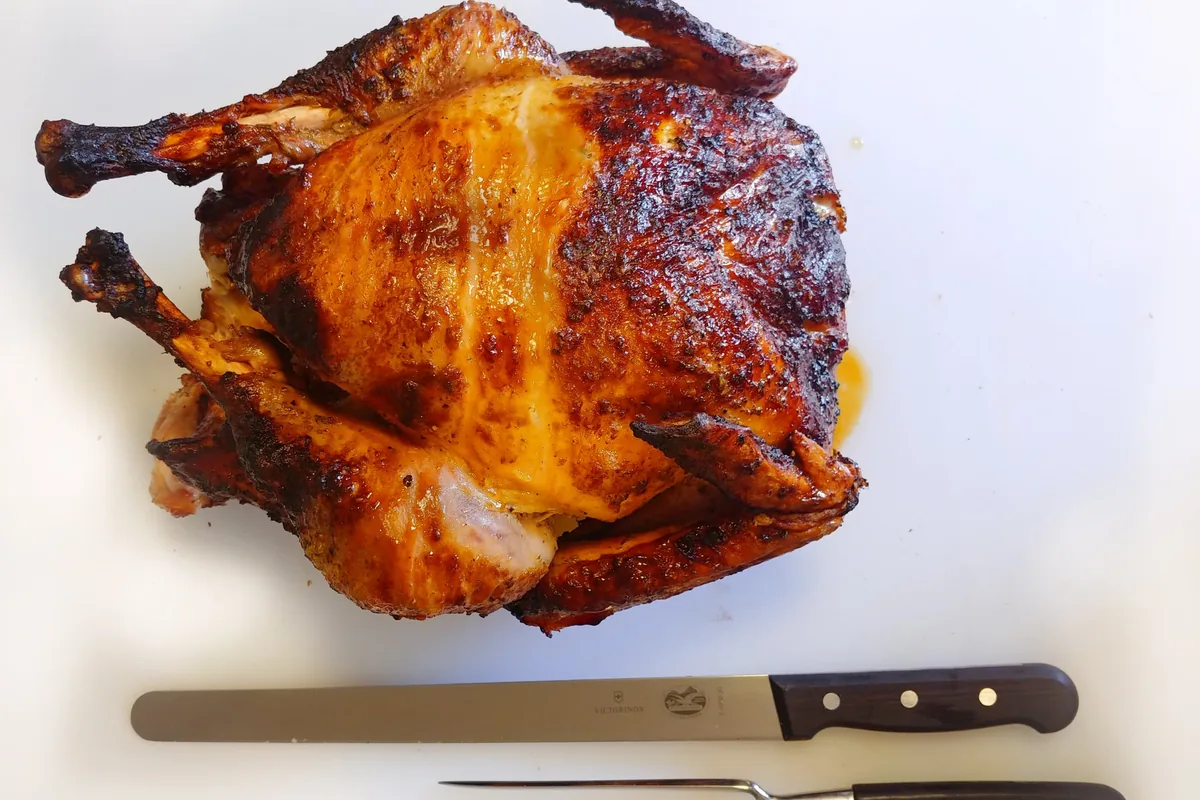
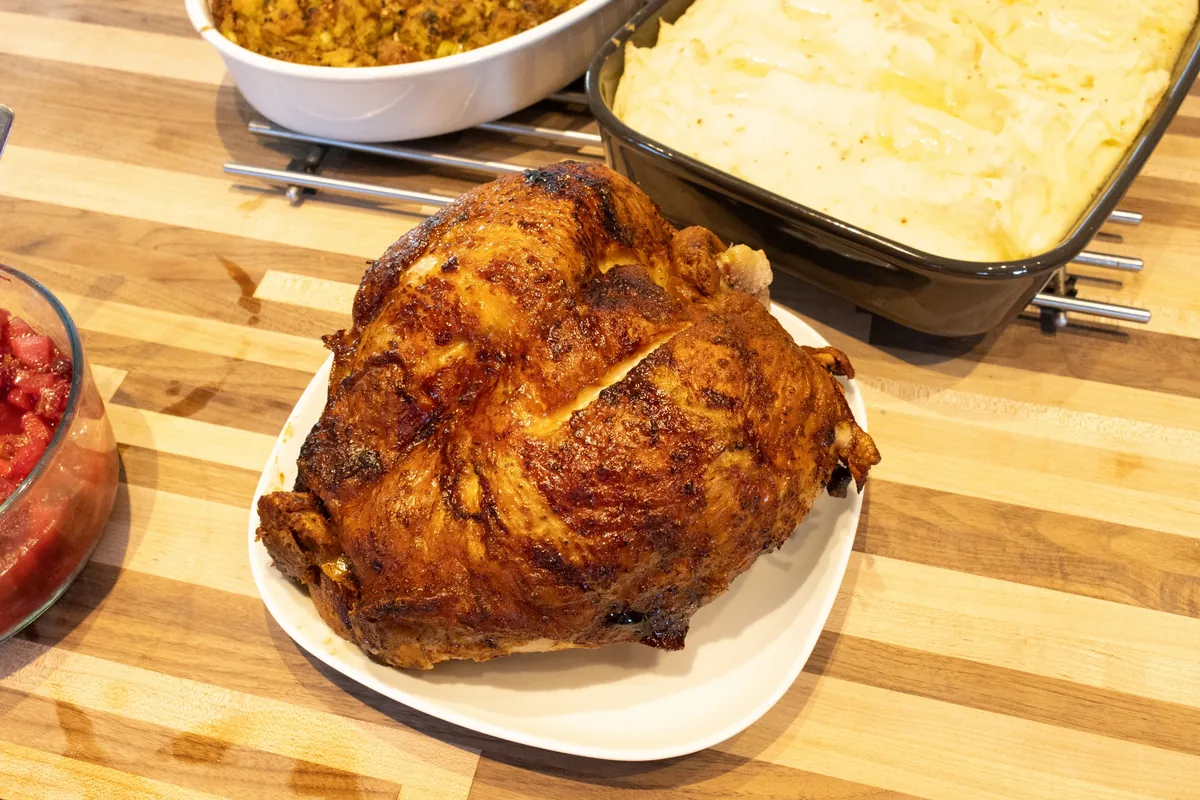
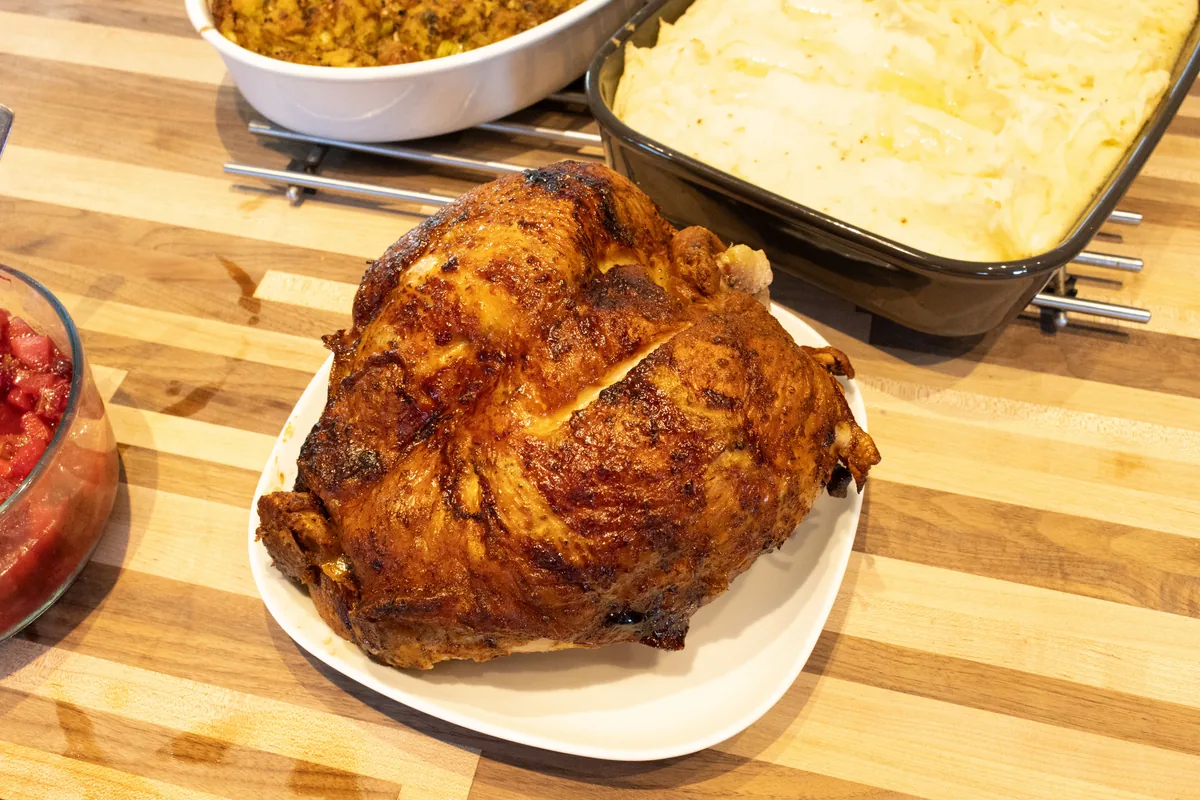
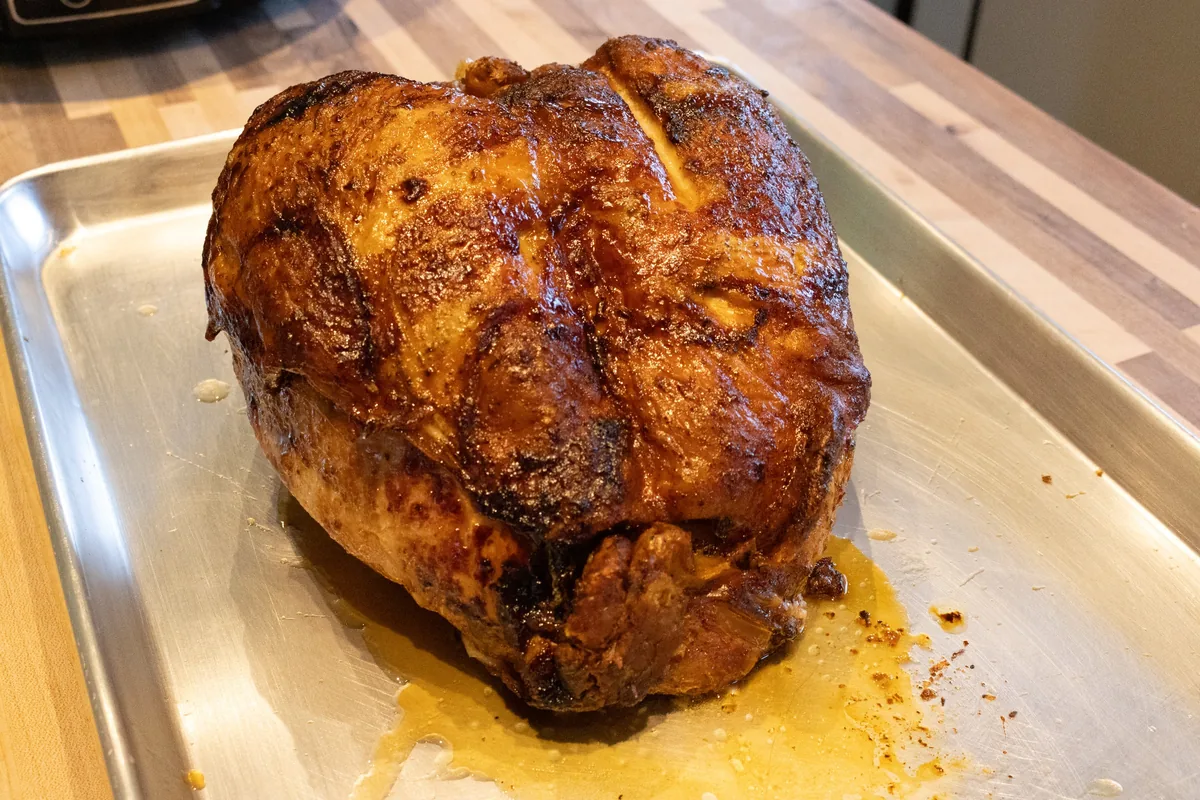
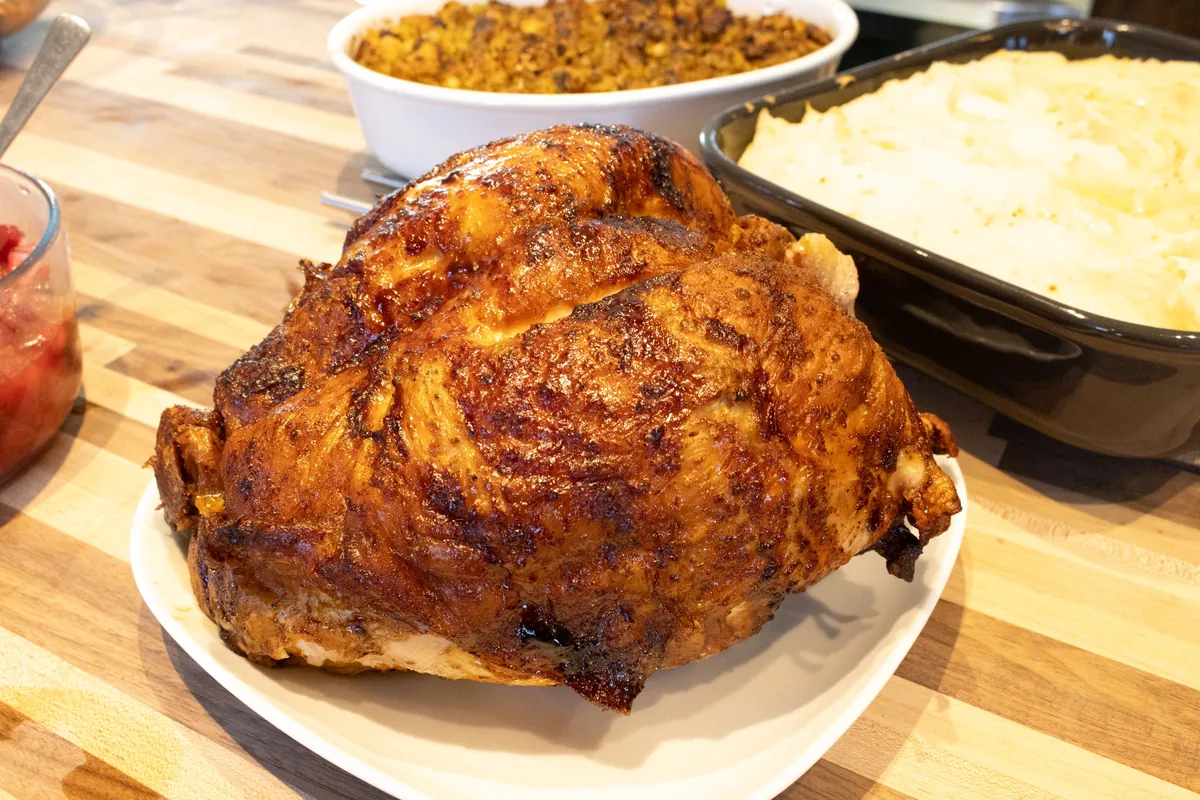
A beautifully roasted turkey is the centerpiece of any great holiday meal, and I'm here to ensure yours is unforgettable. My secret? A flavorful herb-butter marinade and a meat injector to guarantee every slice is perfectly seasoned and incredibly juicy—never dry! Whether you cho Read More

☆☆☆☆☆0x(write a review)👁10x
Published: 11.9.2026
3 h.
6 h.
1/5
583 calories Per Serving (of 10) Read More

Before You Start

Let’s talk about important parts of the recipe before you start…

Jump to Recipe

A Turkey That Is Seasoned All the Way Through

Most of the flavor you put on a big bird never gets past the skin. That is the whole reason this recipe starts with a marinade that goes into a food processor and comes out completely smooth — lemon juice, extra virgin olive oil, two sticks of melted butter, onion, sage, basil, chives, rosemary, six cloves of garlic, salt and pepper, blended until there are no pieces left. Smooth enough to load into a meat injector and push deep into the meat, right in front of the bone.

From there it is simple. The bird rests in that marinade overnight in the refrigerator, then goes into a 350°F oven or onto the rotisserie until it is fully cooked. While it rests on the cutting board, you build the gravy from the roasting juices, chicken broth and a few bones and scraps, and finish it with a flour slurry. By the time the gravy is the thickness you want, the turkey has had exactly the rest it needs and is still hot.

Blend the Marinade Until There Are No Pieces Left

Everything for the marinade goes into the food processor together — the juice from 2 large lemons, 1 ½ cups of extra virgin olive oil, 2 sticks of melted butter, half a roughly chopped onion, ¼ cup each of fresh sage, basil, chives and rosemary, 6 whole peeled garlic cloves, 2 tablespoons of salt and 1 teaspoon of ground pepper. Run it on high speed for a good 2 to 3 minutes, until it is genuinely smooth. This is the step people cut short, and it matters more than it looks: any surviving fleck of garlic or rosemary leaf will block the needle of the meat injector, and then you are standing there clearing it instead of working. Smooth also means the herbs are distributed through every drop, so wherever you inject, you are injecting the whole seasoning and not just oil. If you are using dried herbs instead of fresh, that is 1 tablespoon of each.

Melt the Butter Gently So It Does Not Explode

Two sticks of butter go into the marinade melted, and the way you melt them is worth a moment. Cut the butter into small pieces first, then microwave in very short bursts — a few seconds at a time with a few seconds of break between each one. Butter that is heated hard in one long go will spit and pop and you will be wiping out the microwave instead of cooking. If you would rather do it on the stove, melt it over medium heat with vigorous whisking. Either way, the butter wants to be liquid before it joins the lemon juice and oil in the processor, so the whole thing blends into one emulsion rather than separating into fat and juice.

Warm the Marinade Before It Goes Into the Injector

Once the marinade is blended, pour it into a medium microwave-safe bowl and warm it for 1 to 2 minutes, until it is slightly warm — not hot. Then give it a brief stir with a whisk so it is nicely combined again. There is a practical reason for this: the marinade is built on butter and olive oil, and as it sits it will start to firm up and separate. Slightly warm, it stays loose and even, draws easily into the meat injector and pushes through the needle without resistance. The whisk at the end is not optional busywork either — the heavier solids settle fast, and you want the herbs and salt going into the bird, not left in the bottom of the bowl.

How to Use the Meat Injector

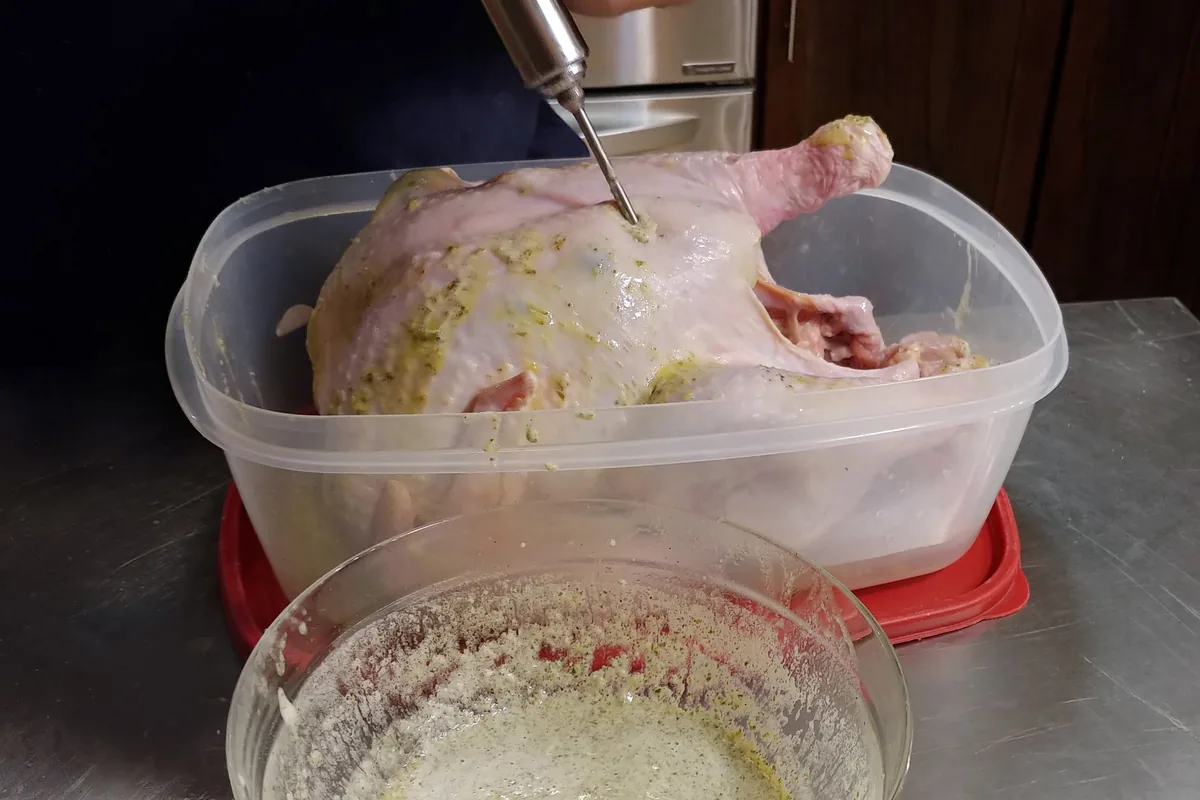
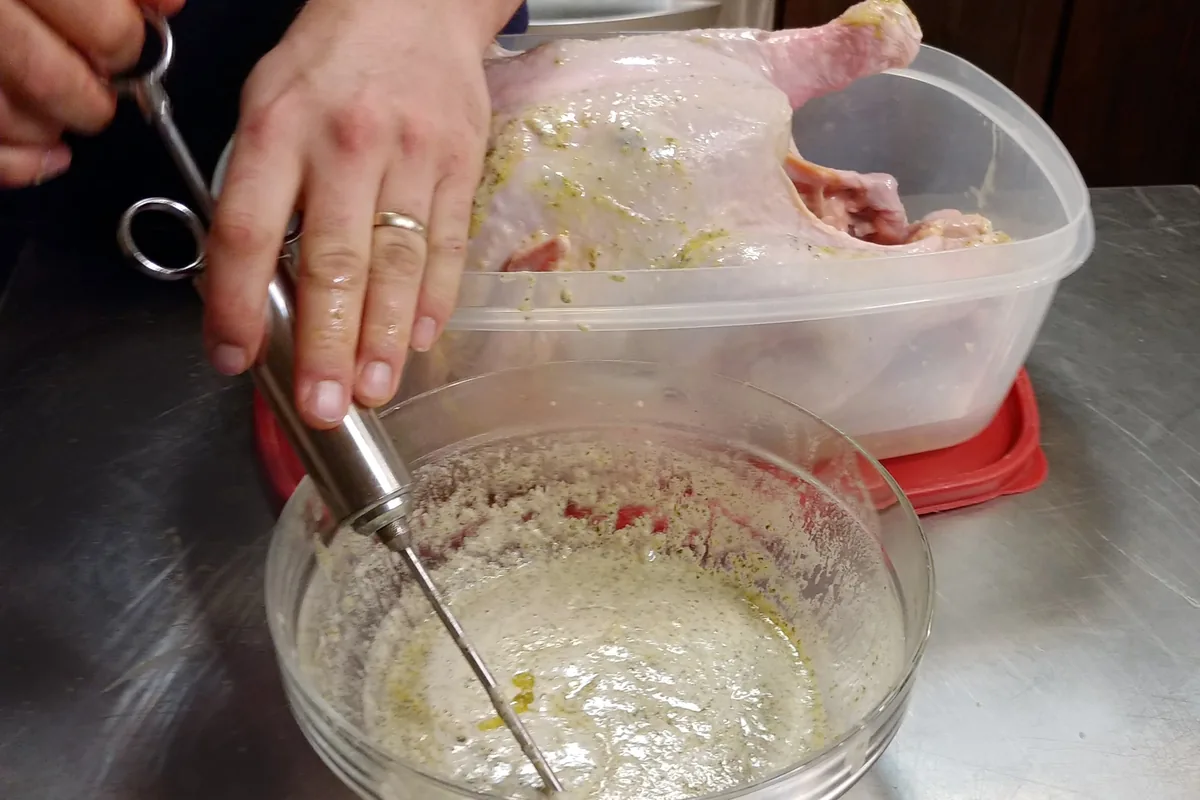
A meat injector is the tool that makes this Turkey with Gravy what it is, and you can buy one online fairly inexpensively — I promise it will become one of your favorite kitchen tools. Put the whole bird into a large mixing bowl, about 8 quarts or more, so nothing is wasted. Draw up part of the marinade and inject right in front of the bone, or about a third of the way deep if you are working with boneless meat. Then repeat, moving evenly around the bird and hitting different places, until the marinade is used up. A good amount of liquid will escape back out into the bowl as you work — that is normal, and you use about half of it to inject again. If you would rather skip the injector entirely, you can simply pour the marinade over the meat instead.

Marinate Overnight, and Season the Outside Too

After the injecting, turn the bird in the marinade that was released into the bowl so the whole outside is coated, then salt and pepper it generously on the breast side and the two other sides — freshly ground is best. Cover with plastic wrap and let it rest in the refrigerator overnight, or at least 3 hours if that is all the time you have. This is where the recipe really asks for your patience. The injected marinade needs time to travel through the muscle, and the surface salt needs time to work on the skin and the outer layer of meat. Plan the overnight rest into your schedule and the day of cooking becomes easy. One timing note: if you are stuffing the bird, do that right before it goes in to bake or onto the rotisserie, never the night before.

Roasting at 350°F, and What the Extra Stick of Butter Does

For the oven method, preheat to 350°F, set the turkey on a large baking pan and pour the marinade over it. Then lay 1 stick of butter, cut into about 8 thick slices, across the top of the bird. As the oven comes up to temperature those slices melt and run down over the breast, which is the part most likely to dry out. A few times during baking, spoon or ladle the juices from the pan back over the turkey. Total time depends entirely on the size of your bird — roughly 2 ½ hours or more for a whole turkey, 1 hour or more for a turkey breast — so treat those numbers as a planning guide, not a timer.

The Rotisserie Option

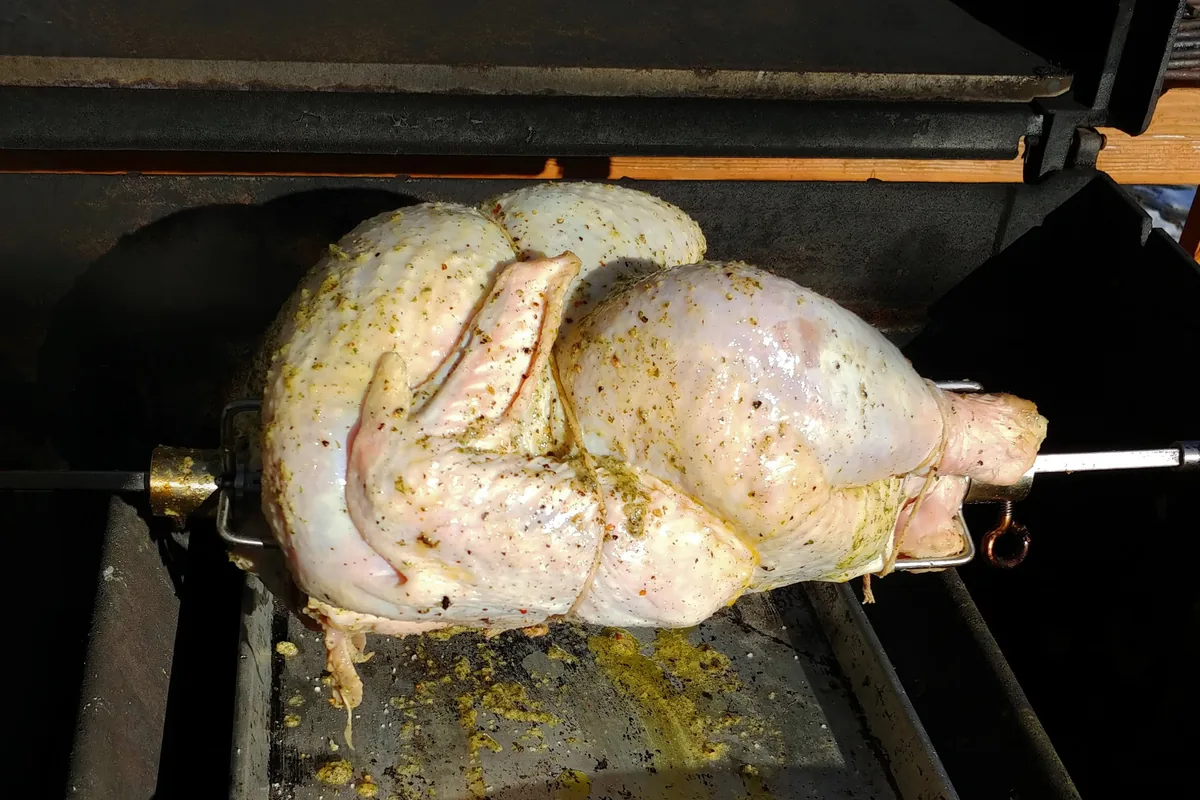
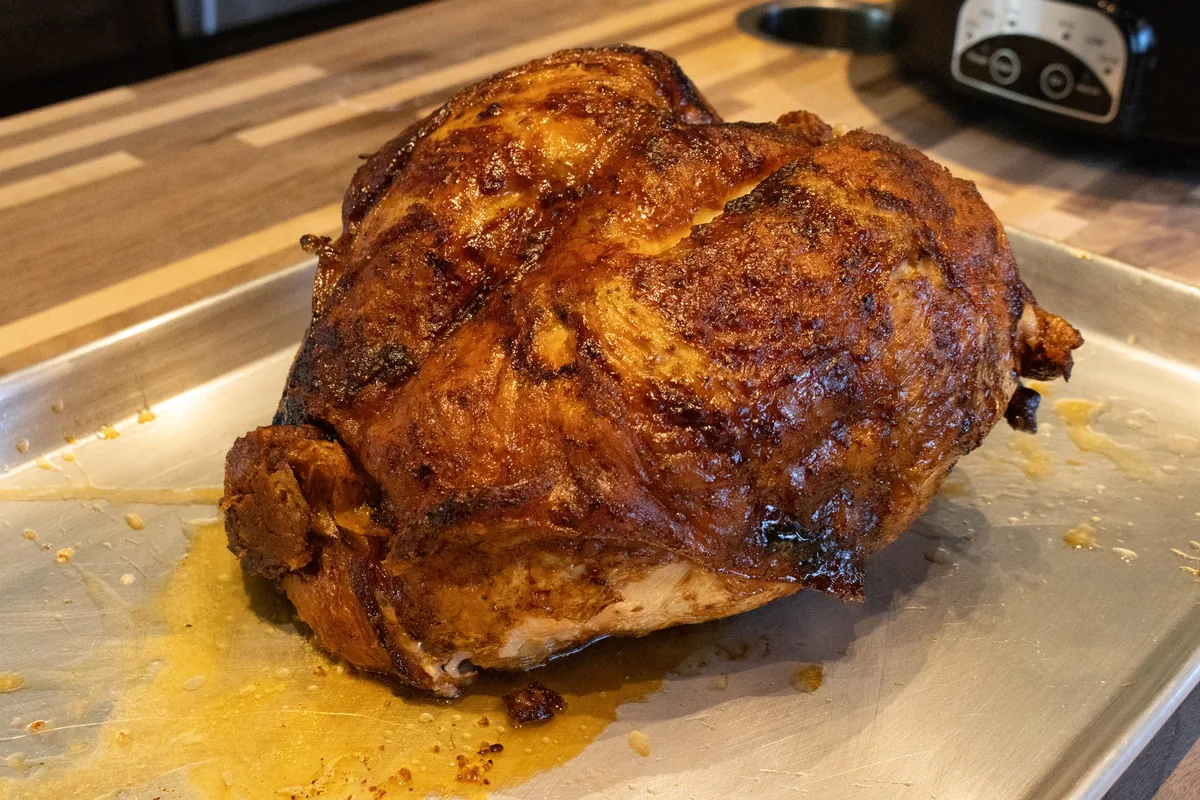
You can cook this same bird on a rotisserie, on a grill or in an oven with the convection baking setting turned on. Before you start, read your owner's manual so you understand the specific requirements and safety instructions for your equipment. Preheat to 350°F, then secure the turkey on the spit and lock it tightly in the center with the side attachments — the meat forks — so it cannot shift as it turns. Set a baking dish underneath to catch the drippings; it makes cleanup much easier and it collects the juices you will want for the gravy. On a large grill, turn off the burner directly under the bird and leave the side burners on high for indirect heat. On a small grill, where indirect heat is not possible, simply lower the flame directly under the turkey. Timing is the same as the oven: about 2 ½ hours or more for a whole bird.

Use a Thermometer — 165°F Is the Number

Size, shape, oven calibration and whether the bird is stuffed all shift the cooking time, which is why the recipe gives approximate hours rather than a fixed one. The only reliable answer comes from a food thermometer: check that you have reached the minimum recommended safe serving temperature for poultry, 165°F. Buy the thermometer before you buy anything else on the tools list if you do not already own one. It is the difference between carving with confidence and cutting into the thickest part hoping for the best, and on a 12 to 15 pound bird that you have marinated overnight, confidence is worth a lot.

Rest the Turkey While the Gravy Cooks

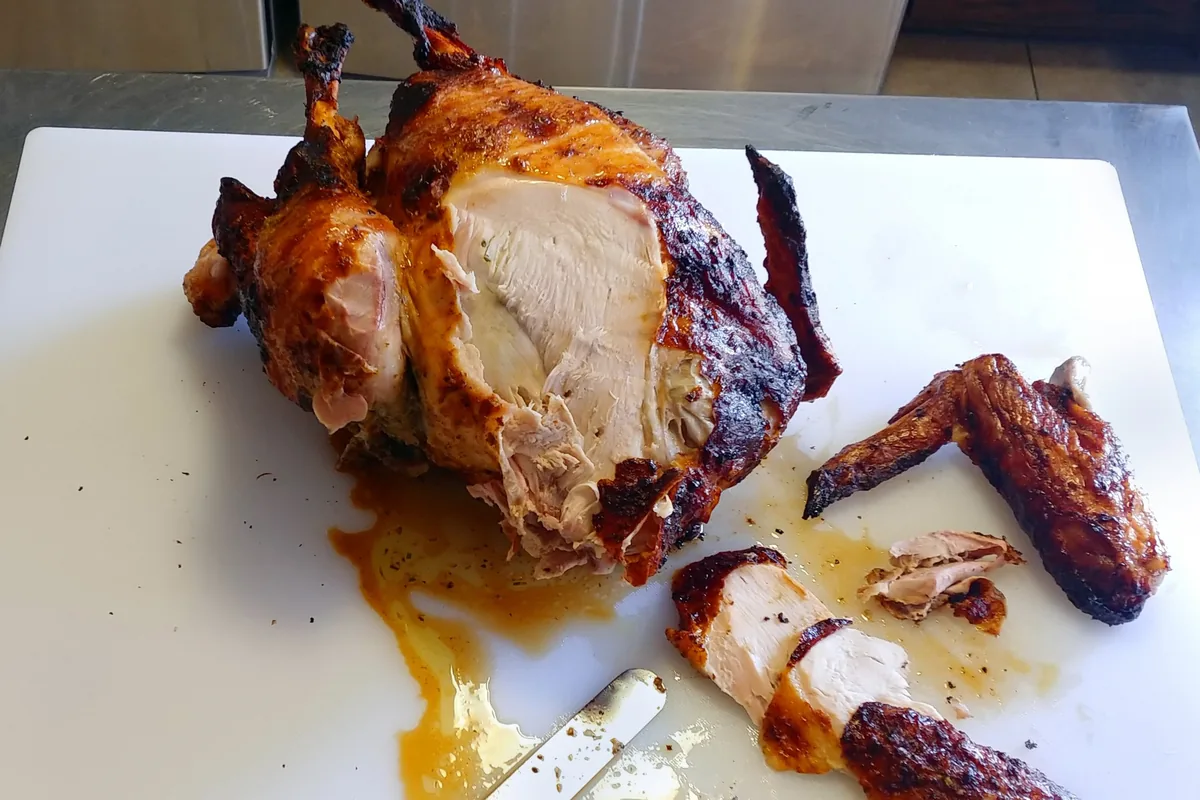
When the bird is done, move it to a cutting board — and do not carve it yet. Instead, consider taking off the wings, some skin and possibly one drumstick, because those are what you will use to build the gravy. Keep the meat from those removed parts next to the turkey and cover it with aluminum foil so it does not go cold. This is the part of the recipe I like best, because the two jobs solve each other: the time it takes to cook the gravy is exactly the amount of resting time the turkey needs, and because you are working right there, the bird never has a chance to cool down. Start the gravy immediately after the turkey comes out of the oven or off the rotisserie.

Building the Gravy and Thickening With the Slurry

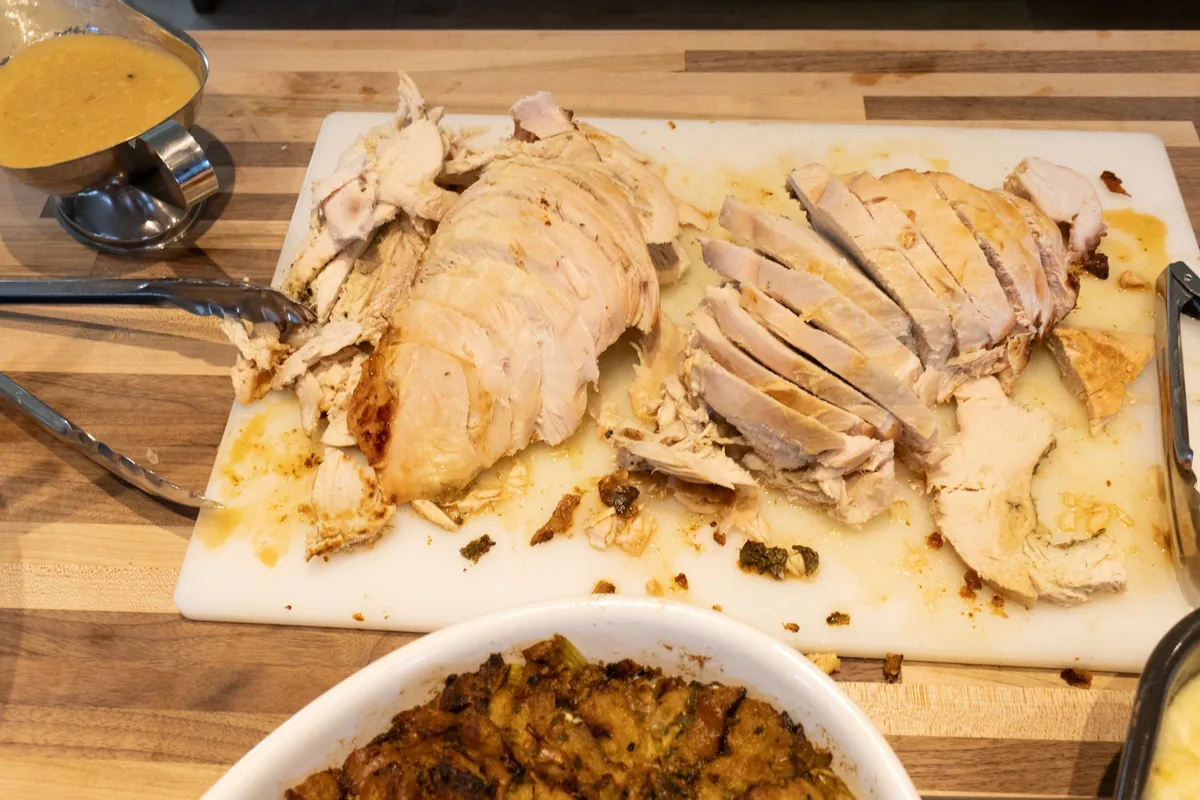
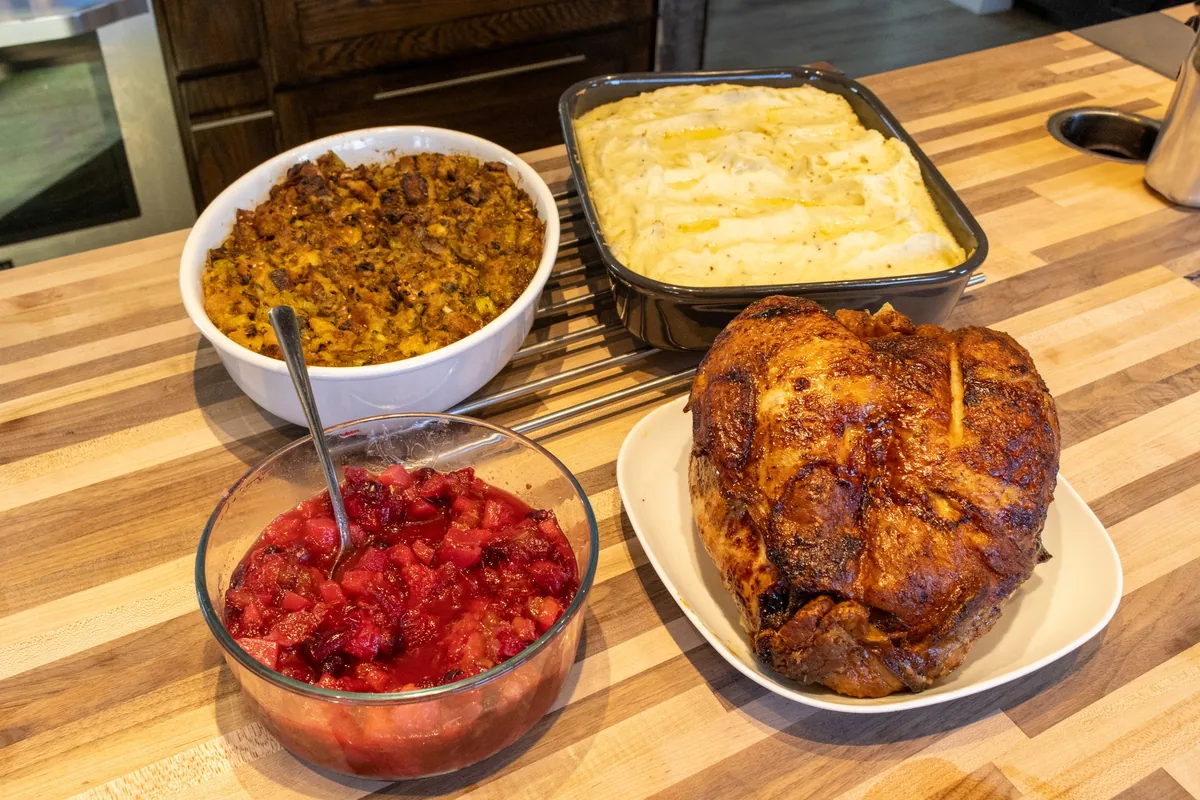
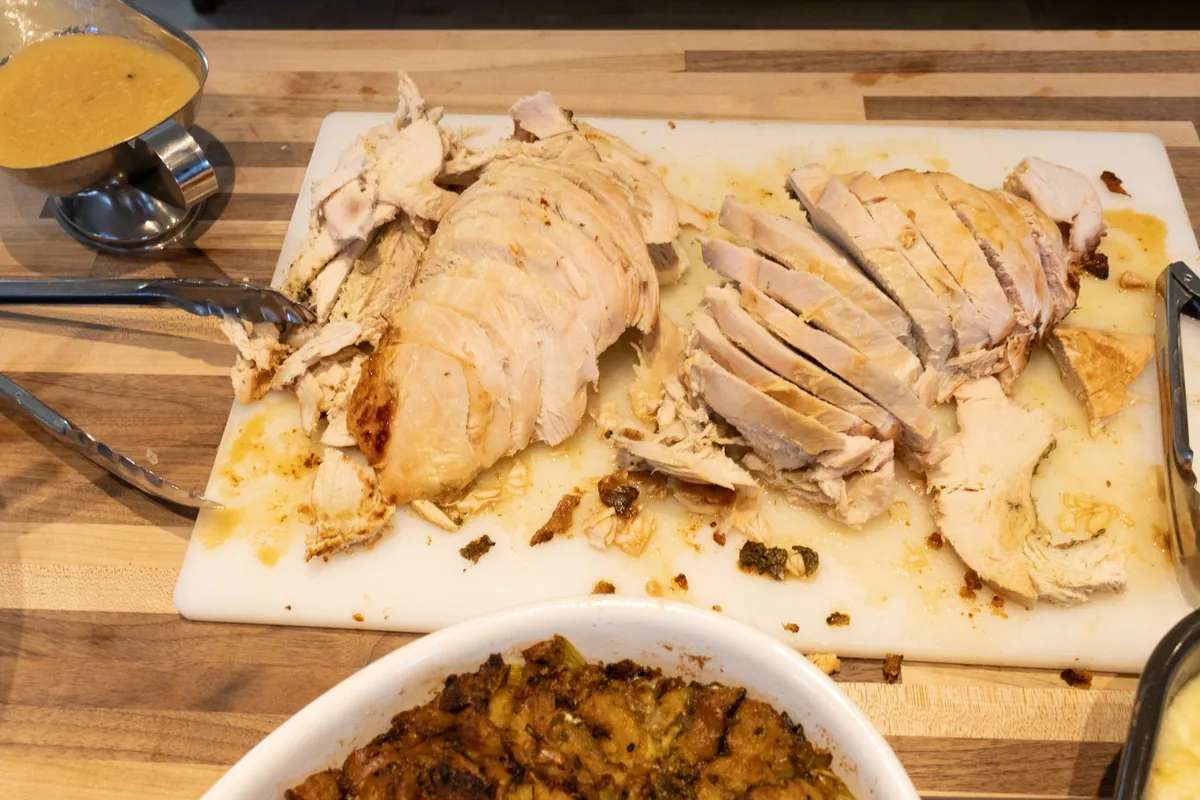
Put a medium saucepan — about 4 quarts — over medium-high heat with up to 1 cup of the juices from baking, 2 cups of chicken broth, and the skin, bones, wingtips and any other roasted parts you set aside. Let it cook with occasional stirring for about 10 minutes, until the flavors blend together. While that happens, whisk ¼ cup of water, 1 tablespoon of all-purpose flour, a pinch of salt and a pinch of ground pepper in a small bowl until fully combined, then set it aside. Flour settles fast, so give the slurry one final stir just before you use it. Remove the meat and bones from the pan, then drizzle the slurry in slowly, whisking constantly so it incorporates without lumps, and keep cooking with occasional whisking until it reaches the thickness you want. Then carve the turkey into easy-to-serve slices and bring it to the table with the warm gravy, stuffing, creamy mashed potatoes and your other favorite sides.

Cooking for a Smaller Table

The recipe is written for one whole turkey of about 12 to 15 pounds, but it scales. You can substitute 6 to 7 pounds of turkey breast — in that case cut all the other ingredient amounts in half — or use 2 large chickens instead. The method does not change: the same blended marinade, the same injecting, the same overnight rest, the same 350°F. What changes is the clock. A turkey breast will be in the neighborhood of 1 hour or more rather than 2 ½ hours or more, and for boneless meat you inject about a third of the way deep instead of aiming in front of the bone. The thermometer still decides when it is finished.

Popular questions

How long should I marinate the turkey before cooking?

You should let the turkey rest in the marinade overnight in the refrigerator, or at least 3 hours.

Turkey with Gravy

10 - 12 servingsNEWPublished: 11.9.2026 ☆☆☆☆☆0x(write a review)👁10x
3 h.
6 h.
1/5
🖨Print

Ingredients:

Click any ingredient to learn more
Juice from 2 large lemons
2 sticks (½ LB) of butter - melted*
½ medium onion - peeled and roughly chopped
¼ cup of fresh sage - roughly chopped (or 1 TBSP of dried)
¼ cup of fresh basil - roughly chopped (or 1 TBSP of dried)
¼ cup of fresh chives - roughly chopped (or spring onion or 1 TBSP of dried)
¼ cup of fresh rosemary - roughly chopped (or 1 TBSP of dried)
6 cloves of garlic - peeled
2 TBSP of salt
1 TSP of ground pepper
1 piece (about 12 - 15 LB) of Turkey **
Extra salt and pepper - preferably freshly ground
Stuff the bird or prepare as a side
For roasting only
1 stick (¼ LB) of butter - sliced into about 8 thick slices
Optionally, prepare gravy
2 cups of chicken broth
¼ cup of water
Pinch of Salt
Pinch of ground pepper
* Cut butter into small pieces before melting. Then, microwave for a short time (a few seconds each) with a few seconds break between - to prevent a little "explosion". Optionally, melt butter over medium heat with vigorous whisking. ** Optionally, substitute with 6-7 LB. of turkey breasts (in this case, lower the amount of other ingredients to ½) or 2 large chickens.

Nutrition per 1 Serving:(recipe split into 10 servings)

Estimated
Calories 583 Protein 2.8 g Fat 61.8 g Saturated fat 22.8 g Carbohydrate 8.1 g Sugars 1.2 g Fiber 3.2 g Sodium 1245 mg Cholesterol 74 mg
Estimated. Worked out from the ingredients above using the United States Department of Agriculture’s FoodData Central reference data. An estimate, not a measurement — brands, sizes and how much of a marinade actually ends up on the plate all move it.
Directions:

1.Marinade:

Let’s start preparing Turkey with Gravy!

1.1.
Place into a kitchen processor:

Juice from 2 large lemons

1 ½ cups of Extra Virgin Olive Oil
2 sticks of butter
½ onion - roughly chopped
¼ cup of fresh sage - roughly chopped
¼ cup of fresh basil - roughly chopped
¼ cup of fresh chives - roughly chopped
¼ cup of fresh rosemary - roughly chopped
6 cloves of garlic - whole
2 TBSP of salt
1 TSP of ground pepper

And process on high speed until smooth - no pieces (about 2 - 3 minutes).

1.2.

Then pour the contents into a medium bowl (suitable for microwave) and microwave for 1 - 2 minutes until slightly warm.

1.3.

Then briefly stir with a whisk to make sure it is nicely combined.

2.Inject Meat:

2.1.

Place the whole bird into a large mixing bowl.

2.2.

Collect part of the marinade with the meat injector and inject into the turkey -- inject right in front of the bone (or ⅓ deep if you are preparing boneless meat).

2.3.

Repeat injecting evenly into different places on the meat until you run out of marinade.

2.4.

Then, do the same thing with about ½ of the marinade, which was released during injecting.

2.5.

Turn the bird in the marinade released during injecting.

2.6.

Generously salt and pepper the bird on the breast side and the two other sides.

2.7.

Cover the meat with plastic wrap and let the meat rest (marinating) overnight in the refrigerator (or at least 3 hours).

2.8.

If you put stuffing in the bird, do so right before baking/rotisserie.

3.Roast in the Oven or Prepare on a Rotisserie:

A.

Roast in the oven:

3.1.1.

Set the oven to 350°F to preheat.

3.1.2.

Place the turkey on a large baking pan and pour the marinade over.

3.1.3.

Place 1 stick of butter on the top of the bird.

3.1.4.
Bake in a preheated oven until fully cooked. *

Important: The total baking time will depend on the exact size of the bird (approximately 2 ½ + hours for the whole bird or 1+ hours for a turkey breast).

3.1.5.

Pour the juices from baking over the turkey a few times during baking.

3.1.6.
When done, remove the turkey from the oven and place it on a cutting board to rest while you prepare the gravy.

Important:

  • Do not carve the turkey yet, but consider removing the wings, some skin, and possibly one drumstick to get bones for the gravy.
  • Keep the meat from these removed parts close to the turkey and cover it with aluminum foil to prevent it from getting cold
  • The time it takes to cook the gravy provides just the right amount of resting time without the bird getting cold.
B.
Prepare on a rotisserie:

Important: Before you begin, please read your owner's manual to fully understand the specific requirements and safety instructions for your rotisserie.

3.2.1.

Preheat your grill or oven to 350°F. (If using an oven, turn on the convection baking setting).

3.2.2.

Meanwhile, secure your turkey onto the rotisserie spit. Lock it tightly in the center using the side attachments (meat forks) to prevent it from moving as it turns.

3.2.3.
Once the grill or oven is preheated, carefully set the spit and turkey in place.

Tip: Place a baking dish underneath the turkey to catch the drippings and make cleanup much easier.

3.2.4.

Manage the heat:

•

Large grills: Turn off the burner directly underneath the turkey and leave the side burners on high to utilize indirect heat.

•

Small grills: If you cannot use indirect heat, simply lower the flame directly under the bird.

3.2.5.
Prepare on Rotisseries until fully cooked. *

Important: The total time will depend on the exact size of the bird (approximately 2 ½ + hours for the whole bird or 1+ hours for a turkey breast).

3.2.6.
When done, remove the turkey from the rotisserie, remove the rotisserie spit, and place it on a cutting board to rest while you prepare the gravy.

Important:

  • Do not carve the turkey yet, but consider removing the wings, some skin, and possibly one drumstick to get bones for the gravy.
  • Keep the meat from these removed parts close to the turkey and cover it with aluminum foil to prevent it from getting cold.
  • The time it takes to cook the gravy provides just the right amount of resting time without the bird getting cold.

4.Gravy:

Important: Start making the gravy right after you remove the turkey from the oven or rotisserie.

4.1.
Place a medium saucepan on medium-high heat and add:

Up to 1 cup of juices from baking

2 cups of chicken broth

Some skin and bones, wingtips, and optionally, other parts of the roasted meat

Let cook together with occasional stirring until the flavors blend together (about 10 minutes).

4.2.
Meanwhile, prepare the slurry. In a small bowl, whisk together:
¼ cup of water
1 TBSP of flour
Pinch of Salt
Pinch of ground pepper

Whisk until fully combined, then set aside.

Important: Just before using, give the slurry one final stir to remix any flour that has settled to the bottom.

4.3.

Remove meat and bones.

4.4.

Then slowly drizzle the slurry into the hot juices, whisking constantly until it is fully incorporated.

4.5.

Then cook with occasional whisking until the desired thickness is reached.

5.Carve and Serve Turkey with Gravy:

5.1.

Once the gravy is ready, carve the turkey into easy-to-serve slices.

5.2.
Serve alongside the warm gravy, stuffing, creamy mashed potatoes, and your other favorite sides.
* Check with a food thermometer to make sure that you have reached the minimum recommended safe serving temperature for poultry of 165°F.
Kitchen Guide

Poultry

The USDA minimum safe internal temperature is 165°F.

The popular serving temperature is the same as the minimum serving temperature.

Read More
Poultry
Turkey with Gravy
Turkey with GravyTurkey with GravyTurkey with GravyTurkey with GravyTurkey with GravyTurkey with GravyTurkey with GravyTurkey with GravyTurkey with GravyTurkey with GravyTurkey with GravyTurkey with Gravy

Cook to safe temperatures and check for allergens. Nutrition values and results are estimates and may vary.

As an Amazon Associate I earn from qualifying purchases. Some of the ingredient and tool links above are affiliate links: if you buy through them the price is the same for you, and it helps keep these recipes free. #ad

Show moreShow less of the Disclaimer

Disclaimer

Last updated October 27, 2026

GENERAL INFORMATION

The content provided by Checked Solutions, LLC (doing business as Tom the Chef) ("we," "us," or "our") on https://www.tomthechef.com (the "Site") and through our related services — including recipes, articles, columns, live and recorded cooking classes, and other materials — is for general informational and educational purposes only and reflects the personal opinions and experience of the author. All information is provided in good faith; however, we make no representation or warranty of any kind, express or implied, regarding the accuracy, adequacy, validity, reliability, availability, or completeness of any information. Your use of the Site and your reliance on any information is solely at your own risk.

NO PROFESSIONAL ADVICE

Our content is not intended to provide, and does not constitute, professional dietary, medical, nutritional, or legal advice. Before making any health- or diet-related decision based on our content, consult a qualified medical or nutritional professional.

COOKING, FOOD SAFETY, AND YOUR RESPONSIBILITY

You are solely responsible for evaluating our recipes and instructions and using your own judgment before following them. To the fullest extent permitted by law, we are not responsible for any outcome or consequence resulting from your use of the Site or our content, including but not limited to:

  • Food Safety: any health risk related to food handling, food quality, cross-contamination, or failure to follow USDA recommendations (including minimum safe cooking temperatures).
  • Preparation Safety: the safe handling of cooking equipment, hot surfaces, sharp knives, or the suitability of tools for any task.
  • Allergies and Dietary Restrictions: any allergic reaction or health issue arising from ingredients in our recipes. You are responsible for ensuring that all ingredients and methods are safe and appropriate for your dietary restrictions, allergies, and health.
  • Recipe Outcomes: the final look, taste, yield, or success of a recipe, which may vary based on ingredients, equipment, oven temperatures, altitude, humidity, and skill.
  • Ingredients and Equipment: the sourcing, quality, and condition of ingredients, tools, or equipment.
  • Nutritional Information: the accuracy of any nutritional data, which is an estimate provided as a courtesy and should not be relied on as a guarantee.
  • Errors and Omissions: any errors, typos, or unclear directions in our content.

EXTERNAL LINKS

The Site may contain links to third-party websites or content, including in banners or other advertising. We do not investigate, monitor, or guarantee the accuracy or reliability of third-party sites. We are not responsible for them or for any transaction between you and a third party. Accessing third-party sites is at your own risk.

TESTIMONIALS, REVIEWS, AND COMMENTS

The Site may contain testimonials, reviews, and comments from users. These reflect the personal experiences and opinions of individual users and may not be representative of all users; your individual results may vary. Testimonials and reviews may be shortened for brevity or corrected for grammar. The views expressed belong solely to the individual. They are not intended as claims that our products or services diagnose, treat, cure, or prevent any disease or medical condition.

CONTENT OWNERSHIP

All content published by Tom the Chef is the intellectual property of Checked Solutions, LLC and its author, unless otherwise noted, and may not be used except as permitted in our Terms of Use.

AFFILIATE DISCLOSURE

As an Amazon Associate, we earn from qualifying purchases. Some ingredient and tool links on the Site are affiliate links. If you buy through them, the price is the same for you, and it helps support our content. We only recommend products we genuinely use and trust.

LIMITATION OF LIABILITY

Under no circumstances shall Checked Solutions, LLC or Tom the Chef have any liability to you for any loss or damage of any kind incurred as a result of the use of the Site or reliance on any information provided. This Disclaimer forms part of, and is subject to, our Terms of Use.