
Side Recipes
Pesto
About 2 cups
Welcome to my Pesto Recipe, a fantastic addition to your cold sauces collection. This cold cuisine favorite is incredibly versatile, perfect for pasta, salads, or served as an appetizer on small pieces of bread. You simply cannot buy the freshness of this homemade pesto in the store. Using fresh basil leaves, pine nuts, and Extra Virgin Olive Oil blended to perfection in your kitchen food processor, you will create a rich and vibrant sauce in just ten minutes. Not only does this taste amazing with its touch of parmesan cheese, but making homemade pesto provides you with huge savings, especially if you use homegrown ingredients. Let's make it together and store it in clean small jars for the best flavor! Read More
Side Recipes
VegetarianGluten-freeLow-carb
Before You Start
Let’s talk about important parts of the recipe before you start…
Welcome to My Pesto Recipe
I am so incredibly excited to share my Pesto Recipe with you today. If you are looking for the absolute best among cold sauces, this cold cuisine staple is going to transform your meals. I truly believe that you cannot buy the freshness of this homemade pesto in any store. By taking just ten minutes of your time, you can blend together fresh basil leaves, pine nuts, a whole peeled clove of garlic, and high-quality Extra Virgin Olive Oil right in your kitchen food processor. Once it is perfectly smooth, we add grated parmesan cheese to bring all those incredible flavors together. I love making this because it provides huge savings, particularly if you have a garden. After we finish processing everything, we will store it in clean small jars with an extra layer of oil on top. You are going to love this vibrant, fresh homemade pesto!
1. Processing the Base Ingredients
The very first and most important step in my Pesto Recipe is processing the foundational ingredients to create the perfect base for our cold sauces. To begin this cold cuisine masterpiece, you will place two cups of fresh basil leaves, half a cup of pine nuts, one whole peeled clove of garlic, three-quarters of a cup of Extra Virgin Olive Oil, one-quarter teaspoon of salt, and one-quarter teaspoon of ground pepper directly into your kitchen food processor. If you prefer, you can use cashews or walnuts instead of pine nuts, but you must ensure they are blended well. Turn your kitchen food processor on high speed and process the mixture until it is completely smooth, which usually takes about three to four minutes. This intense blending is what releases the vibrant oils from the fresh basil leaves, ensuring your homemade pesto has that unmistakable, bright flavor that you simply cannot buy in a store.
2. Incorporating the Parmesan Cheese
Once the base of your Pesto Recipe is beautifully smooth, the next crucial phase is incorporating the cheese. For this step, you will add half a cup of grated parmesan cheese directly into the kitchen food processor with your blended fresh basil leaves, pine nuts, and Extra Virgin Olive Oil. You will process the mixture again until all the ingredients are thoroughly incorporated, which should take about one to two minutes. The parmesan cheese adds a deeply savory richness that balances the bright notes of the fresh basil leaves perfectly, elevating this dish to the top tier of cold sauces. It is this careful integration of parmesan cheese into the homemade pesto that gives it the classic, thick texture essential for this cold cuisine favorite. Remember, patience here is key to achieving the perfect consistency before we move it into our small jars.
3. Scraping the Kitchen Food Processor
While making this Pesto Recipe, you might notice that some parts of the ingredients stick to the side of the kitchen food processor during processing. This is a completely normal part of making homemade pesto! If this happens while you are blending the fresh basil leaves, pine nuts, Extra Virgin Olive Oil, and parmesan cheese, simply stop the kitchen food processor. Take a silicone spatula and carefully push the stuck ingredients back down into the mixture. Then, secure the lid and continue processing. Ensuring that every little bit of the fresh basil leaves and pine nuts is blended perfectly guarantees that your cold cuisine creation will have a uniform texture. You want every spoonful of these cold sauces to be consistently smooth and flavorful before you transfer it to your small jars for storage.
4. Tasting and Adjusting the Flavors
A vital part of any Pesto Recipe is the final tasting phase. Once your kitchen food processor has thoroughly incorporated the fresh basil leaves, pine nuts, Extra Virgin Olive Oil, and parmesan cheese, you must taste your homemade pesto. Depending on the exact freshness of your ingredients, you may need to add a drizzle of Extra Virgin Olive Oil, salt, or freshly ground pepper. Adjusting these elements ensures that your cold sauces hit the perfect balance for your palate. This level of customization is exactly why this cold cuisine is so much better than anything store-bought. You have complete control over the flavor profile! If you wanted to add a modification like a squeeze of fresh lemon juice for extra acidity, you could certainly do so, but please note that it is the modification that is not part of the recipe.
5. Storing in Small Jars for Optimal Freshness
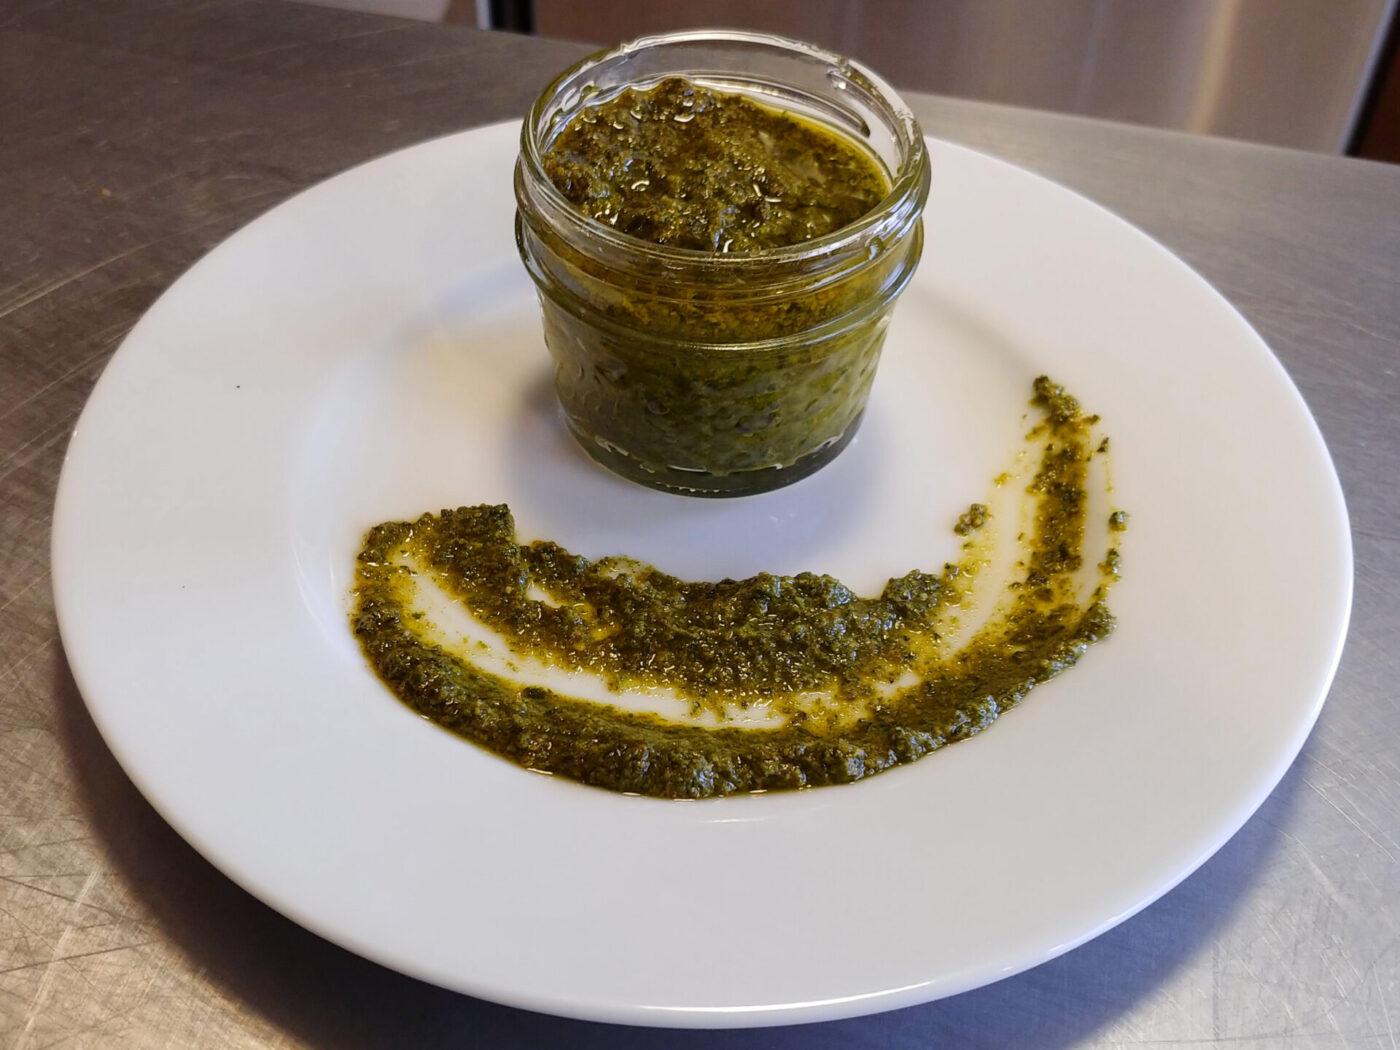
The final step in my Pesto Recipe is properly storing your beautiful homemade pesto. After everything is blended perfectly in your kitchen food processor, you will place the mixture into clean small jars. It is very important that these small jars are no bigger than four ounces. Once the homemade pesto is in the small jars, you must add an extra layer of Extra Virgin Olive Oil, about one-quarter inch thick, directly on top of the pesto in each jar. This layer of Extra Virgin Olive Oil acts as a protective seal, keeping the fresh basil leaves vibrant and preventing oxidation. For the absolute best results with your cold sauces, let the pesto rest for at least one day in the refrigerator. This resting period allows the flavors of the pine nuts, parmesan cheese, and fresh basil leaves to meld perfectly, resulting in the ultimate cold cuisine experience!
Pesto
Ingredients:
Click any ingredient to learn more2 cups of basil - fresh and whole
½ cup of pine nuts (or cashew or walnuts)
1 clove of garlic - peeled
¾ cup of Extra Virgin Olive Oil (adjust if needed)
Drizzle of Extra Virgin Olive Oil
¼ TSP of salt
¼ TSP of pepper - ideally freshly ground
½ cup of parmesan cheese
Nutrition per entire recipe (whole batch):
EstimatedCalories 1987
Protein 30.8 g
Fat 194.3 g
Saturated fat 33.2 g
Carbohydrate 43.7 g
Sugars 1.3 g
Fiber 6.7 g
Sodium 1317 mg
Cholesterol 43 mg
VegetarianGluten-freeLow-carb
Estimated. Worked out from the ingredients above using the United States Department of Agriculture’s FoodData Central reference data. An estimate, not a measurement — brands, sizes and how much of a marinade actually ends up on the plate all move it.
Directions:
1.Prepare Pesto Recipe:
Let’s prepare the pesto recipe.
1.1.
Place into your kitchen food processor:
2 cups of fresh basil leaves
½ cup of pine nuts
1 clove of garlic – whole
¾ cup of Extra Virgin Olive Oil
¼ TSP of salt
¼ TSP of ground pepper
Process on high speed until smooth (about 3 – 4 minutes).
1.2.
Add:
½ cup of grated parmesan
Process until all ingredients are thoroughly incorporated (about 1 – 2 minutes).
1.3.
Taste and add olive oil, salt or pepper if needed.
1.4.
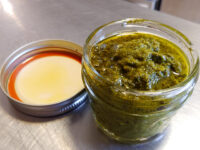
Place in clean small jars (no bigger than 4 oz) and add an extra layer of olive oil (about ¼ inch) on top of the pesto in each jar.
1.5.
For best results, let the pesto rest for at least one day in the refrigerator.
If parts of the ingredients stick to the side of the kitchen food processor during processing, stop the kitchen food processor, and with a spatula, add it back into the mixture. Then, continue processing.
Popular questions
Can I use different nuts instead of pine nuts for this Pesto Recipe?
Yes, you absolutely can! While my Pesto Recipe specifically calls for half a cup of pine nuts to be blended in your kitchen food processor with the fresh basil leaves and Extra Virgin Olive Oil, I have included an option in the ingredients list. You can easily substitute the pine nuts with cashews or walnuts if you prefer. These alternatives still provide a wonderful texture and richness to your homemade pesto. Regardless of which nut you choose, just make sure to process it on high speed until smooth before adding your parmesan cheese and storing your delicious cold cuisine creation in small jars. It is one of the most adaptable cold sauces you can make!
Share
Click on the icons below to share "Title of the item to share"